
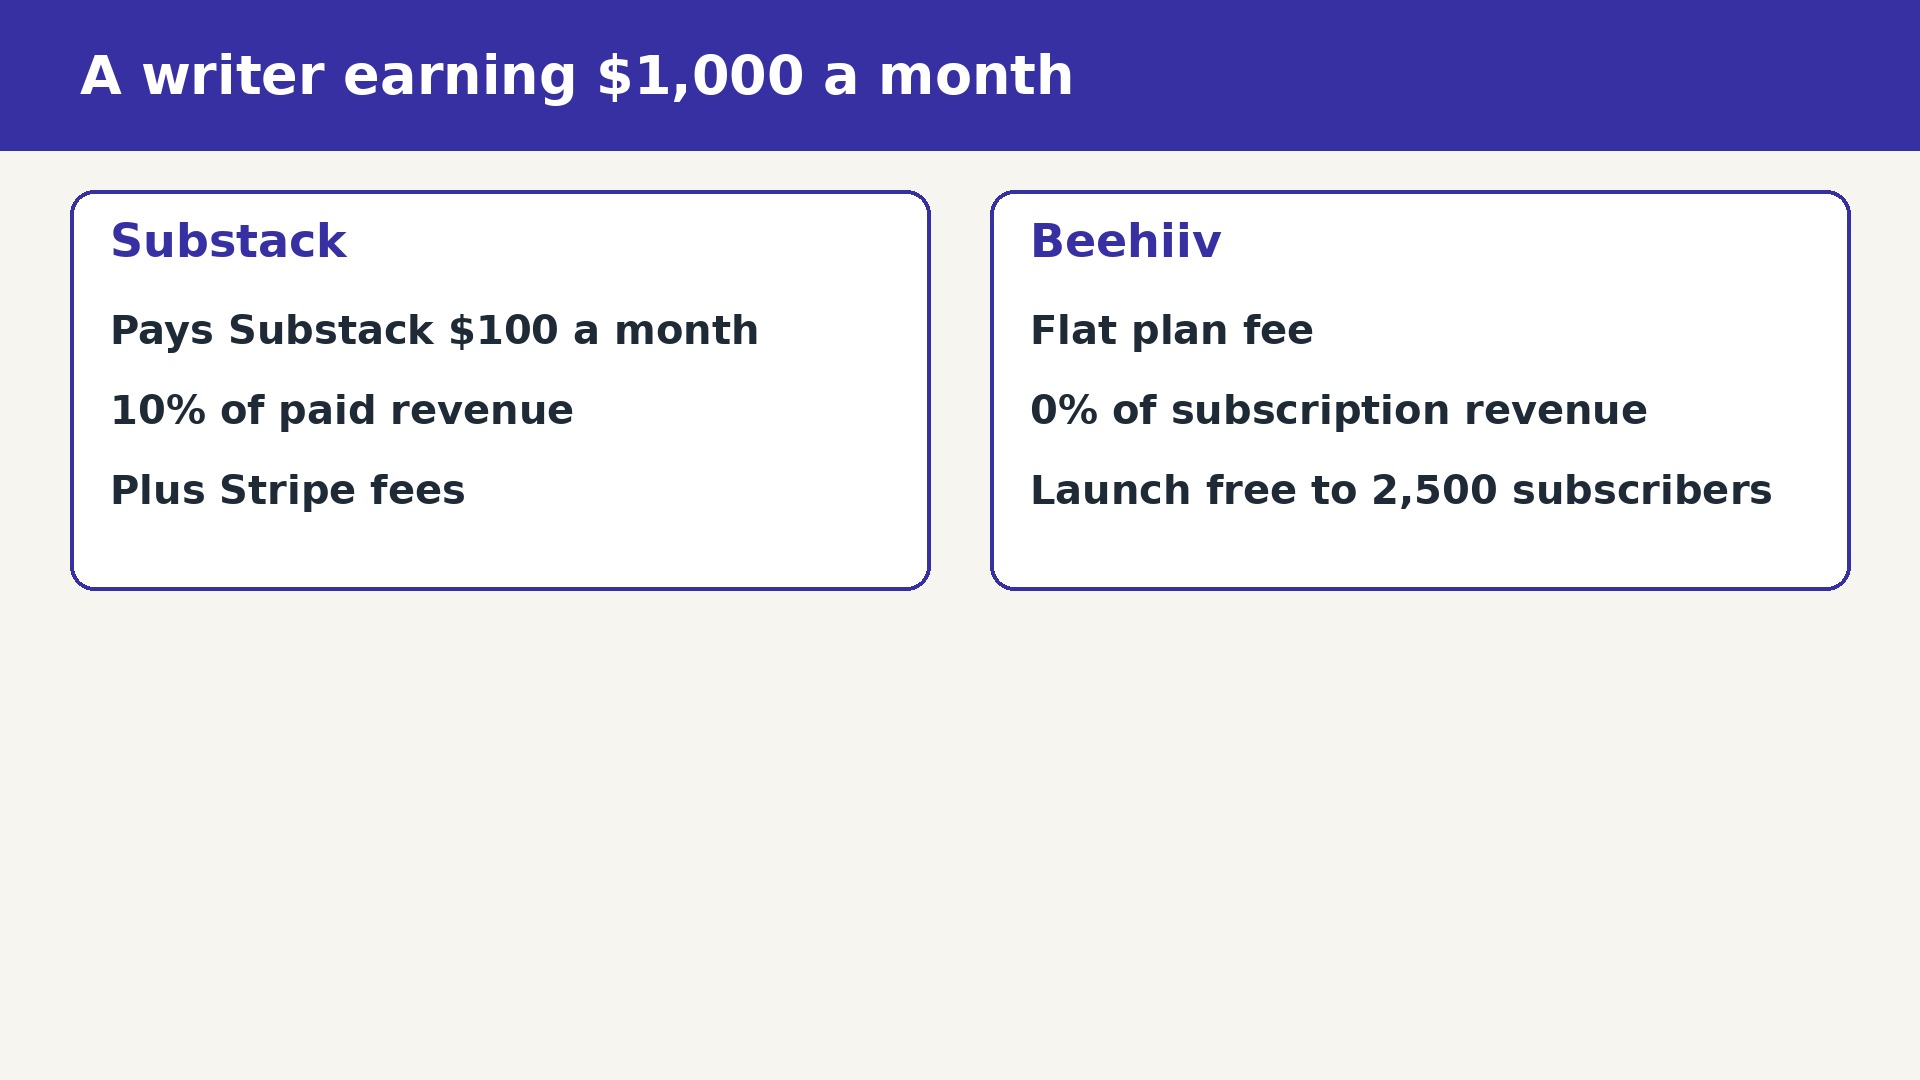
Newsletters move from Substack to Beehiiv when the 10 percent fee on paid subscriptions starts to feel like rent on your own audience. A writer earning 1000 dollars a month from paid readers pays Substack 100 dollars, while Beehiiv charges a flat plan fee and takes 0 percent of subscription revenue. How to switch from substack to beehiiv is the move this guide covers in full, with the real steps, the real costs, and the checks that keep your work safe.
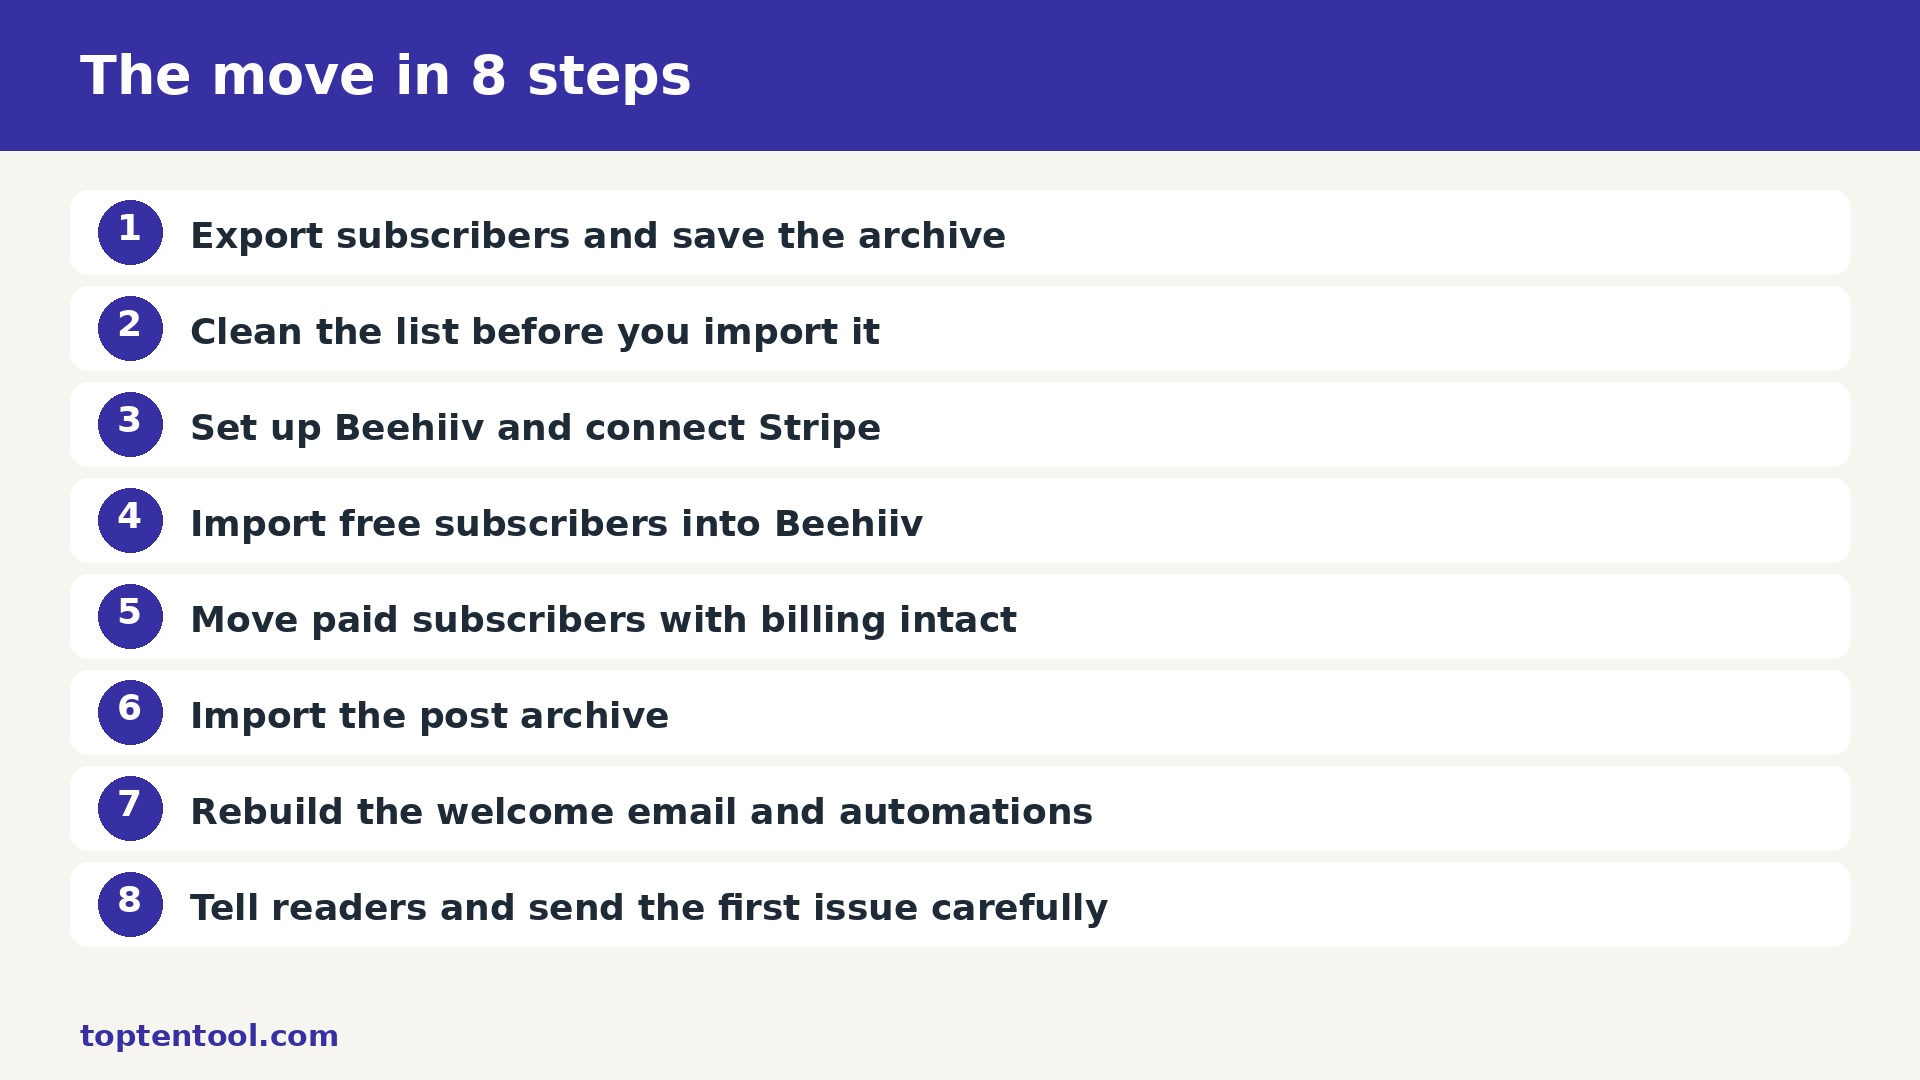
Beehiiv also gives writers more control over the website, growth tools, segments, and automations, while Substack keeps the simplest writing experience and a built in recommendation network. This guide shows the move in eight steps, with the paid subscriber transfer that keeps billing intact for readers who already pay.
Before you start, read the whole plan once, then pick a quiet week to do it. A move done in a rush creates errors that take weeks to find, while a move done in stages feels calm and leaves a clear record of what changed and when.
Why teams leave Substack for Beehiiv
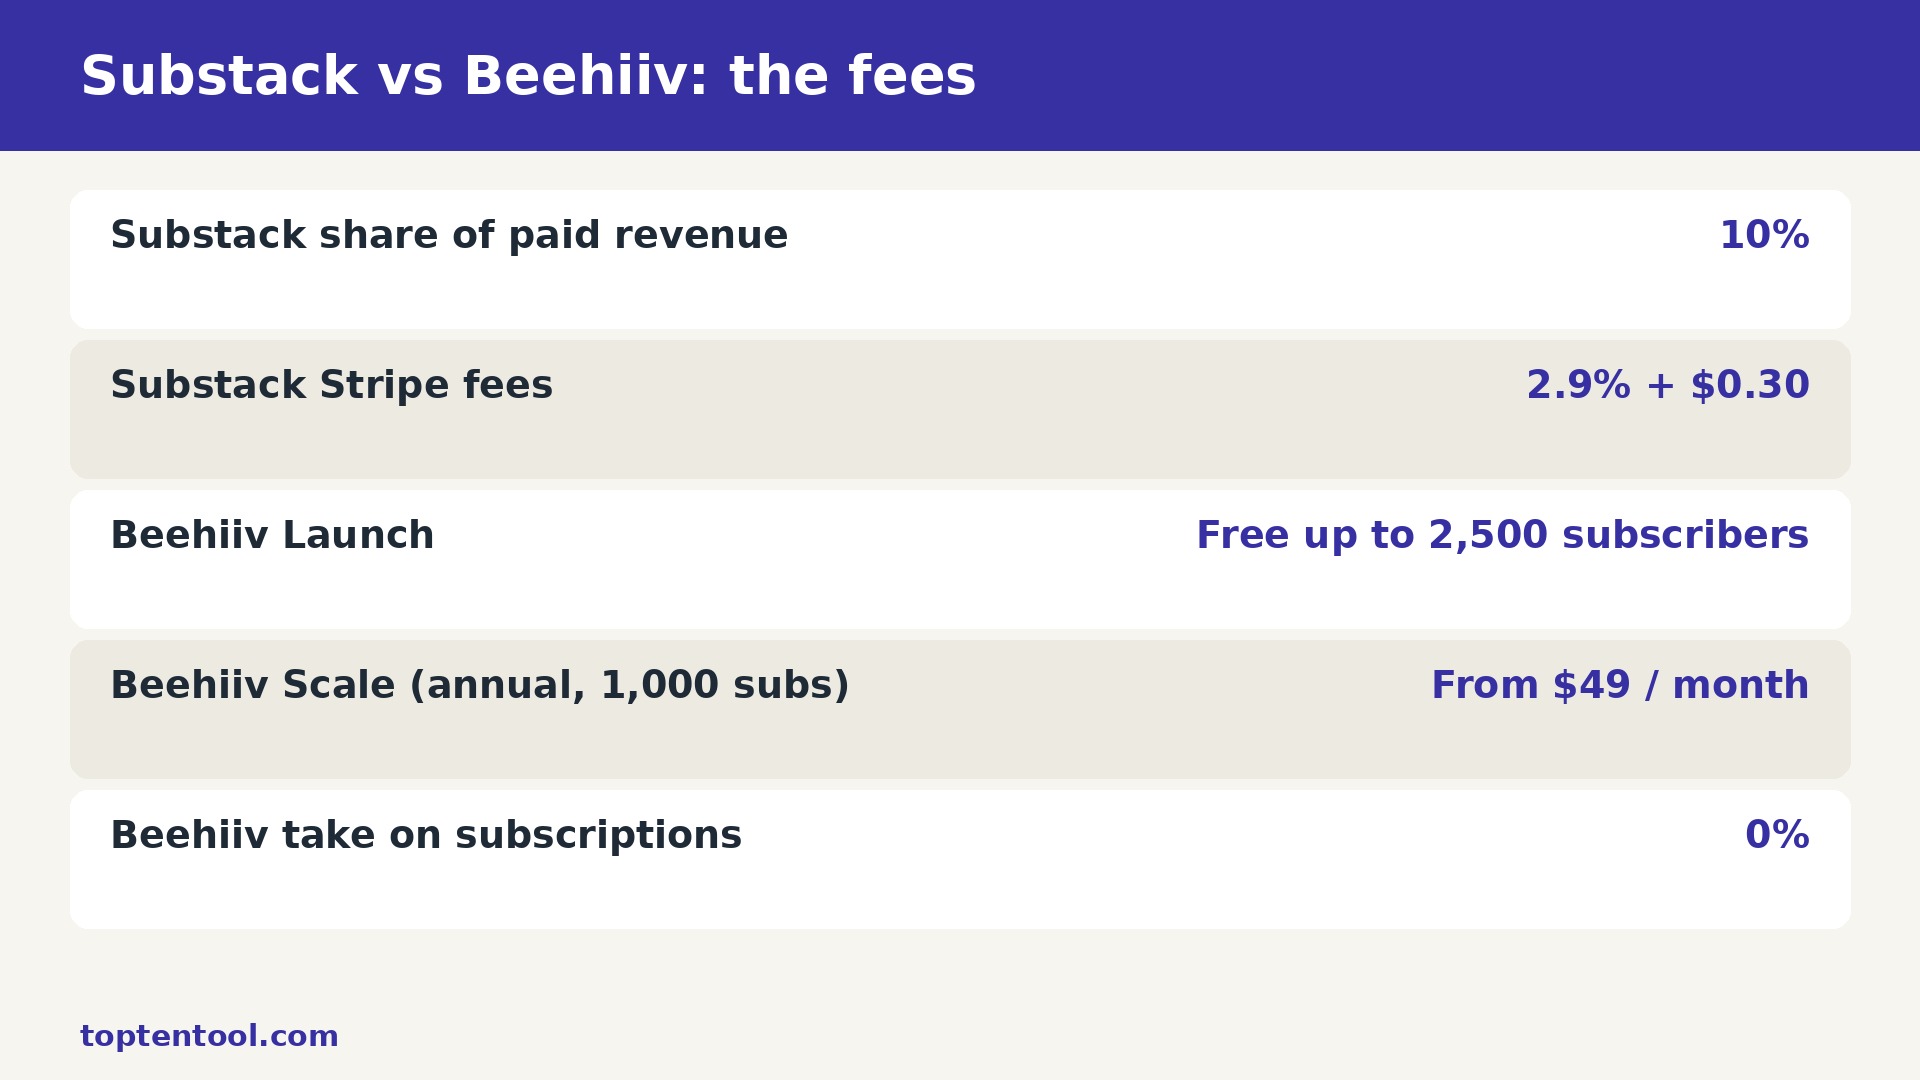
Substack suits a writer who wants to publish fast, charge readers, and be found by other Substack readers, and it charges 10 percent of paid revenue for that simplicity. The fee is fair while the list is small, and it becomes a large monthly cost as paid readers grow. A writer with 200 paying readers at 5 dollars a month pays Substack 100 dollars a month, plus Stripe fees.
Beehiiv suits a writer who wants to grow a newsletter as a business, with segments, automations, recommendations, and a real website. Launch is free up to 2500 subscribers, and Scale from 49 dollars a month at 1000 subscribers on annual billing takes 0 percent of subscription revenue. The trade off is setup time, because Beehiiv asks the writer to set up domains, automations, and growth tools that Substack hides.
The decision is not about which tool is better in general, because both tools serve real businesses well. It is about which tool fits the next year of your work, the size of your team, and the way your customers find you. If the current tool still fits, staying put is a valid choice, and this guide will still help you judge that honestly.
how to switch from Substack to Beehiiv in 8 steps
The steps below run in order, and each one has a check at the end. Do not skip a check to save time, because a check that takes ten minutes now can save a day of repair later. Work through the list with one other person when you can, so a second pair of eyes catches a mapping error before it spreads.
If you are weighing how to switch from Substack to Beehiiv, start with the smallest live project, not the biggest one. A small win gives the team confidence, proves the mapping, and shows the real time cost before you commit the whole workspace to a new home.
Step 1 Export subscribers and save the archive
In Substack, open Subscribers, open the menu above the list, and choose Export to download a CSV of every subscriber, including email, status, and paid details. Save the file in a dated folder and keep a copy you never edit. Also export the post archive from Settings, then Exports, so you have the full text of every issue. These two files are the whole newsletter, and losing either one turns a simple move into a rebuild from memory.
Check this step before you move on. Open the result in Beehiiv, compare it with the original in Substack, and confirm that the names, dates, and amounts match. If anything looks wrong, fix it now while the step is fresh, and write a short note about what you changed so the next step starts from a clean record.
Step 2 Clean the list before you import it
Open the CSV in a spreadsheet and remove duplicates, fix obvious typos, drop bounced addresses, and separate free readers from paid readers. Check for comped, gifted, and iOS subscribers, because those do not live in Stripe and need special handling. Add tags for the segments you actually use, such as paying readers, free readers, and lapsed readers. A clean list imports fast and keeps your sending reputation intact on the new domain.
Check this step before you move on. Open the result in Beehiiv, compare it with the original in Substack, and confirm that the names, dates, and amounts match. If anything looks wrong, fix it now while the step is fresh, and write a short note about what you changed so the next step starts from a clean record.
Step 3 Set up Beehiiv and connect Stripe
Create the Beehiiv publication, choose a plan, and connect Stripe before you import paid posts or paid subscribers. Free Launch covers up to 2500 subscribers, and paid subscriptions at a 0 percent take rate start on Scale, from 49 dollars a month at 1000 subscribers on annual billing. Create at least one paid tier at the same price Substack readers already pay, set the publication name and custom domain, and set up SPF, DKIM, and DMARC records before you send anything.
Check this step before you move on. Open the result in Beehiiv, compare it with the original in Substack, and confirm that the names, dates, and amounts match. If anything looks wrong, fix it now while the step is fresh, and write a short note about what you changed so the next step starts from a clean record.
Step 4 Import free subscribers into Beehiiv
In Beehiiv go to Settings, then Subscribers Import, choose Upload a CSV file, and upload the cleaned free subscriber file. Map the columns to Beehiiv fields, create custom fields where needed, and confirm that every contact opted in to receive email. Review the import summary, check the count against the Substack export, and fix any rows that failed before you move on. Send a test email to yourself and to a small segment first to check formatting and links.
Check this step before you move on. Open the result in Beehiiv, compare it with the original in Substack, and confirm that the names, dates, and amounts match. If anything looks wrong, fix it now while the step is fresh, and write a short note about what you changed so the next step starts from a clean record.
Step 5 Move paid subscribers with billing intact
For paid readers, use the Beehiiv paid subscriber migration, which is available on paid plans. Copy customers from the Substack connected Stripe account into the Beehiiv connected Stripe account using the Stripe transfer, then give Beehiiv a restricted read only API key so it can recreate the subscriptions. Migrated readers keep their price and renewal date and sit on a temporary trial until then, so nobody is charged twice. After the move, pause or cancel billing on Substack, or readers will be charged twice.
Check this step before you move on. Open the result in Beehiiv, compare it with the original in Substack, and confirm that the names, dates, and amounts match. If anything looks wrong, fix it now while the step is fresh, and write a short note about what you changed so the next step starts from a clean record.
Step 6 Import the post archive
In Beehiiv go to Settings, then Content Import, click Start Import, choose Substack, and paste the Substack publication address for free content. For paywalled content, upload the Substack export zip file as well. The import usually takes 5 to 10 minutes depending on the number of posts. Check the ten most read posts first for missing images, broken formatting, and paywall settings. Audio and video posts do not import, so recreate those by hand if they matter.
Check this step before you move on. Open the result in Beehiiv, compare it with the original in Substack, and confirm that the names, dates, and amounts match. If anything looks wrong, fix it now while the step is fresh, and write a short note about what you changed so the next step starts from a clean record.
Step 7 Rebuild the welcome email and automations
Recreate the welcome email as a Beehiiv automation, rebuild the segments and tags you use, and set up the publication website, navigation, and subscription forms. Beehiiv gives you far more control over the website, recommendations, and growth tools than Substack, so use the extra options, but do not rebuild every Substack feature at once. Test the signup form, the welcome email, and a paid signup end to end before you tell readers about the move.
Check this step before you move on. Open the result in Beehiiv, compare it with the original in Substack, and confirm that the names, dates, and amounts match. If anything looks wrong, fix it now while the step is fresh, and write a short note about what you changed so the next step starts from a clean record.
Step 8 Tell readers and send the first issue carefully
Tell readers before the first Beehiiv issue lands, because the sender address and the look will change. Send the first issue to the most engaged readers first, then to the full list, so inbox placement stays steady on the new sending domain. Watch open rates, spam complaints, and unsubscribes for the first three issues, and reply to every reader question in the first week. Keep Substack live until the new home is sending and billing cleanly, then close it.
Check this step before you move on. Open the result in Beehiiv, compare it with the original in Substack, and confirm that the names, dates, and amounts match. If anything looks wrong, fix it now while the step is fresh, and write a short note about what you changed so the next step starts from a clean record.
Carryover and Breakage
| From Substack | To Beehiiv | Moves cleanly |
|---|---|---|
| Free subscribers | Subscribers | Yes, by CSV import |
| Paid subscribers | Paid subscribers | Yes, by Stripe migration |
| Post archive | Posts | Yes, by Content Import |
| Paywalled posts | Paywalled posts | Yes, with Stripe connected |
| Email addresses | Email addresses | Yes |
| Tags and segments | Tags and segments | Partly, map fields on import |
| Audio and video posts | Posts | No, recreate by hand |
| Welcome email | Automation | No, rebuild as automation |
| Substack recommendations | Recommendations | No, rebuild in Beehiiv |
| Notes and likes | Engagement | No, engagement does not transfer |
The table above is the honest picture, not a sales promise. Items marked yes move with the importer or the conversion tool, items marked partly need a manual check, and items marked no need a rebuild. Budget time for the no items first, because they are the ones that surprise teams who planned only for the import.
The best time to plan how to switch from Substack to Beehiiv is before the busy season, not during it. A quiet week gives you room to fix a bad import, retrain a teammate, and check the numbers without a deadline pressing on every decision.
Attachments, comments, and history deserve special care. Open a sample of each type after the import and confirm that files open, comments read in order, and dates match the original. If a file is missing, check the backup export before you assume the importer failed, because the file may have been a link to an outside drive rather than a real upload.
The Before-You-Move Checklist
Confirm that every live project, board, list, or account has a named owner, and that the owner knows the move date. Owners answer questions faster than a shared inbox, and they spot missing work that a checklist alone would miss.
Export a full backup and store it in a dated folder outside the old tool. Test the backup by opening a few files, because a backup you cannot open is not a backup at all.
Write the mapping of old fields to new fields on one page and share it with the team. When everyone reads the same mapping, the import result looks familiar instead of confusing.
Choose the plan in the new tool and confirm the price, the limits, and the billing date. A trial that ends mid move creates a deadline nobody planned for.
Tell customers, readers, or supporters what will change, what will stay the same, and what they need to do. A short message sent before the move prevents a flood of questions after it.
Many teams delay how to switch from Substack to Beehiiv because they fear losing history, yet the history that matters is usually a short list of open work, recent comments, and unpaid items. Export that list first and the rest becomes far less scary.
Planning the Switch Week
| When | Task | Time needed |
|---|---|---|
| Hour 1 | Export and clean the list | 1 hour |
| Hour 2 | Set up Beehiiv and Stripe | 1 hour |
| Hour 3 | Import free subscribers | 30 minutes |
| Hour 4 | Migrate paid subscribers | 30 minutes |
| Hour 5 | Import post archive | 10 to 30 minutes |
| Week 1 | First issues and checks | Ongoing |
The timing above fits a small team or a small business with one main workspace, shop, or set of books. A larger team should double the checking time, because more people means more edge cases, more custom fields, and more integrations to test. Do not compress the plan into a single day unless the scope is truly tiny.
A clear owner makes how to switch from Substack to Beehiiv move faster than any tool or template. One person keeps the checklist, answers questions, and decides when a step is truly done, so work does not drift between two systems.
Keeping What You Have Built
Protect the assets that earn money before you protect the design. For a shop or a site, that means the best selling pages, the links that bring traffic, and the email list. For books, it means the bank balance, the open invoices, and the tax records. For a creator, it means the paying supporters and the posts they paid for. List those assets first and check them first after the move.
Keep the old tool readable for at least 30 days after the move, and keep a local export for longer. A readable old account lets you answer a question about an old comment, an old invoice, or an old order without guessing. Set a calendar reminder for the closing date and check the list of assets one last time before you cancel.
Watch the numbers daily for the first week. Compare sales, traffic, open rates, or bank balances with the same week before the move, and investigate any drop at once. A small drop in the first days can be normal while systems settle, but a drop that grows each day is a sign that a step was missed.
Before you start how to switch from Substack to Beehiiv, agree on what success looks like in one sentence. It might be faster handoffs, cleaner books, or lower fees, and that sentence will guide every trade off when a step gets hard.
Running Costs Once You Have Moved
Before the move, Substack costs 10 percent of paid subscription revenue plus Stripe fees at 2.9 percent plus 30 cents. After the move, Beehiiv costs Free Launch up to 2500 subscribers, Scale from 49 dollars per month at 1000 subscribers on annual billing, 0 percent take on subscriptions. Compare the two at your real team size or volume, not at the smallest tier, because the smallest tier rarely fits a working team for long.
Add the one off costs too, which are the migration tool if you use one, the time to rebuild fields or pages, and the time to train the team. A conversion tool can cost around 100 to 300 pounds for a complex set of books, and a migration app for a shop can cost a similar amount. Those costs are small beside a month of lost sales or a month of confused work.
The cheapest part of how to switch from Substack to Beehiiv is the software subscription, and the most expensive part is the time your team spends relearning how to work. Budget for training time as carefully as you budget for the monthly bill.
Team Mistakes That Cost Real Money
The most common mistake is importing everything, including dead boards, dead listings, and dead accounts. Old work creates noise in the new tool, hides live work, and makes the team distrust the new system from day one. Leave the dead work behind and keep it in the backup if you ever need it.
The second mistake is skipping the test import. A test on one small board, one small set of books, or five products shows the mapping errors while they are still easy to fix. A full import without a test spreads the same error across every project at once.
The third mistake is forgetting the people. A new tool with no training, no owner, and no announcement leaves the team working in two places at once. A short walkthrough, a one page guide, and a clear date for the switch prevent most of that confusion.
The fourth mistake is closing the old account too soon. Cancel the old subscription only after a full cycle in the new tool, after the numbers match, and after the team agrees the new home works. A month of overlap costs less than a lost invoice, a lost order, or a lost supporter.
Our verdict for newsletters
Move when the current tool limits the work you do every day, not when a new tool looks attractive in a demo. If Substack still fits the work, stay and save the move for later. If the limits are real, the steps in this guide will carry the work across safely, with a backup, a test, and a check at every stage.
After you finish how to switch from Substack to Beehiiv, run one full cycle in the new tool before you judge it. A single week of real work, real deadlines, and real customers tells you far more than the first day of setup ever will.
The best move is a boring one, with no surprises, no lost work, and no angry customers. Plan it in a quiet week, test it on a small scope, check the numbers, and tell people what changed. That is how a small team switches tools and keeps its work, its money, and its reputation intact.
Keep the old account readable for at least a month after the move. Old comments, old invoices, old posts, and old messages are hard to recreate once the account is closed. Set a calendar reminder for the closing date, check that nothing important is left behind, and only then cancel. A quiet month of overlap costs little and prevents a painful loss.
Start with a small test before you commit the whole team or the whole budget. A one week trial with real work, real customers, and real deadlines tells you more than any demo video. Write down what felt fast, what felt slow, and what needed a workaround. If the test saves time on the second day, the tool is probably a fit. If the test creates new work, the tool is probably not ready for your team yet.
Budget for the second year, not just the first month. Introductory discounts, free trials, and first year deals all end, and the regular price is the price you will live with. Add the cost of extra seats, extra volume, and the add ons you will actually use. A tool that looks cheap at 20 dollars a month can cost 80 dollars a month once the team grows and the limits bite.
Check who owns the data before you sign up. Export a sample file on day one, open it, and confirm that names, dates, amounts, and notes are all there. If export is hard, slow, or missing fields, treat that as a warning. The best tools make it easy to leave, because they know good work keeps customers, not locked doors.
Talk to the people who will use the tool every day, not just the person who pays the bill. A finance lead cares about reports, a support lead cares about speed, and a creator cares about how the page looks to fans. Ask each group for one must have feature and one deal breaker. When those lists agree, the choice is easy. When they conflict, pick the tool that serves the daily user first.
Keep a simple log during the first month. Note the date, the task, the time it took, and any error or surprise. After 30 days the log shows the real cost in hours, not the promised cost in marketing copy. Share the log with the team and ask what to keep, what to change, and what to drop. Small fixes in week two prevent big frustration in month three.
Do not move everything at once if you can move in stages. Pick the smallest group, the quietest week, or the least risky project and move that first. Learn from the first move, fix the template, and then move the next group with a better plan. Staged moves feel slower on paper, but they protect revenue, reputation, and sleep.
Read the plan limits as carefully as the headline price. Word caps, contact caps, credit caps, and seat caps are where most bills surprise people. A plan that allows 5000 emails a month is not the same as a plan that allows 5000 contacts, and a plan with 100 AI prompts is not the same as unlimited use. Match the limit to your real volume from last month, not to your hopes for next year.
Support quality matters more than feature count when something breaks at 9 pm. Test support before you need it by asking one real question during the trial and timing the reply. A clear answer in an hour beats a long feature list with no one to call. Check the help centre too, because good docs save more time than good chat support over a year.
Make one person the owner of the move. That person keeps the checklist, answers questions, and decides when a step is done. Without an owner, tasks drift, two people fix the same problem, and nobody fixes the real one. The owner does not need to do every step, but they need to know the status of every step at any moment.
Plan the announcement as carefully as the technical move. Customers, readers, and supporters need to know what changed, what stayed the same, and what they need to do, if anything. A short message sent twice beats a long message sent once. Tell people before the change, not after, and give them a place to ask questions.
Measure the result 30 days after the move. Compare the same numbers you measured before, such as time per task, cost per month, open rate, or sales per week. If the numbers improved, keep going. If they did not, find the one step that failed and fix it before you blame the tool. A move is only a success when the numbers say so.
Frequently Asked Questions
How long does the move take?
Most small moves take one week from audit to go live, with the import itself taking a few hours. Larger scopes take two to four weeks, because checking, training, and rebuilding take longer than the import. Plan a quiet week and do not rush the checks.
Will I lose my data during the move?
No, if you export a backup first and test the import on a small scope. The importer or conversion tool carries most data, and the backup covers the rest. Check a sample of every data type after the import before you close the old account.
Can I run both tools at the same time?
Yes, and you should. Run both tools in parallel for two to four weeks, do new work only in Beehiiv, and keep Substack readable for reference. Close the old tool only after a full cycle in the new one.
What does not transfer?
The items that do not transfer are usually automations, custom fields from add ons, paid subscriptions held by the old platform, and engagement such as likes or internal search rank. The table in this guide lists each item, so check it before you start.
Do I need a paid plan in the new tool?
Most teams need a paid plan in Beehiiv for real work, because free plans cap users, volume, or features. Check the plan limits against your real volume from last month and pick the plan that covers the next 90 days.
When should I cancel the old subscription?
Cancel only after a full month end or a full billing cycle in the new tool, after the numbers match, and after the team agrees the new home works. Keep a local export of reports and data before you cancel, because closed accounts are hard to reopen.