The renewal email is the moment most people start thinking about it. Photoshop costs 22.99 dollars a month on the annual plan, or 263.88 dollars a year prepaid, and the bill arrives every month whether the app was opened twice or two hundred times. Canva Pro costs 18 dollars a month, or 144 dollars a year, and the free plan costs nothing at all. That is the moment most small teams start asking how to switch from Photoshop to Canva, and it is a fair question.
Photoshop is a pixel editor built for precise, layer-level work, and nothing in Canva replaces it for retouching, masking or print preparation. Canva is a template design tool built for speed, and nothing in Photoshop replaces it for turning out a week of social posts in an afternoon. A designer who retouches product photos all day should stay in Photoshop. A small business owner who needs a flyer, a price list and five Instagram posts before lunch should move to Canva.
The switch is not about which tool is better in general. It is about which kind of work fills the week. Photoshop charges per person and assumes one skilled editor at one desk. Canva charges per person too, but its free plan covers a whole small team, and its Business plan at 20 dollars a month per person adds shared brand controls and approval workflows. For a team that makes graphics for social media, email and print, the gap is real. For a team that lives in layers, masks and colour profiles, Canva can feel thin, and this guide says so plainly.
This guide walks through how to switch from Photoshop to Canva in seven steps, with a checklist, a cost comparison, and a clear account of what transfers, what does not, and what to test before cancelling Photoshop. Follow the steps in order, run both tools side by side for two weeks, and the move will be boring in the best way. Skip the steps, cancel early, and layered files, fonts and brand colours can vanish without a trace.
The Price Gap That Starts the Conversation
Cost is the reason most people switch, and the numbers explain why. Photoshop on the single-app plan costs 22.99 dollars a month on the annual plan billed monthly, or 263.88 dollars a year prepaid, with 100 GB of cloud storage, Adobe Fonts and Adobe Express included. The Photography plan costs 19.99 dollars a month with 1 TB of storage and adds Lightroom and Lightroom Classic, which is the cheapest legitimate route to desktop Photoshop. Photoshop for teams costs 37.99 dollars a month per licence. There is no free Photoshop plan, only a 7-day trial.
Canva Free costs nothing and includes the editor, 1.6 million templates, 4.7 million stock assets, 5 GB of storage and limited AI tools. Canva Pro costs 18 dollars a month, or 144 dollars a year, and adds 3.6 million templates, 141 million premium assets, 1 TB of storage, the background remover, Magic Resize and the Brand Kit. Canva Business costs 20 dollars a month per person, or 250 dollars a year per person, and adds team libraries, brand controls, approval workflows and central billing.
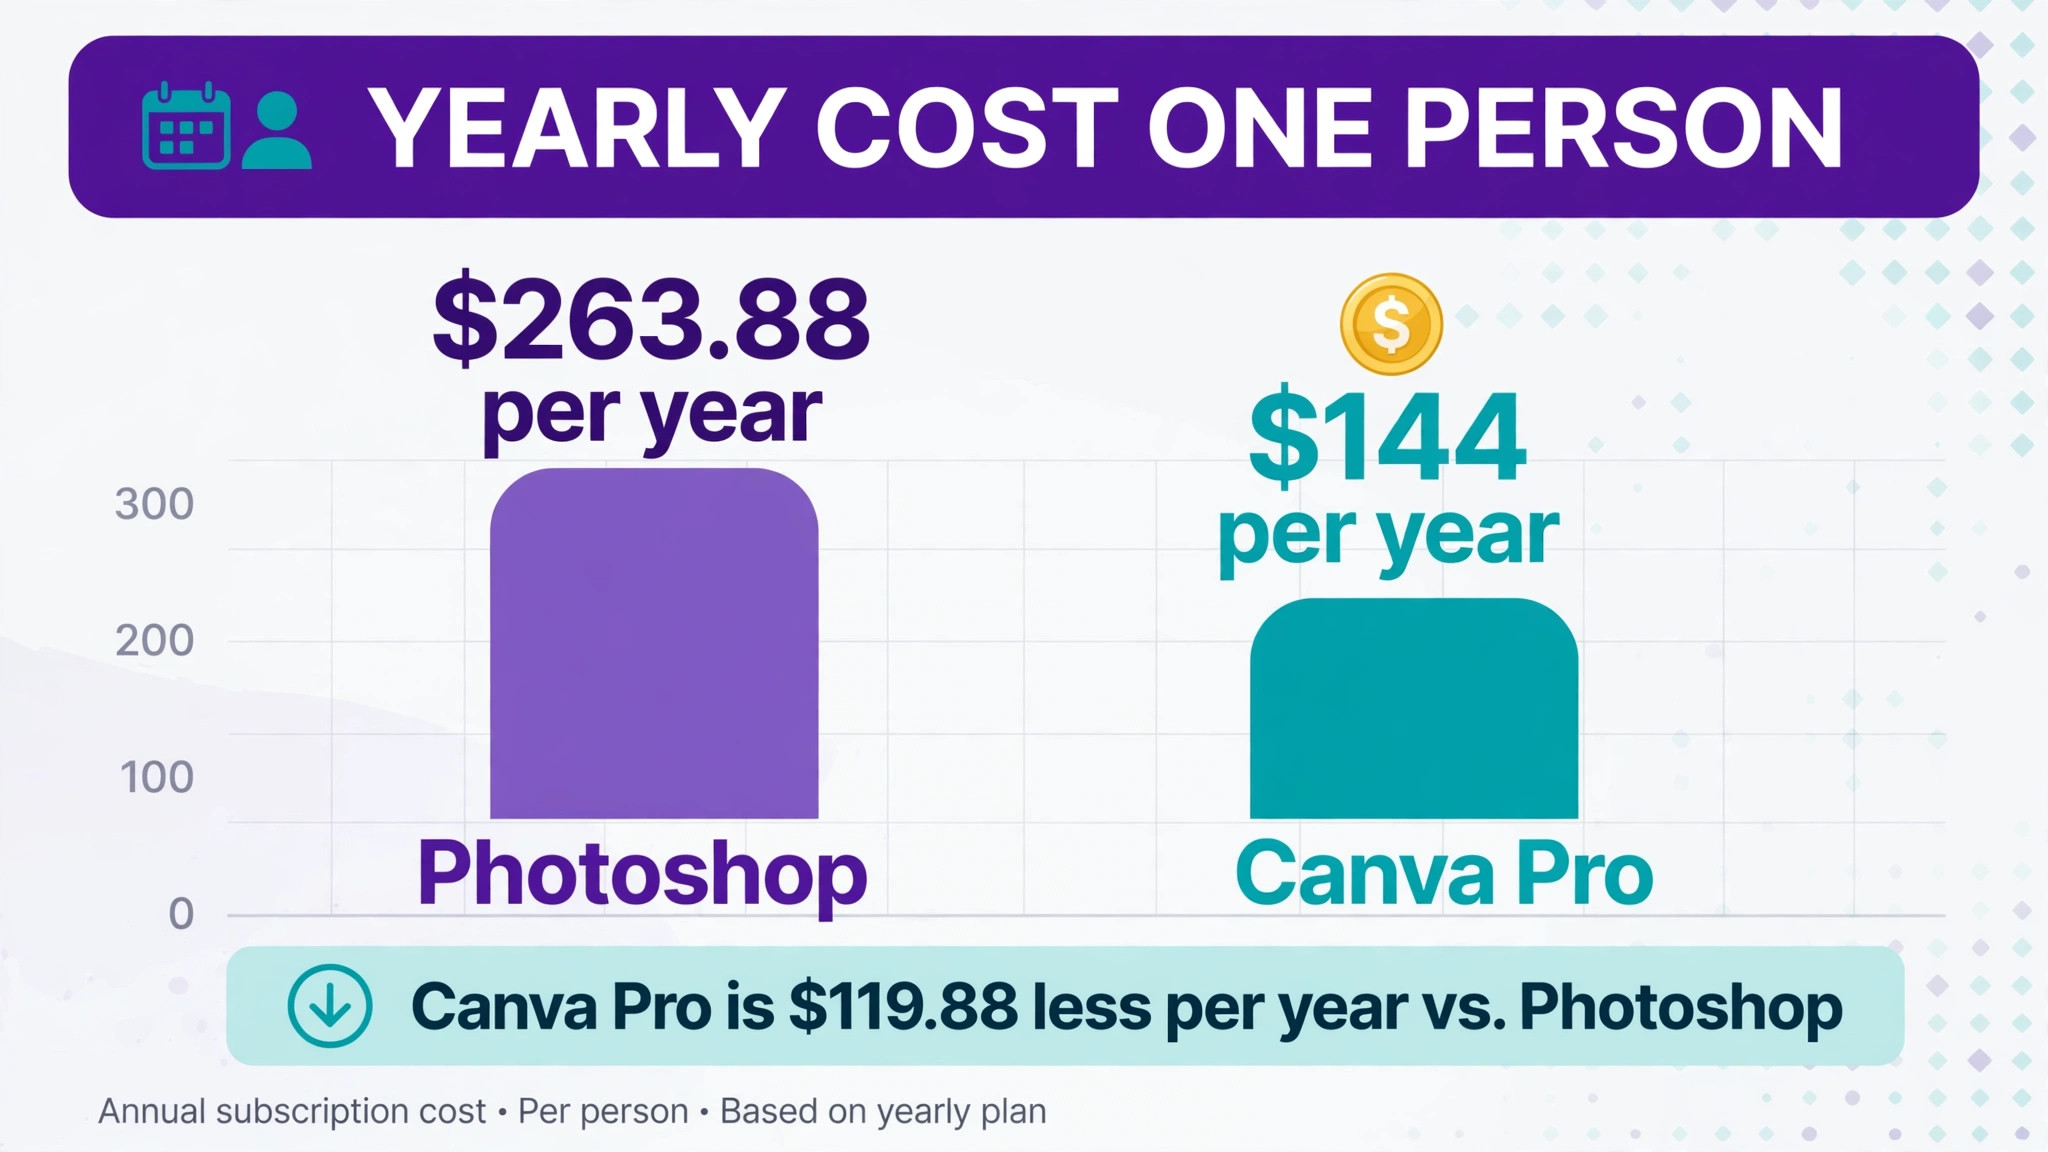
One person on Photoshop prepaid pays 263.88 dollars a year. The same person on Canva Pro paid yearly pays 144 dollars, a saving of about 120 dollars a year, and gets templates, stock photos and a brand kit that Photoshop does not offer at any price. A team of five on Photoshop for teams pays about 190 dollars a month. The same five on Canva Business pay about 100 dollars a month, a saving of about 90 dollars a month, or about 1,080 dollars a year.
The free plan tells the same story. Photoshop has no free plan, so every seat costs money from day one. Canva Free lets a whole small team design, share and publish without paying anything, and the team only pays when it needs the premium assets or the Brand Kit. A team that wants to test Canva with real work can do it free, which makes the trial cheap and the decision easy.
Photoshop vs Canva at a Glance
| Feature | Photoshop | Canva |
|---|---|---|
| Pricing model | Per person subscription | Free plan, per person paid plans |
| Free plan | 7-day trial only | Free forever, 5 GB storage |
| Entry paid price | 22.99 dollars a month annual | Pro 18 dollars a month, 144 dollars a year |
| Team price | 37.99 dollars a month per licence | Business 20 dollars a month per person |
| Photo retouching | Full layer, mask and colour control | Basic edits, filters, background remover on Pro |
| Templates | None built in | 3.6 million on Pro |
| Stock assets | Adobe Stock is a separate purchase | 141 million premium assets on Pro |
| Brand Kit | None | Pro and Business |
| Magic Resize | None | Pro and Business |
| Print preparation | CMYK, colour profiles, bleed control | PDF print export, limited colour control |
| AI credits | 25 generative credits a month on the single-app plan | AI tools included on Pro, with monthly allowances |
| Learning curve | Steep, months to master | An afternoon for most people |
Canva bundles more into each tier, and that bundling is the point of the switch. Templates, stock photos, brand colours and resize tools all live in the same browser tab, so a team stops paying for a separate stock subscription and a separate template pack. Photoshop stays deeper and more precise, with layers, masks and colour profiles that Canva cannot match, and that depth is worth real money to a team that retouches photos for a living. Check which side of that trade your work sits on before you move.
The Trade-Offs Nobody Mentions First
A switch guide that only lists the savings is not honest, so this section states the trade plainly. Photoshop is a pixel editor. Canva is a template tool. A designer who opens Photoshop, masks a product cutout and colour-grades a photo will find Canva shallow, with no pen tool, no real masking and no CMYK workflow. The first week in Canva feels fast, even when the output is rougher, and a designer who cares about print quality will feel that friction daily.
A team that already pays for stock photos, a template pack and a brand guide will not miss the depth, because Canva replaces three subscriptions at once. The question is not which tool is better. The question is whether the work needs pixel precision or publishing speed, and learning how to switch from Photoshop to Canva starts with answering that question honestly.
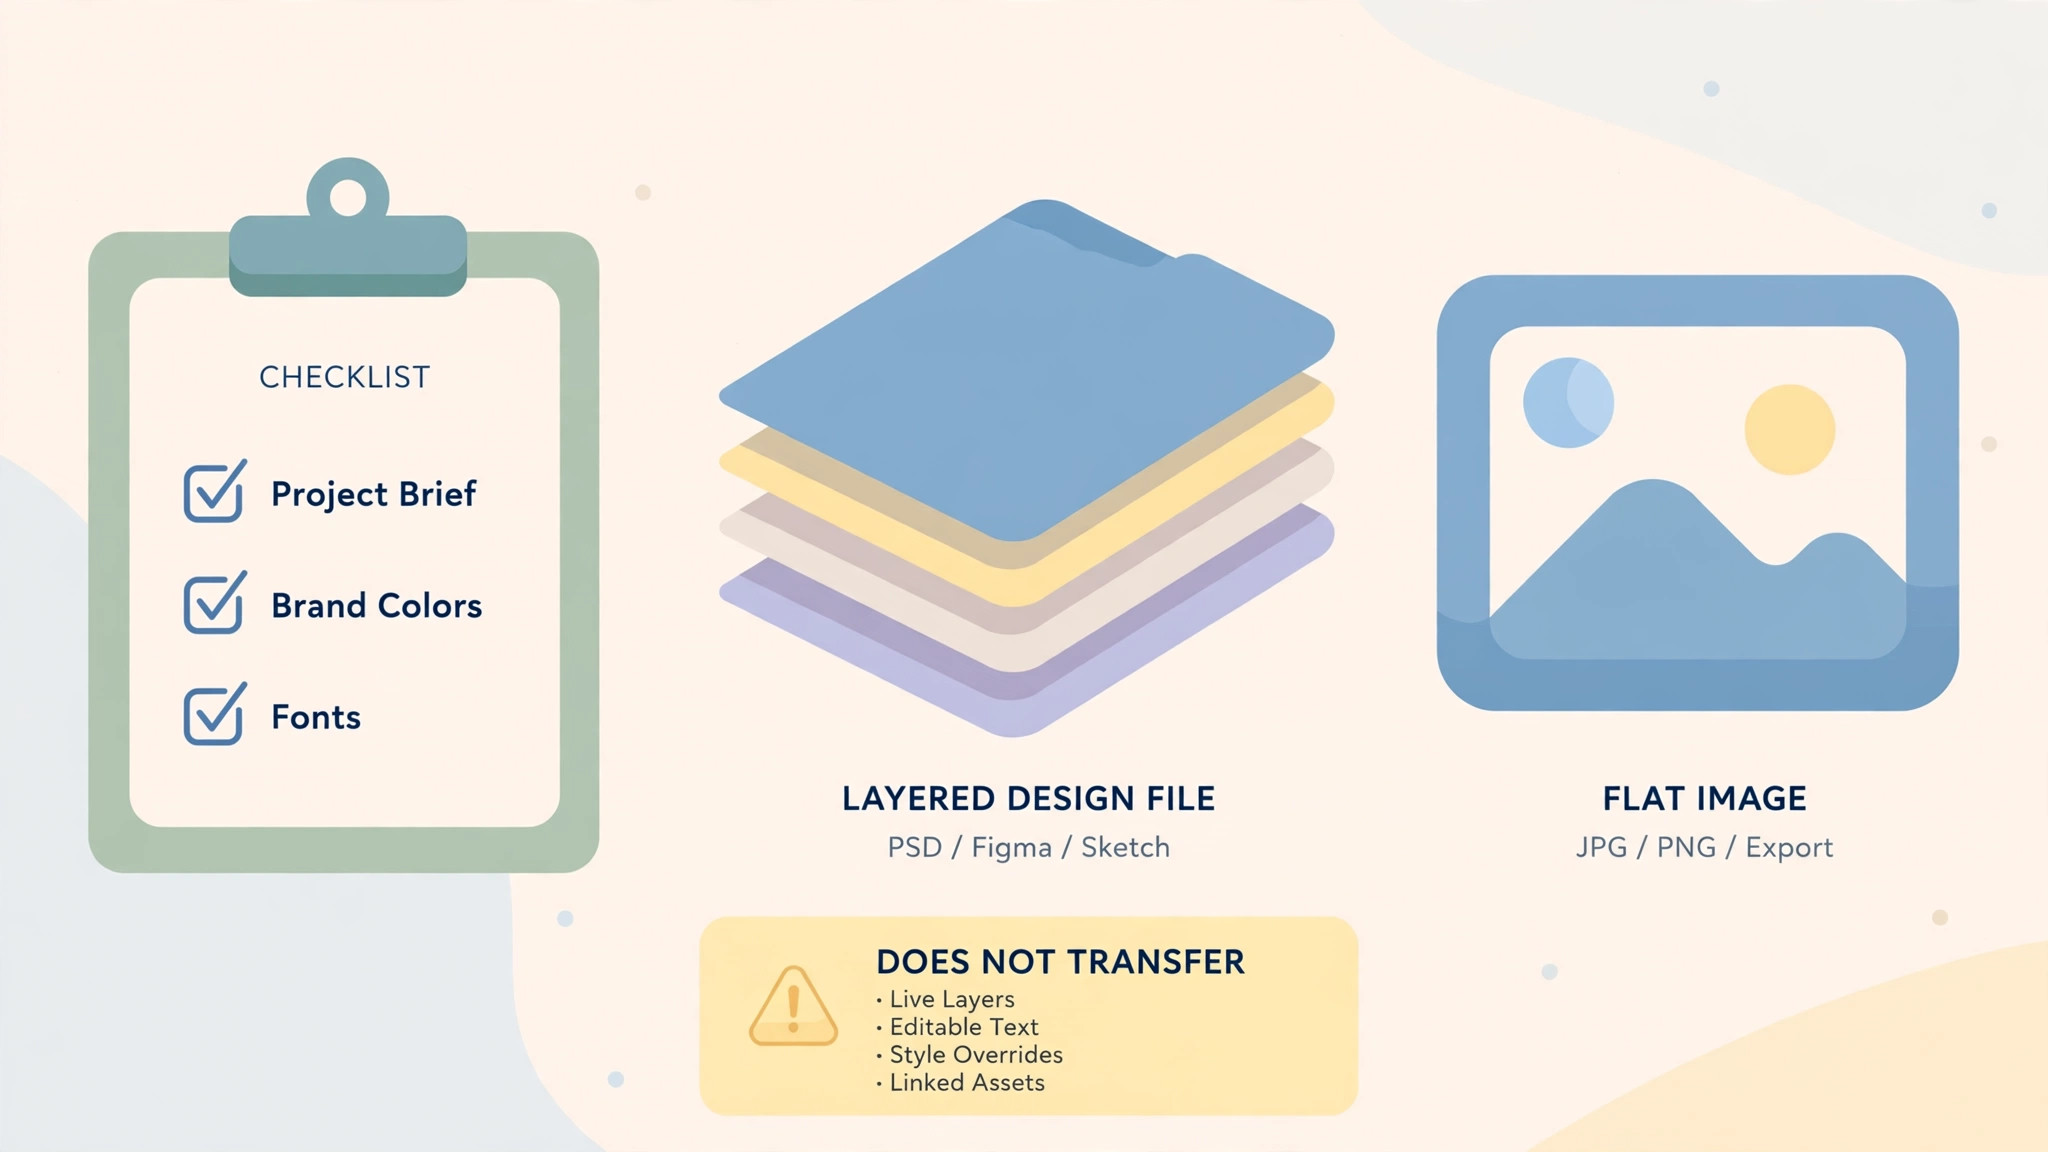
The file format deserves a second look, because it decides what survives the move. Photoshop files are layered PSD files, and Canva cannot open them with layers intact. A PSD imported into Canva arrives flattened, so the layers, masks and adjustment layers are gone. Count the PSD files that still need editing before deciding, and the math will make the choice. A team with a hundred live PSDs should keep Photoshop for those files and use Canva only for new work.
The AI allowance also changes the bill. Photoshop includes only 25 generative credits a month on the single-app plan, so a designer who uses Generative Fill daily runs out fast. Canva Pro includes its AI tools with monthly allowances, and the free plan includes limited AI. A team that leans on AI heavily should check both allowances before moving, because the cheaper plan is not cheaper if it needs a paid AI add-on on top.
How to Switch from Photoshop to Canva in 7 Steps
This is the full process for how to switch from Photoshop to Canva without losing the work that matters. Do the steps in order, and do not cancel Photoshop until step 7.
Step 1. Audit the Photoshop library before touching anything
Open Photoshop and list every PSD file, every template, every brush set, every action, every font and every linked asset. Export each live PSD as a flattened PNG or JPG for reference, and note which files still need layer editing and which are finished. Pay special attention to files with smart objects, layer masks and adjustment layers, because Canva cannot open those with layers intact. This audit takes an afternoon and prevents the most common switch failure, which is discovering a live file only after the subscription was cancelled.
Step 2. Set up Canva and build the Brand Kit first
Create the Canva account, choose the plan that matches the team size, and build the Brand Kit before importing anything. Add the logo, the brand colours with their hex codes, the brand fonts and the logo usage rules. A Brand Kit built on paper first saves a week of fixing off-brand posts later. Invite the team now, and decide who can edit, who can only comment, and who approves designs before they publish.
Step 3. Rebuild the five most-used templates in Canva
Pick the five designs the team makes most often, such as the social post, the flyer, the price list, the email header and the presentation cover. Rebuild each one as a Canva template with the Brand Kit colours and fonts, and save them as team templates. Do not import PSDs yet. A clean template set built in Canva behaves better than a converted file, and the team starts the switch with designs that already look right.
Step 4. Move the finished assets, not the layered files
Upload the finished PNG and JPG exports, the logos and the stock photos into Canva folders, organised by campaign or by client. PSD files stay in Photoshop, because Canva flattens them on import and the layers are lost. For any PSD that still needs editing, finish the edit in Photoshop first, export the flat file, and then upload it. This is the largest single task in the switch, so budget a full afternoon for a normal library.
Step 5. Move the team and set the approval workflow
Invite the team to Canva and set access levels. Turn on approval workflows on the Business plan if more than one person publishes, so nothing goes live without a second pair of eyes. Run a short training session on Magic Resize, the background remover and the Brand Kit, because those three tools are where Canva saves the most time. A teammate who cannot find the brand colours will fall back to Photoshop, and the switch will stall.
Step 6. Run both tools side by side for two weeks
Work from Canva for two weeks while Photoshop stays open and the old files finish. Watch the output daily, check that brand colours and fonts match the old work, and confirm the exported files print and post cleanly. Compare a Canva export with the Photoshop original from step 1 to spot any gap in quality. Fix the problems while Photoshop is still available as a fallback, not after it is cancelled. Two quiet weeks of parallel running cost nothing and catch every problem early.
Step 7. Cancel Photoshop and confirm the files are safe
Once two weeks of Canva work look clean, export the final PSD files and any remaining assets from Photoshop, then cancel the subscription before the renewal date. Confirm the cancellation email arrives, and check that no auto renewal is set. Keep the PSD export files for six months, because Canva cannot reopen them with layers and the old exports are the only record of the layered work. The switch is done when Canva has run cleanly for two weeks and Photoshop is cancelled without a surprise charge.
What Comes Across and What Stays Behind
Canva takes the finished work well. Flat PNG and JPG exports upload cleanly, logos and stock photos organise into folders, and the Brand Kit carries the colours and fonts into every new design. For a normal design library, that covers most of what a team needs to keep working on day one.
What does not transfer is specific, and the team should name it before starting. Layered PSD files do not transfer with layers intact, so finish the edits in Photoshop first or accept a flat file. Photoshop actions and brush sets do not transfer, so list the ones the team actually uses and find the Canva equivalent. Custom fonts may need re-uploading, and some Adobe Fonts are not available in Canva at all. Smart objects, layer masks and adjustment layers are lost on import, so rebuild those effects by hand in Canva or leave the file in Photoshop.
It is a one time move, not a live sync. Photoshop stays as it was, and later changes in either tool do not sync back. That is the full picture of how to switch from Photoshop to Canva without losing the work that matters.
The Go-Live Checklist
Use this checklist before starting step 1, and do not skip a line.
- List every PSD file, template, brush set, action and font. – Export each live PSD as a flat PNG or JPG and save the files. – Note the Photoshop renewal date and any contract term. – Flag files with smart objects, layer masks and adjustment layers. – Choose the Canva plan by team size and Brand Kit needs. – Build the Brand Kit with logo, colours and fonts before importing.
- List the Photoshop actions the team actually uses. – Count the seats, because Canva Business charges per person. – Plan a replacement for any Photoshop feature Canva lacks. – Set a switch date in a quiet week, not during a launch. – Tell the team the switch date and the new workflow before step 1.
What the Switch Saves in Real Money
The saving depends on team size and plan, because the two tools charge different rates for similar work. One person on Photoshop prepaid pays 263.88 dollars a year. The same person on Canva Pro paid yearly pays 144 dollars, a saving of about 120 dollars a year. The same person on Canva Free pays nothing, a saving of the whole 263.88 dollars, as long as the free templates and assets are enough.
A team of five on Photoshop for teams pays about 190 dollars a month. The same five on Canva Business pay about 100 dollars a month, a saving of about 90 dollars a month or about 1,080 dollars a year. A team of five on the Photography plan pays about 100 dollars a month, the same as Canva Business, so the saving only appears when the team drops Lightroom or moves to Canva Pro.
The saving shrinks when the team adds stock photos or keeps Photoshop for print work. Adobe Stock is a separate purchase, while Canva Pro includes 141 million premium assets, so a team that buys stock monthly saves that bill too. A team that keeps one Photoshop seat for retouching and moves the rest to Canva still saves most of the bill. Count the stock purchases and the seats, run the two totals, and the answer will be clear. For most teams without heavy retouching, Canva saves money once the team outgrows the Photoshop trial.
Run the same math for your own team before you commit to how to switch from Photoshop to Canva, because the totals decide the plan.
Your First Two Weeks in Canva
The parallel run only helps if the team tests the right things, so set the tests before the first Canva design is assigned. Create one design of each type the team makes, including one social post, one flyer, one presentation and one print export, and confirm each one shows the right brand colours and the right fonts. Then compare the Canva exports against the Photoshop originals from step 1, checking colour, sharpness and text. That test plan is the part of the switch that most teams skip, and it is the part that catches the problems while Photoshop is still available as a fallback.
Test the resize and the print export next, because those are the workflows that break quietly. Use Magic Resize to turn one design into three sizes and confirm each one looks right, export a print PDF and check the bleed and the colour, and have a second teammate confirm they see the same Brand Kit. Also test a design that needs a background removal, since that tool sits behind the Pro paywall and trips up teams on the free plan. A test that covers design types, resize, print and background removal in the first week leaves the second week for fixing what failed, which is exactly how a quiet switch is supposed to work.
Five Mistakes That Stall the Move
The first mistake is cancelling Photoshop before the Canva templates are checked. A team that cancels on day one loses the layered files, the actions and the brush sets in one move, and the rebuild takes days instead of hours. Keep Photoshop until step 7, and the switch stays boring. The second mistake is importing the whole PSD library at once without a pilot. A flattened import repeats across every file, and fixing it after the fact costs more than the pilot ever did.
The third mistake is forgetting the print quality math. A team that prints flyers and menus will find Canva exports softer than Photoshop files, and a team that needs CMYK colour control will find Canva limited. Check the print output before choosing a plan. The fourth mistake is skipping the two week parallel run. A team that switches overnight discovers the font gaps during a live campaign, when fixing them costs the most. Two quiet weeks of parallel running cost nothing and catch every problem early.
The fifth mistake is underestimating the template rebuild. Five templates rebuilt well take an afternoon, and a team that budgets an hour for the rebuild will run out of time. Budget an afternoon, rebuild the top five templates first, and leave the long tail of old designs behind. The switch is a good time to clean the library, not a reason to move every old file into the new tool.
Life After the Switch
The first month after the move is when the saving becomes real, and it is also when the new habits form. Set a weekly review in Canva, one hour where the team checks the template library, clears the drafts and updates the Brand Kit, because a tool with thousands of templates needs a steadier rhythm than Photoshop did.
Tune the rebuilt templates after two weeks, not on day one, because the first fortnight shows which templates get used and which never open at all. The work of learning how to switch from Photoshop to Canva does not end on cancel day. It ends when the team stops opening the old tool out of habit, and that usually takes a full month.
Revisit the plan choice after 90 days. A team that started on Pro may find it needs Business for the approval workflows, and a team that started on Business may find it can drop to Pro if nobody uses approvals. Count the seats again too, because Canva Business bills per person, and a contractor who finished their project should come off the plan. The switch saves money once. The habits save it every month after.
Frequently Asked Questions
How long does it take to switch from Photoshop to Canva?
Most small teams finish the switch in one to two weeks. The setup takes an afternoon, the template rebuild and the asset move take another afternoon, and the two week parallel run catches the problems while Photoshop is still available. A team with many layered files or heavy print work should budget three weeks. Do not promise a one day switch, because the template rebuild and the parallel run are what make the move safe.
Will I lose my Photoshop files when I switch from Photoshop to Canva?
Layered PSD files do not open in Canva with layers intact, so export each live PSD first and finish any layer editing in Photoshop before the move. Flat PNG and JPG exports, logos and stock photos transfer cleanly, and the Brand Kit carries the colours and fonts into every new design. Keep Photoshop running until the Canva templates are checked, and no finished work will be lost.
Is Canva really cheaper than Photoshop?
For most teams that make graphics for social media, email and print, yes, by a clear margin. Canva Pro paid yearly costs 144 dollars a year against 263.88 dollars for Photoshop prepaid, so one person saves about 120 dollars a year. At team scale, five people on Canva Business pay about 100 dollars a month against about 190 dollars for Photoshop for teams. A team that retouches photos daily should stay on Photoshop, because Canva cannot replace that work at any price.
Does Canva have the same tools as Photoshop?
Canva has more templates and stock assets than Photoshop, but fewer editing tools. Photoshop offers layers, masks, smart objects and CMYK colour control, while Canva offers templates, Magic Resize, the background remover and the Brand Kit. A team that needs pixel precision should keep Photoshop for that work and use Canva for everything else. Pick the tool by the job, not by the brand.
Can I keep my Photoshop fonts when I switch?
Some fonts transfer and some do not. Brand fonts can be uploaded to Canva on Pro and Business plans, but Adobe Fonts that are licensed through the Adobe subscription are not available in Canva. List the fonts the team actually uses, upload the ones you own, and pick a close Canva replacement for the rest. Check the brand fonts in the first week, because a wrong font shows up on every design.
The Call
Switch to Canva if the team makes graphics for social media, email and print, if the team is paying for Photoshop and only using it for simple designs, or if the team wants templates, stock photos and a Brand Kit in the same login. A team of one to twenty people will save a clear amount each month, get Magic Resize and stock assets that Photoshop does not offer, and lose nothing it actually uses, as long as the audit flags the layered files and the fonts first. For those teams, learning how to switch from Photoshop to Canva is worth an afternoon, and the saving repeats every month.
Stay on Photoshop if the team retouches photos daily, if the team prints work that needs CMYK colour control, or if the team is mid campaign and cannot afford a week of parallel running. A team that values pixel precision over publishing speed will feel Canva as thin, and a team with many live PSDs can find the rebuild costs more than the saving. Stay also if the contract renewal is close and the team is mid launch. A switch during a launch costs more in chaos than it saves in subscription fees.
The decision rule is simple. Count the PSD files, count the people, list the design types the team actually makes every week, and run the two totals with stock and seats included. If Canva covers the weekly work and costs less, switch in a quiet week and follow the seven steps. If Photoshop covers a weekly job that Canva cannot match, stay and renegotiate the Photoshop plan instead. The right tool is the one that matches the work, not the one with the lower headline price.