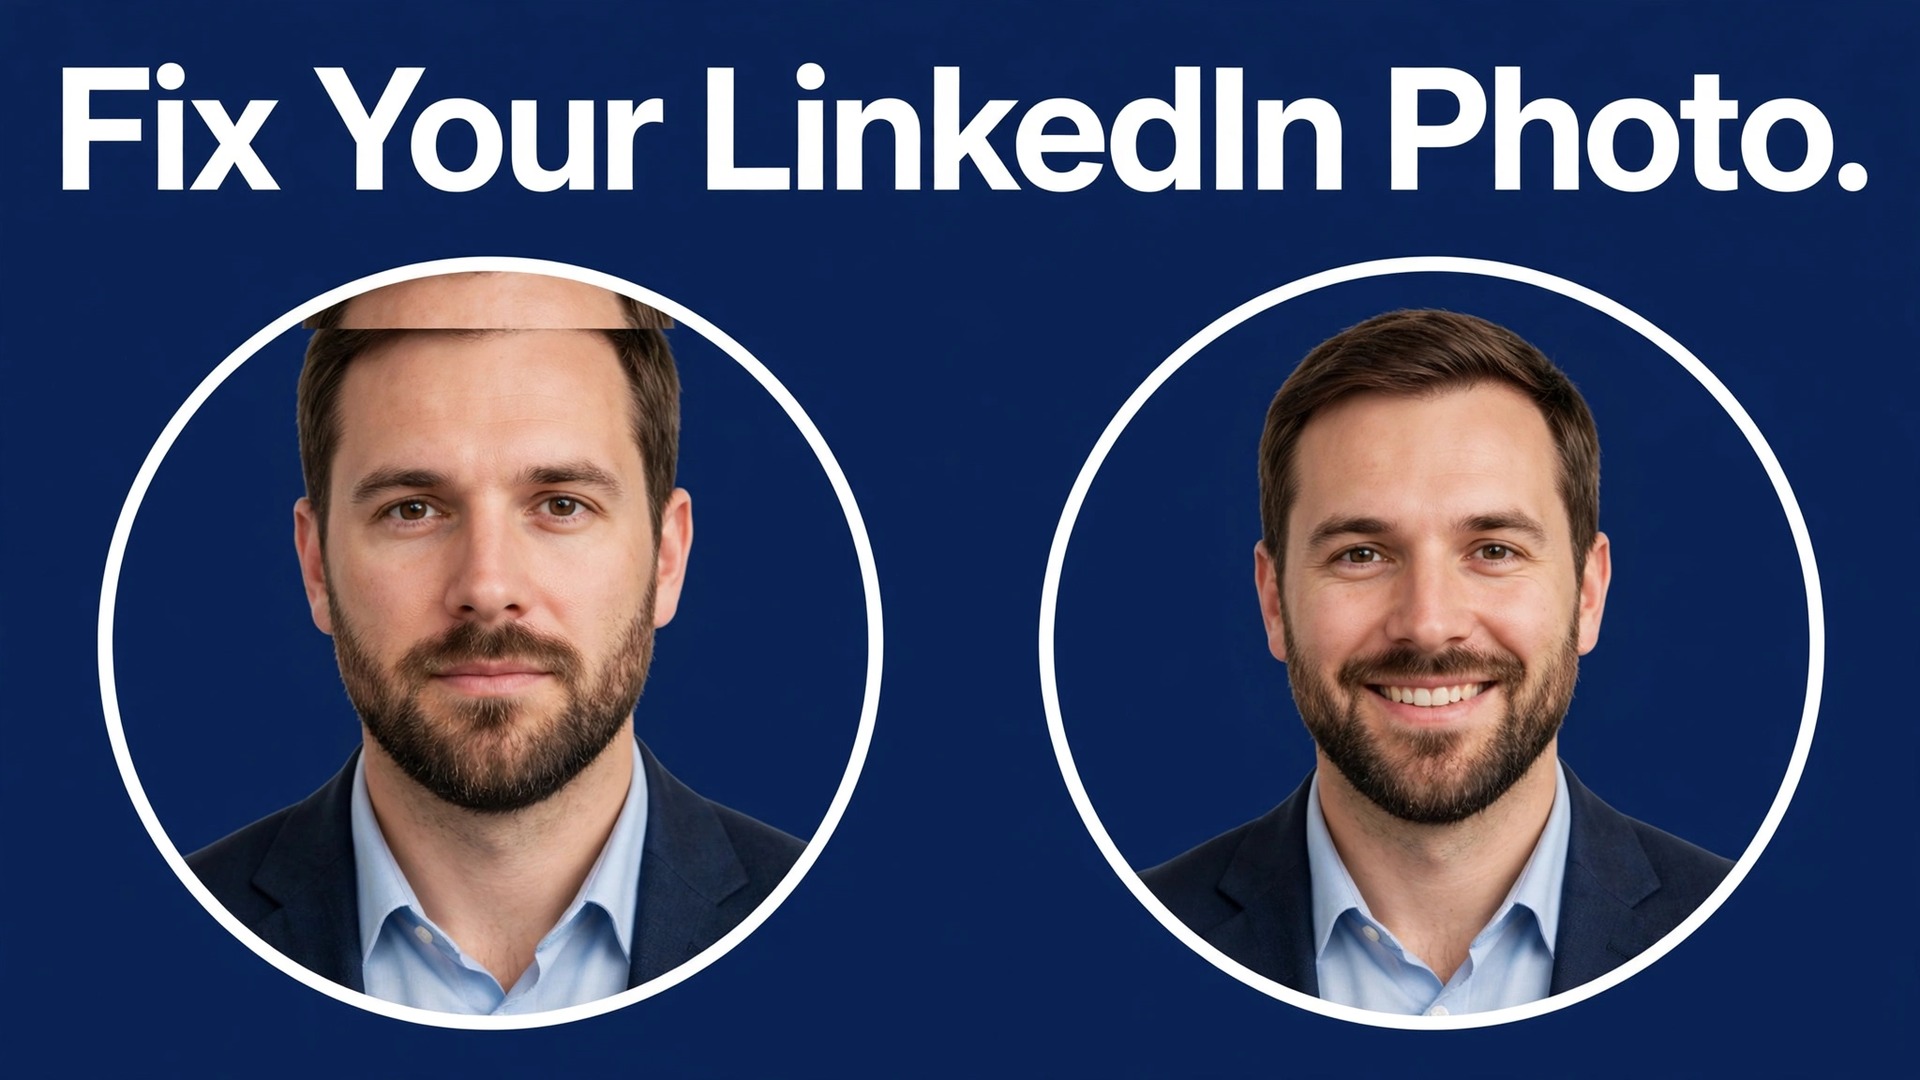
You upload a photo you like, LinkedIn crops it, and suddenly the top of your head is gone or your chin is cut off at the jaw. It is a small problem with an outsized cost, because that tiny circle is the first thing every recruiter, client, and future colleague sees. The good news is that the cause is almost always one of four things, and all four are fixable in under half an hour. This guide shows you how to fix cropped LinkedIn profile picture trouble at the source, with the exact sizes LinkedIn accepts in 2026, a step by step re-upload that puts your face back in the frame, and the tools that make the fix stick.
Why LinkedIn Crops Your Photo
LinkedIn stores your profile photo as a square and displays it as a circle, and that single design choice causes most of the trouble people report. The corners of your square image disappear the moment the photo goes live. Anything near a corner, the top of a tall hairstyle, a shoulder, a hand, or a logo on a shirt, can be sliced away even though it looked fine in the square preview. The crop is not a bug. It is how the platform is built, and the fix starts with designing for the circle instead of fighting it.
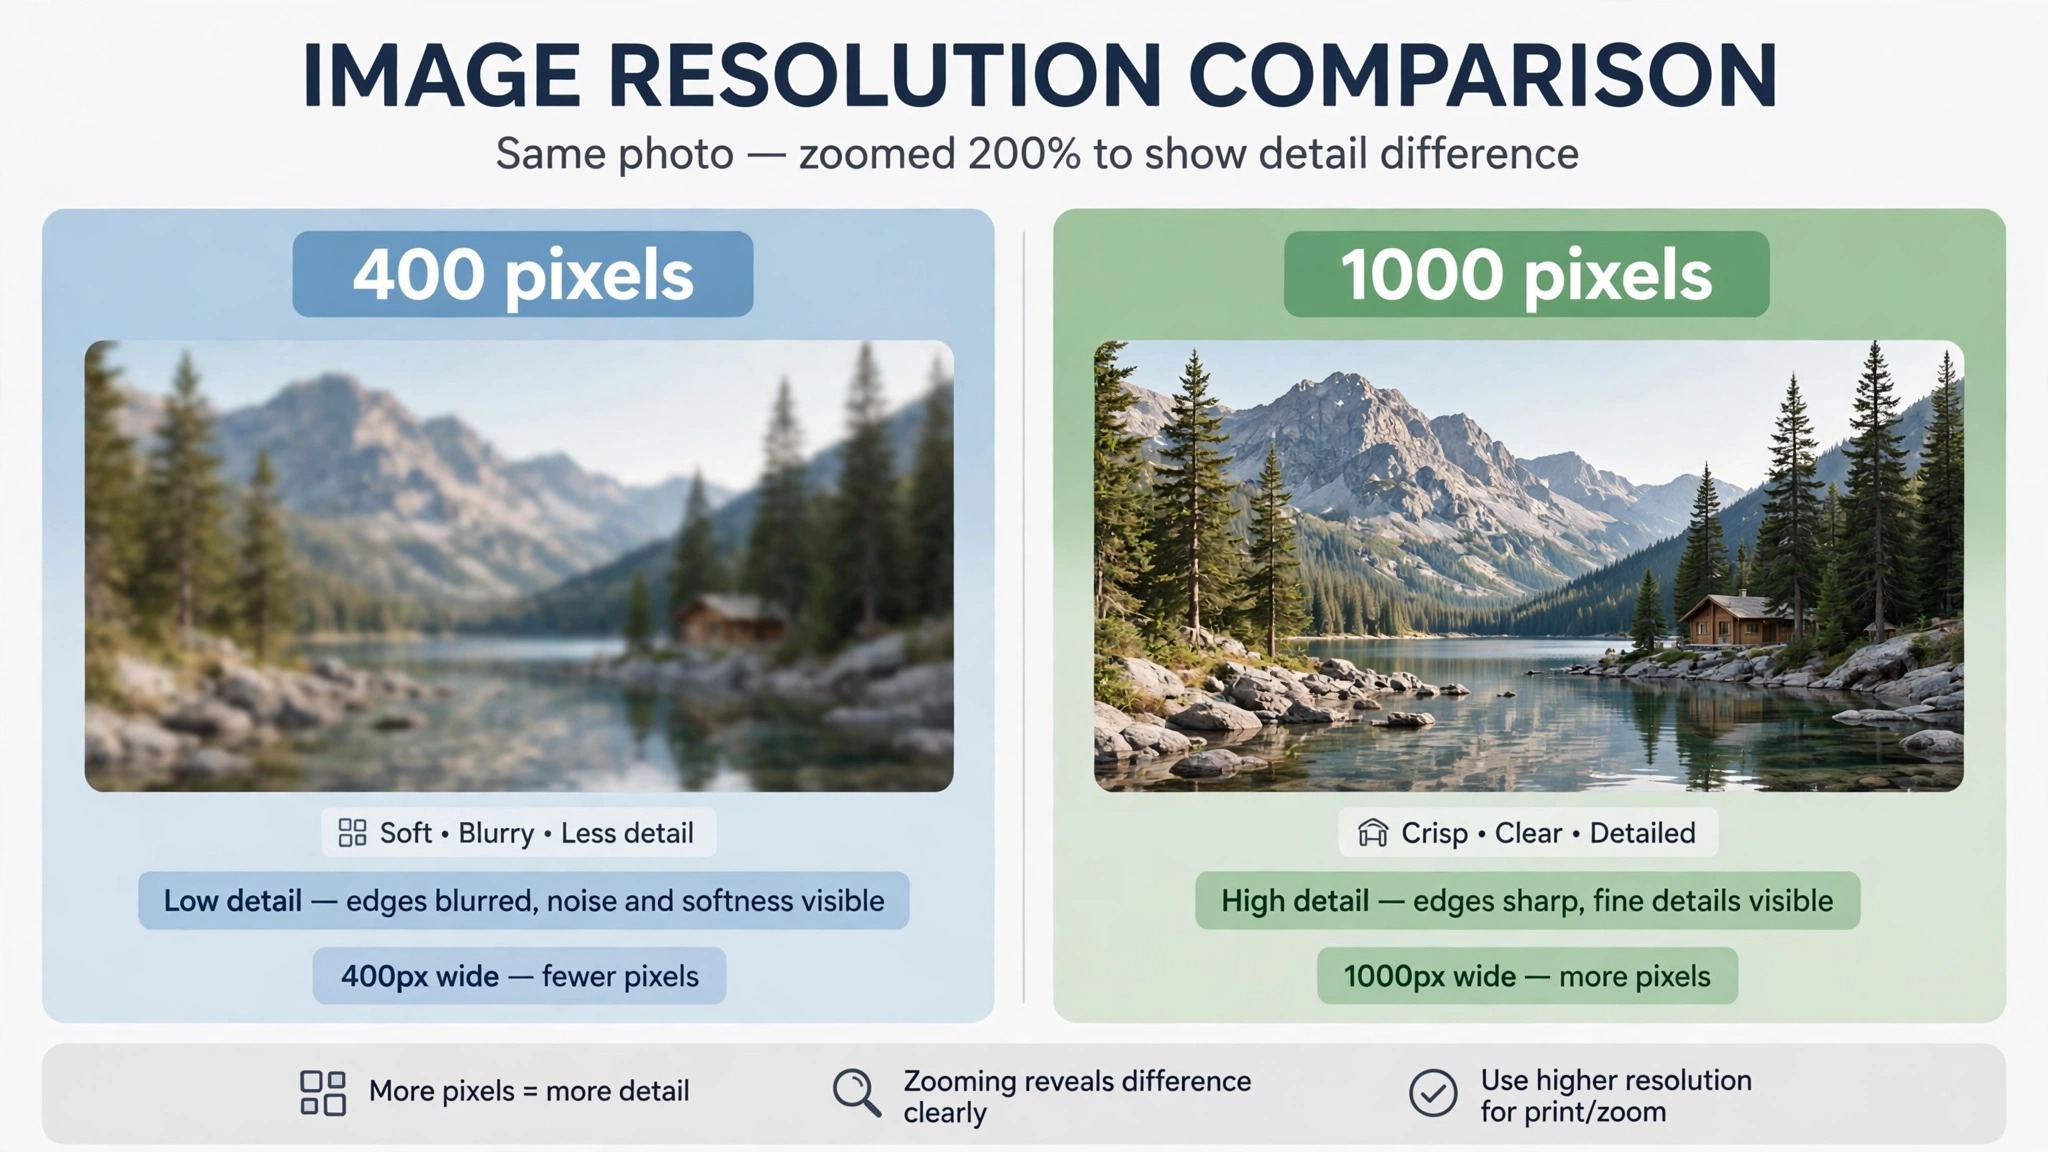
Compression makes the problem worse. LinkedIn re-encodes every upload, and a file that starts near the 400 pixel minimum has almost no detail left after that pass. Faces go soft, fabric texture turns to mush, and edges pick up a crunchy outline that reads as low quality even when the original was sharp. Uploading a larger file gives LinkedIn more detail to work with, so the result survives compression far better. That is why the recommended export in this guide is 1,000 by 1,000 pixels, even though the platform accepts 400 by 400.
The third cause is the upload itself. LinkedIn lets you upload a rectangular photo, but it forces a square crop before saving, and its default crop is rarely where you would put it. A wide photo of you at a conference becomes a square centred on the middle of the frame, which may be your shoulder rather than your face. A portrait photo taken from too far away becomes a small face in a large circle, because the crop cannot add detail that was never there.
The fourth cause is the simplest one. The original file was already small, already compressed, or already cropped once by another app, so LinkedIn had nothing good to work with. A screenshot of a photo, a picture pulled from a messaging app, or a heavily compressed social media image will always look worse after a second round of processing.
The Exact Sizes for 2026
LinkedIn publishes a clear set of limits for profile photos, and staying inside them removes most of the guesswork. The minimum size is 400 by 400 pixels. Anything smaller is rejected or looks soft after processing. The accepted range runs from that minimum up to very large files, with an upper bound of 7,680 by 4,320 pixels, though nobody needs to go anywhere near that high. The aspect ratio is square, the file must be a JPG or a PNG, animated formats are not supported, and the maximum file size is 8 MB. In practice you will sit well below that limit if you export correctly.
The simplest rule that covers all of it is to export a square headshot between 800 and 1,000 pixels on each side, save it as a JPG at high quality, and keep the file under 1 MB. That file is comfortably above the minimum, small enough to upload instantly, and detailed enough to survive compression and still look sharp on a modern screen. Exporting at 2,000 by 2,000 pixels is also fine and gives extra headroom, but it adds nothing visible on most screens and can slow the upload on a weak connection.
| Image | Recommended size | Shape | File limit |
|---|---|---|---|
| Profile photo | 1,000 by 1,000 pixels | Square, shown as a circle | 8 MB |
| Profile banner | 1,584 by 396 pixels | Wide rectangle | 8 MB |
| Company logo | 300 by 300 pixels | Square | 8 MB |
| Company page banner | 1,128 by 191 pixels | Wide rectangle | 8 MB |
| Post image | 1,200 by 627 pixels | Wide rectangle | 8 MB |
The banner deserves a note of its own, because it crops too. The personal profile banner is 1,584 by 396 pixels, and LinkedIn cuts the sides off on mobile, so keep text and logos inside the centre of the frame. On desktop the lower left corner sits behind your profile photo, so never put anything important there. The safe zone habit you build for the profile photo applies to the banner as well, and the same rule holds. Design for what survives the crop, not for the full canvas.
How to Fix Cropped LinkedIn Profile Picture Problems Step by Step
The steps below fix the crop in order, from finding the best original file to checking the result on a phone and a laptop. Do them in order, and do not skip the preview step, because the preview is where most bad crops are caught for free.
- Find the original camera file. Open your phone gallery or camera roll and look for the full resolution original, not the version you sent through a messaging app or downloaded from social media. If you only have a compressed copy, use the largest one you can find, and accept that the result will be softer than a fresh original.
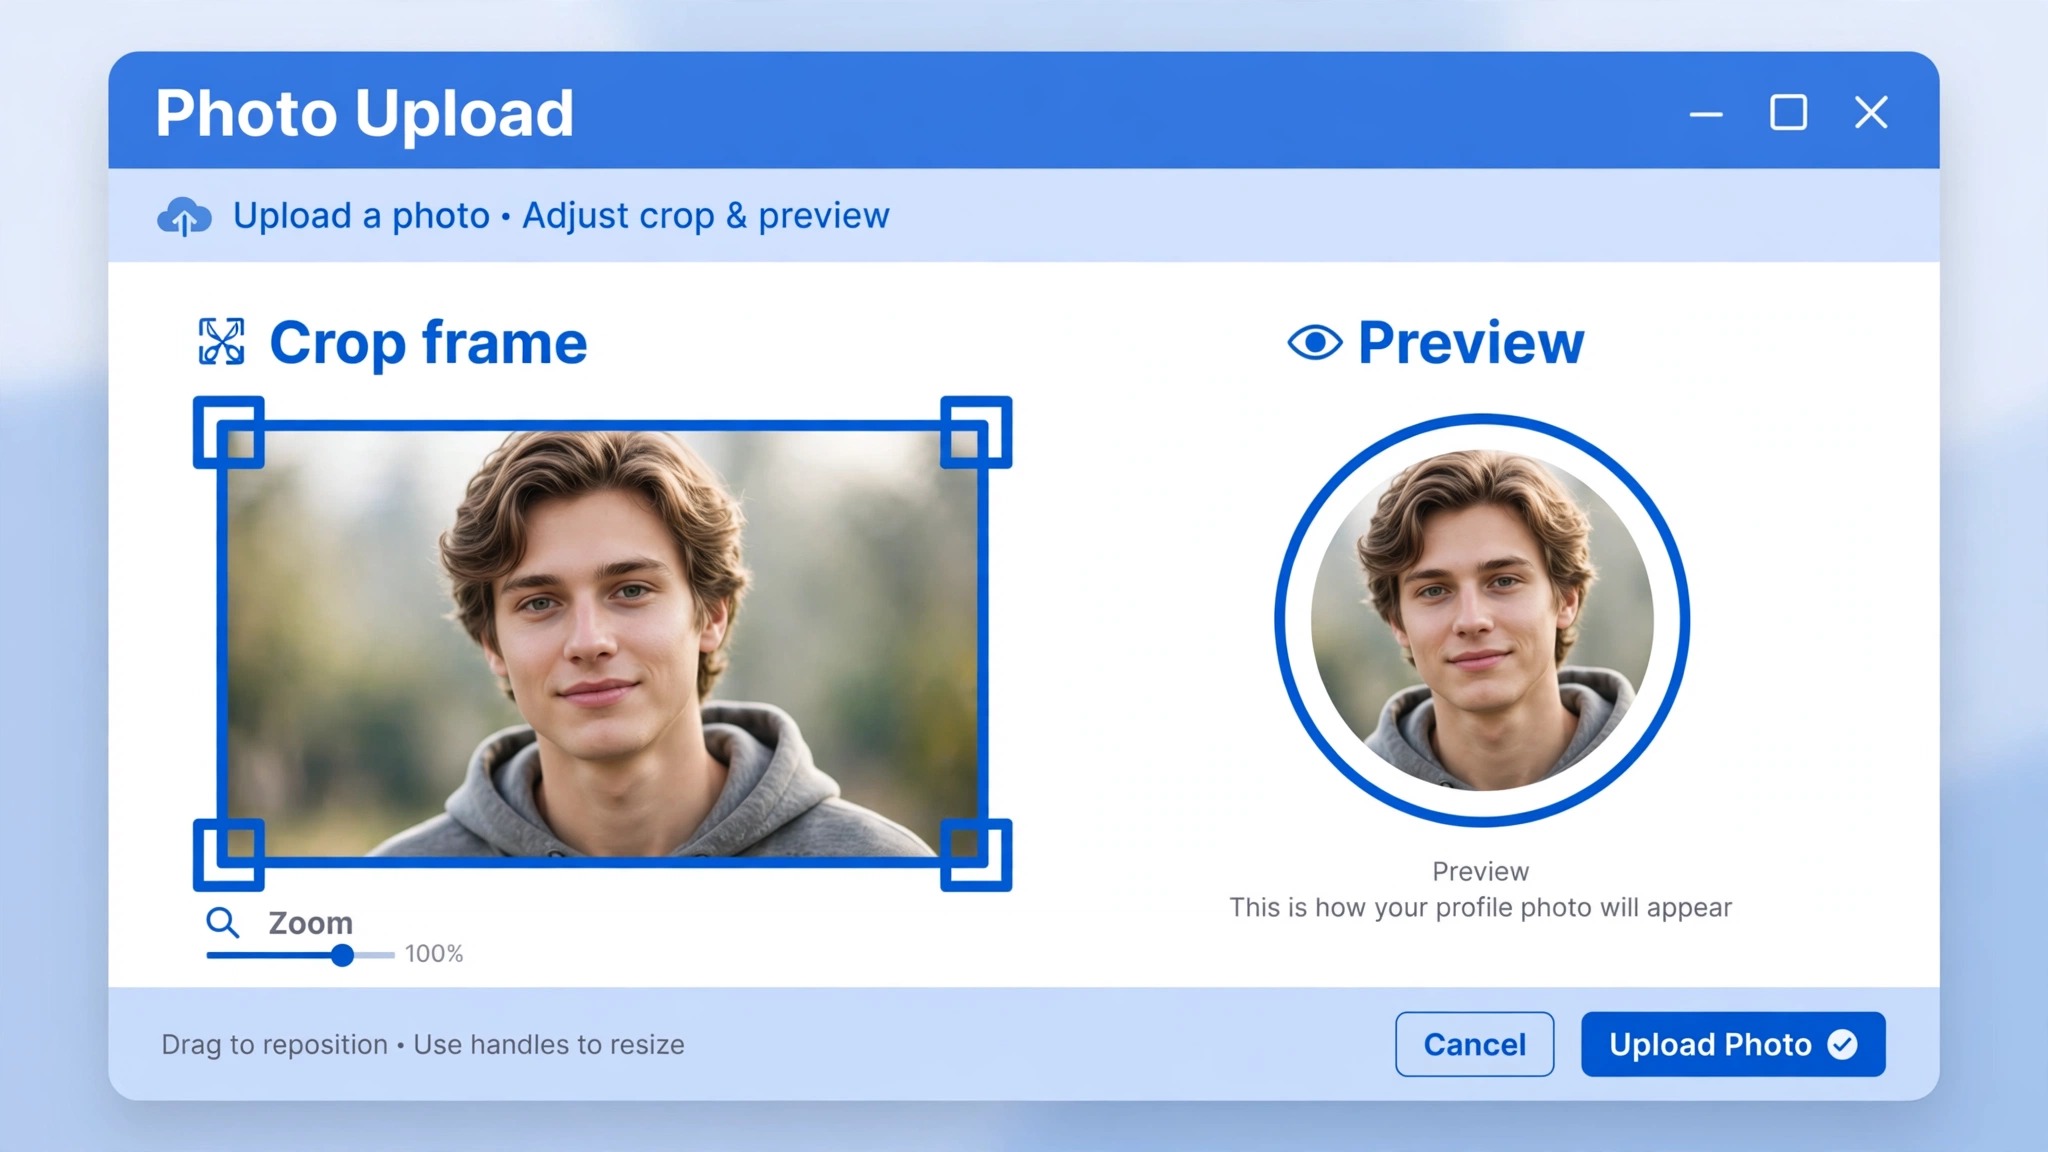
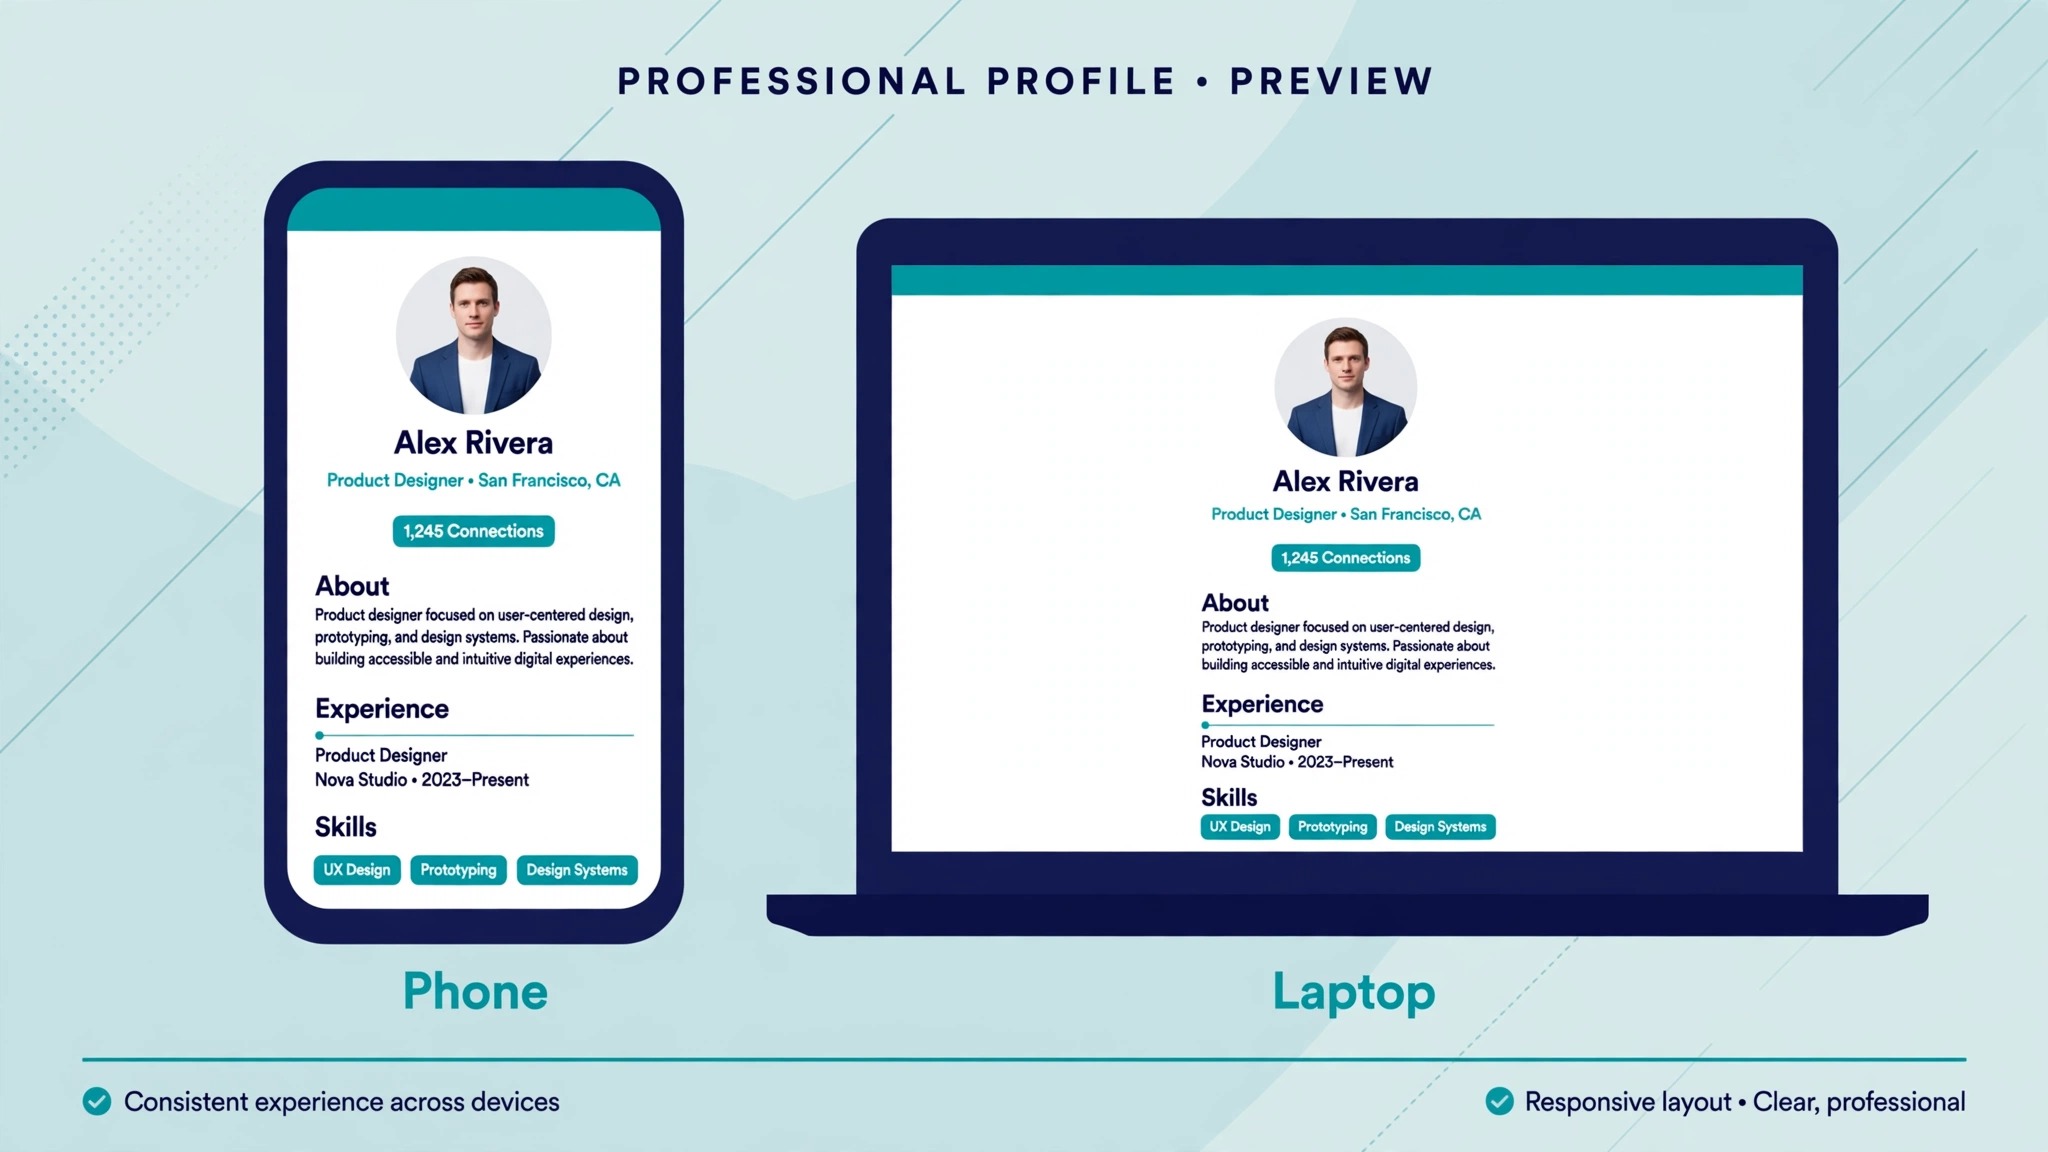
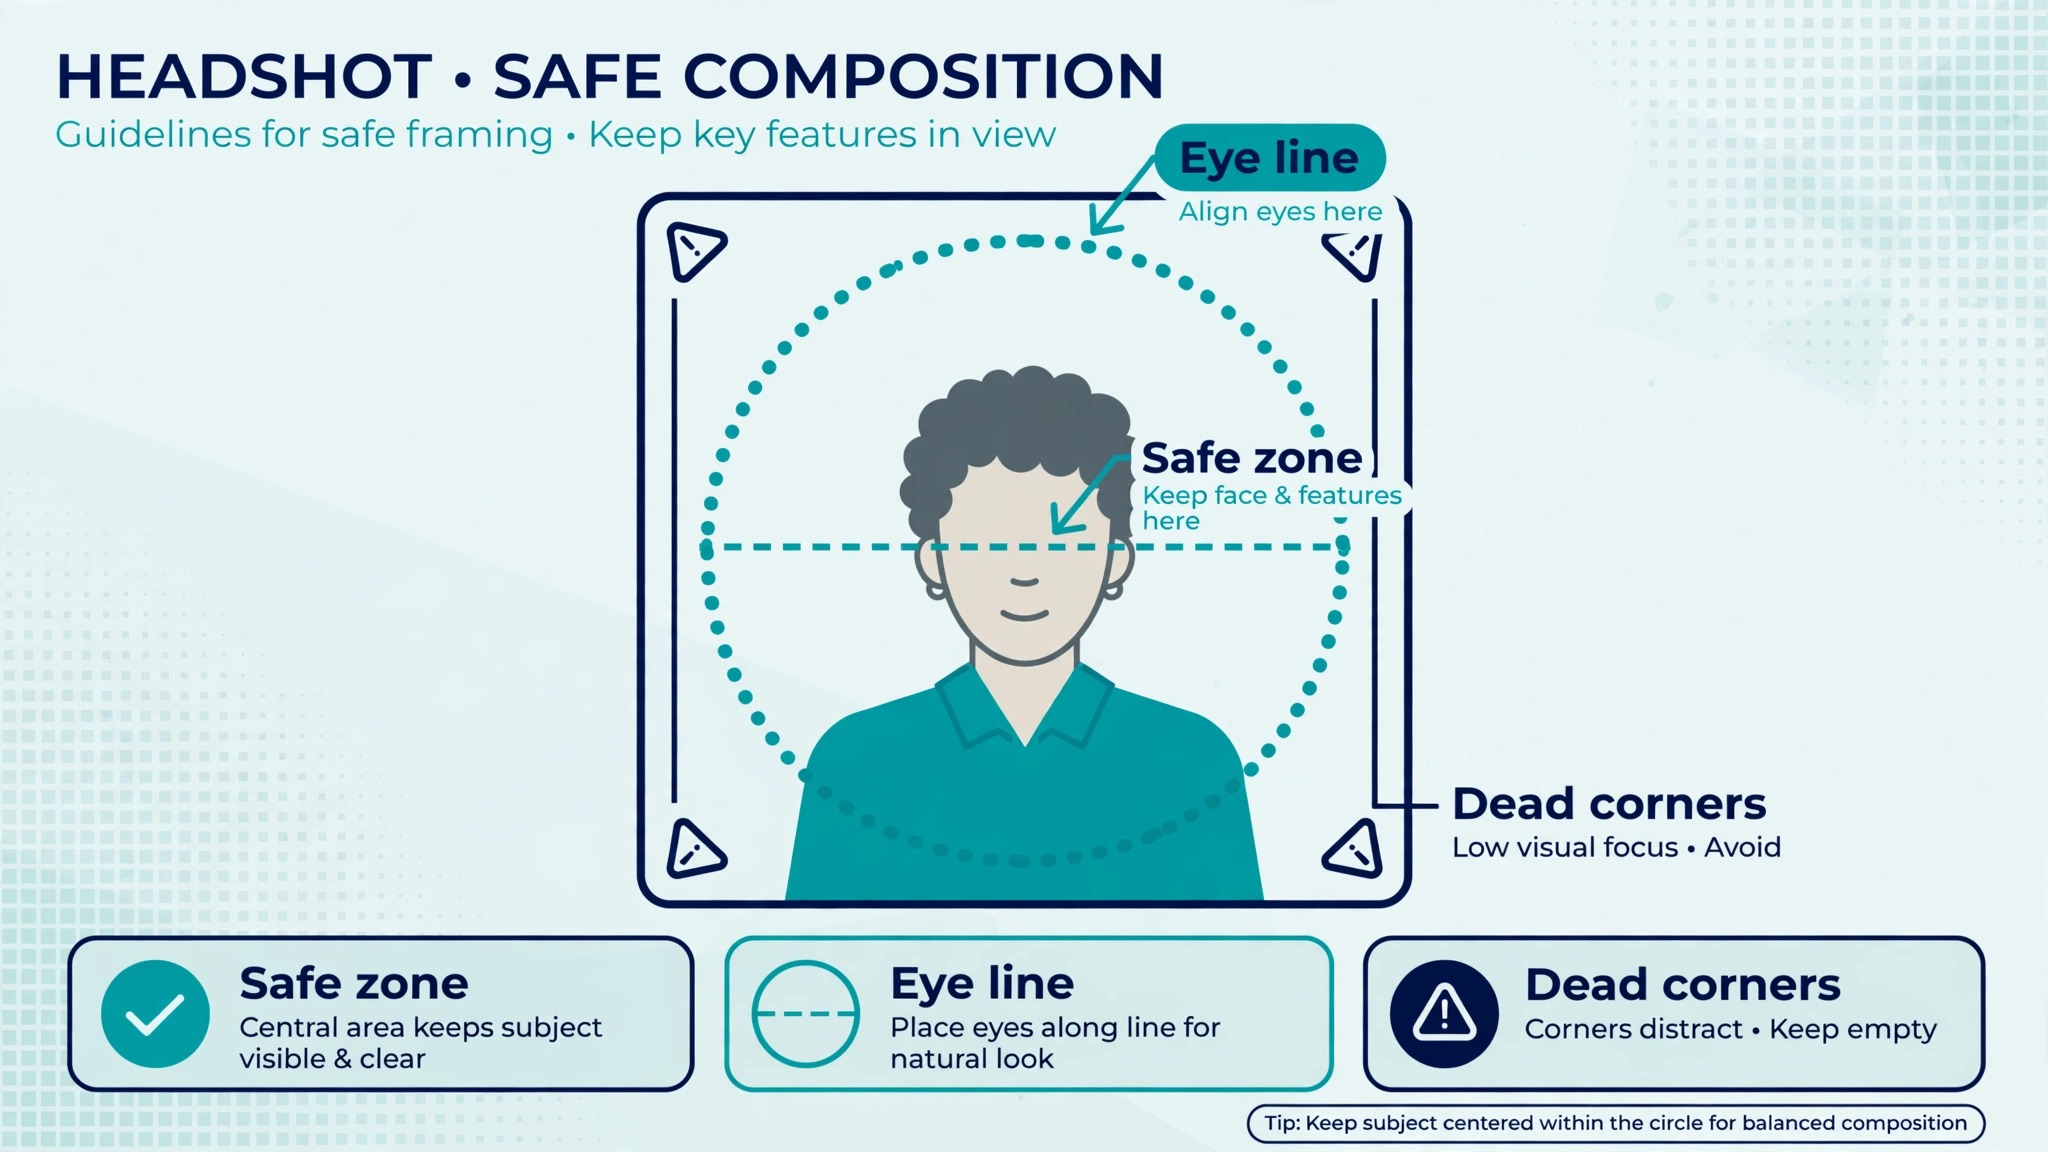
- Open the photo in an editor and crop it to a square yourself, before LinkedIn touches it. Place your face in the centre of the square, with your eyes slightly above the horizontal middle line. Leave clear space above the top of your head and below your chin, because the circle will eat into both.
- Check the circle before you save. Most editors let you preview a circular crop, and Canva and Adobe Express both offer it directly. If your editor does not, imagine a circle inscribed in the square and confirm that your whole head, your chin, and the tops of your shoulders sit inside it. Anything outside that circle is gone on LinkedIn.
- Export the square at 1,000 by 1,000 pixels as a JPG at quality 90 or higher. Keep the file under 1 MB if you can, and under the 8 MB limit in all cases. A PNG is also accepted, but a JPG at high quality is smaller and looks identical at this size.
- Open LinkedIn on a desktop browser, go to your profile, and click the camera icon on your photo. Desktop gives you a larger preview and finer control over the crop than the mobile app, so use it for the fix even if you normally use the app.
- Upload the square you prepared. LinkedIn will still show you its crop tool, but since the file is already square and already composed for a circle, the tool has almost nothing to change. Drag the crop only if your face sits off centre, and keep the whole head inside the circle as you do it.
- Save, then view your profile on your phone as well as on your desktop. LinkedIn renders the photo at different sizes across feed, search, messages, and your profile, down to as small as 40 by 40 pixels in some places. A photo that looks right at full size but loses the eyes at small size needs a tighter crop.
- Wait a few minutes and check again. LinkedIn caches the old photo in some views, so the new one may not appear everywhere at once. If the old photo is still showing after an hour, sign out and back in, or clear the app cache, before assuming the upload failed.
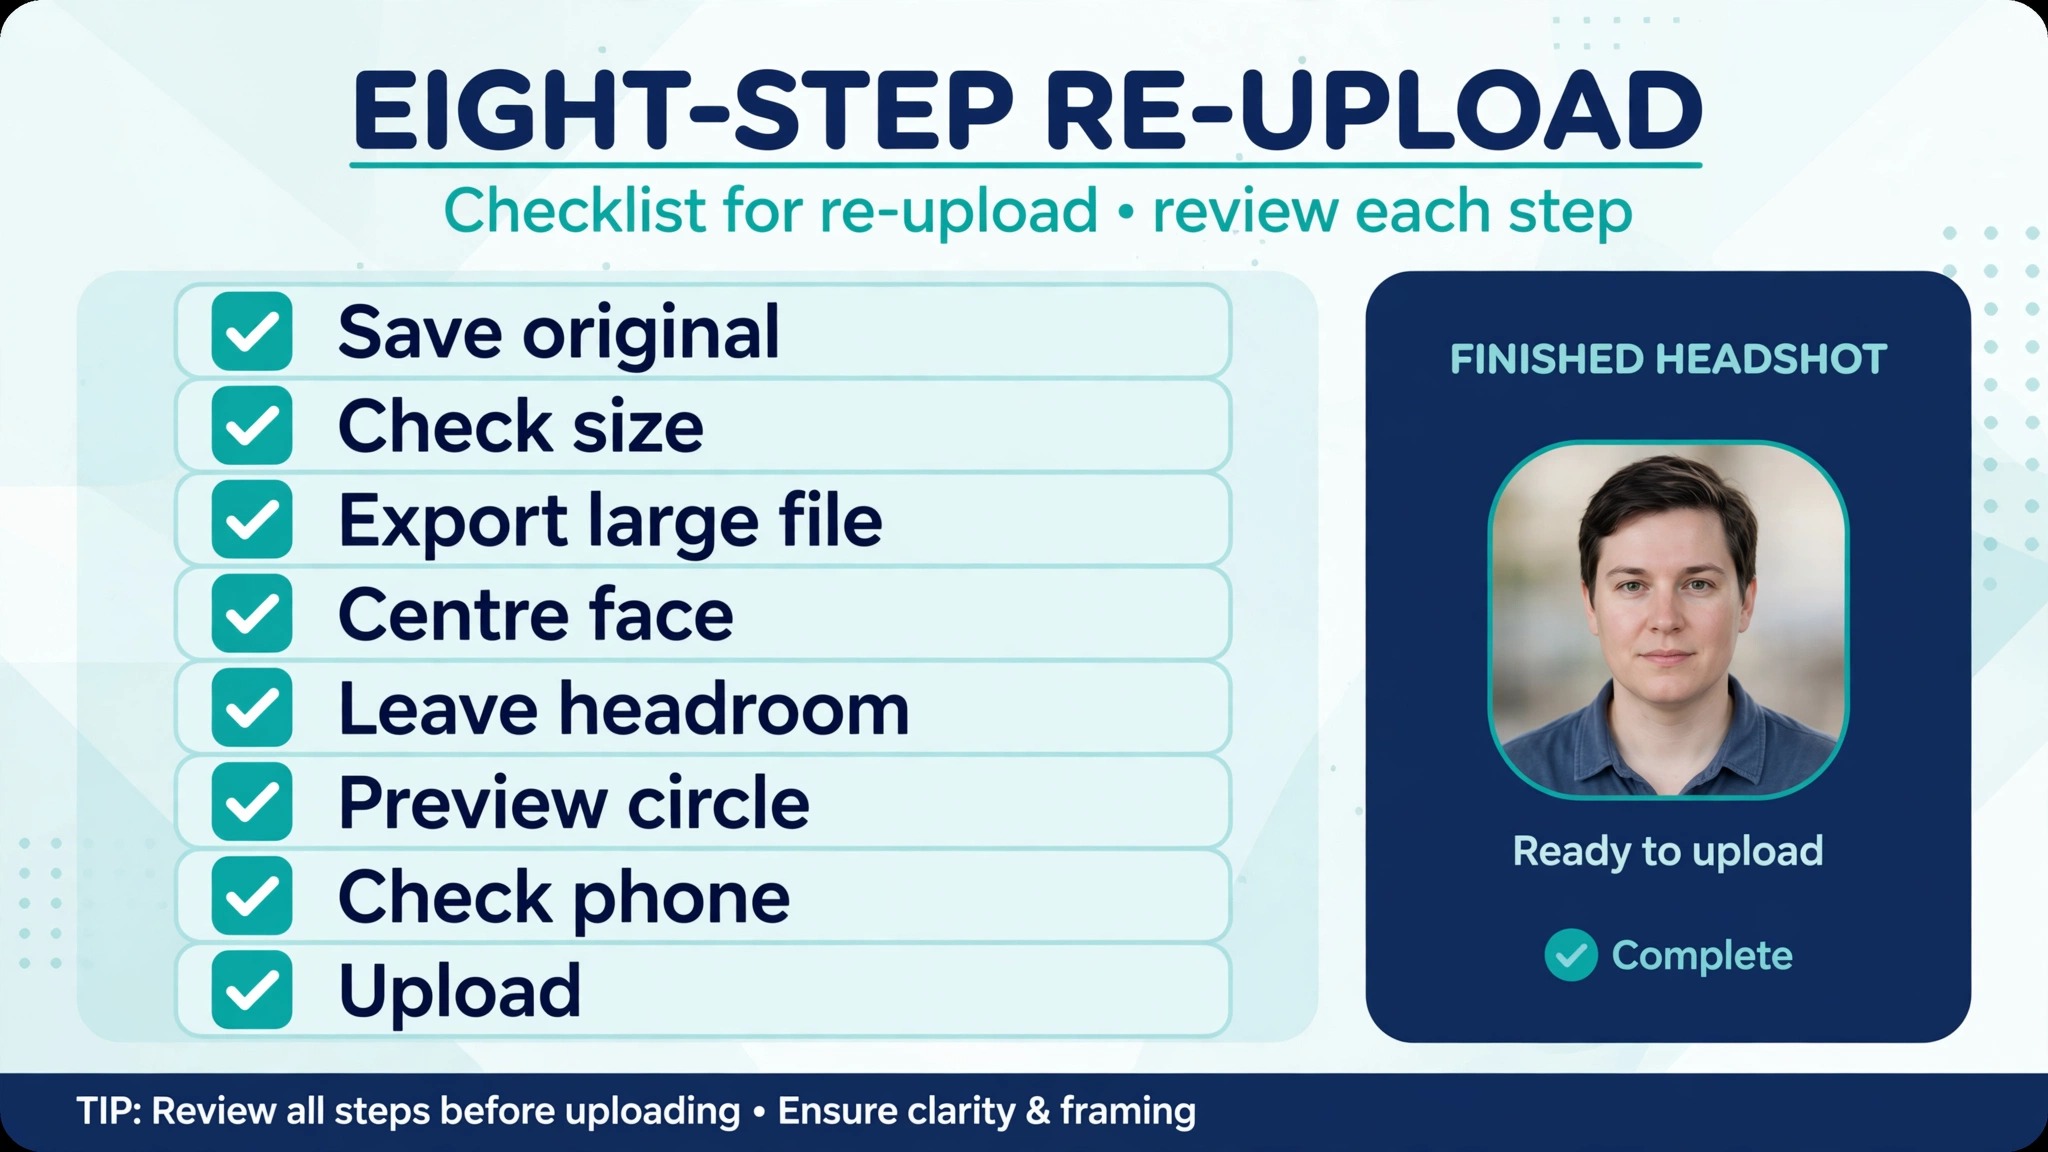
That sequence fixes the large majority of cropped photos, because it removes the two things that cause most failures. The file is square and composed for a circle before upload, and it is large enough to survive compression. If the result still looks wrong after these steps, the problem is in the original photo, not the upload, and the next sections cover how to tell the difference.
Diagnose the Crop Before You Fix It
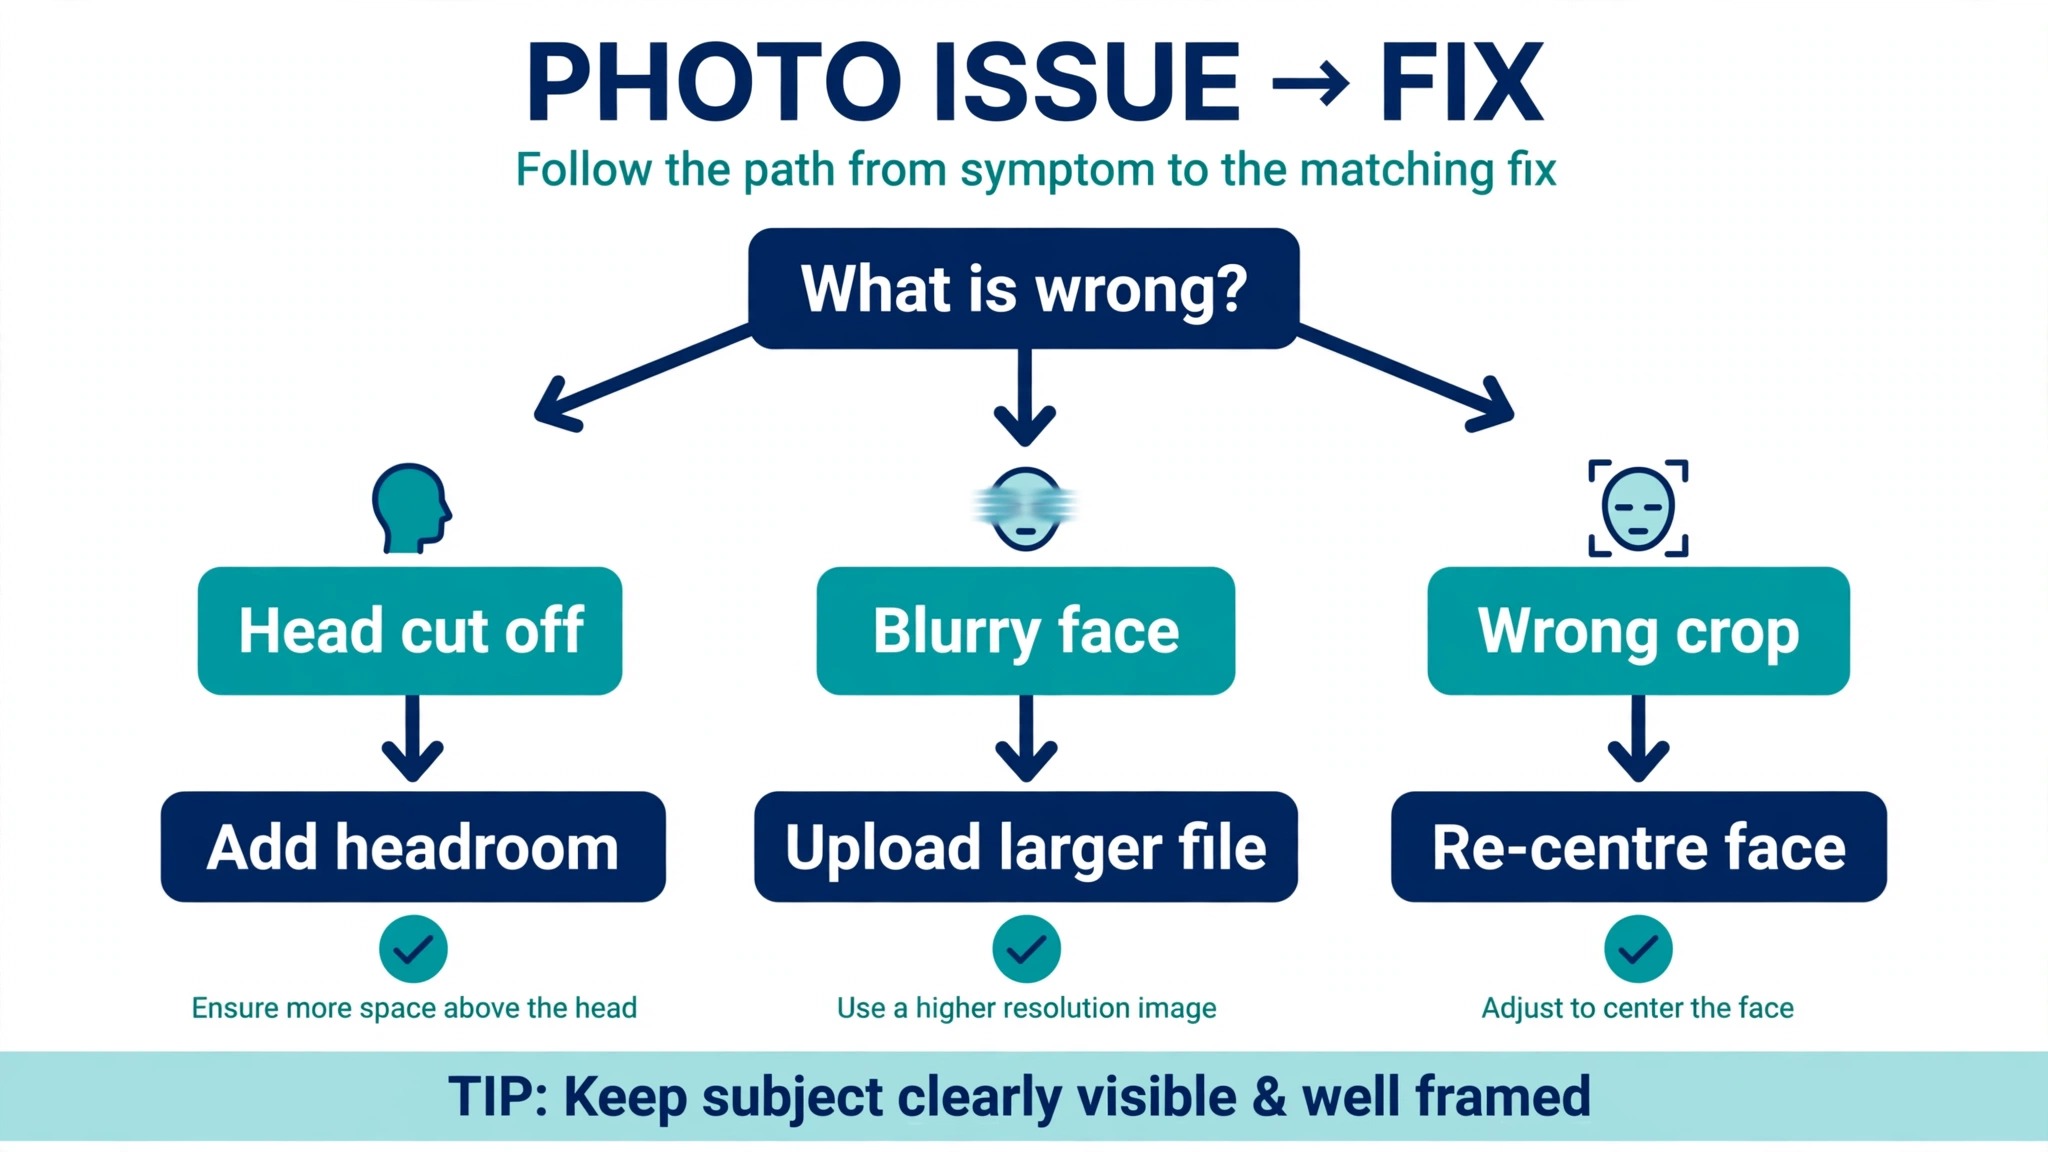
Guessing at the fix wastes time, so run this quick diagnosis first. Each item below points at a different cause, and the cause decides the repair. Read through the list, find the symptom that matches your photo, and jump to the fix that belongs to it.
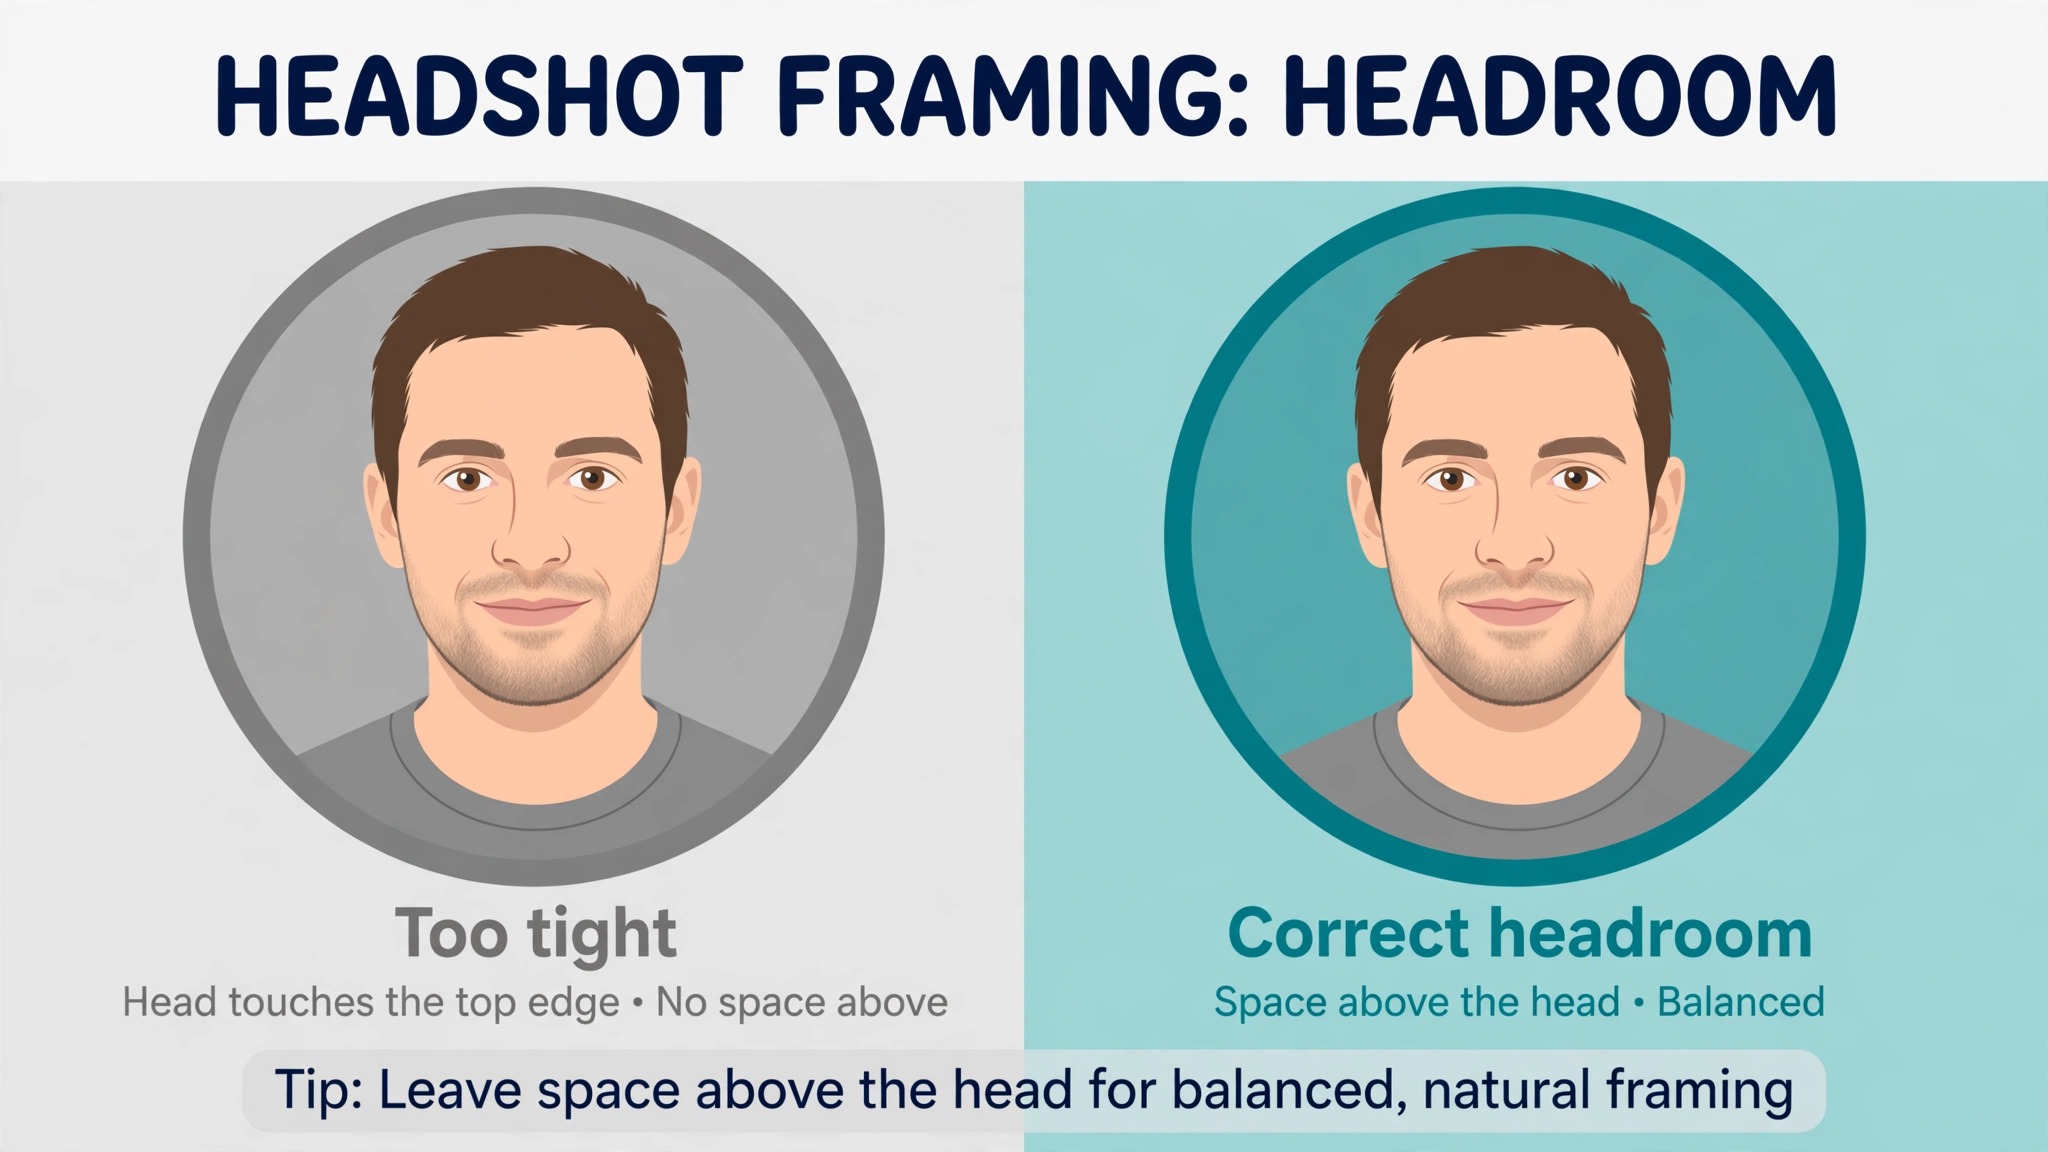
- The top of the head is cut off. The original was composed too tight, with the head touching the top of the frame. Fix it by going back to the original, adding space above the head, and re-cropping to a square with your eyes in the upper third of the frame.
- The chin or shoulders are cut off. The face sits too low in the square, or the crop was dragged down. Fix it by moving the face up in the frame and leaving clear space below the chin before you export.
- The face is tiny in the circle. The original was taken from too far away, or the crop included too much background. Fix it by cropping tighter around the head and shoulders, so the face fills about 60 percent of the circle.
- The photo is blurry or soft. The original was too small, already compressed, or upscaled from a tiny file. Fix it by finding a larger original, or by taking a fresh photo, because no editor can add detail that was never captured.
- The photo looks fine on desktop but wrong on mobile. The mobile app and the desktop site crop differently, and the phone shows a narrower view. Fix it by checking the result on both, and by keeping the face dead centre with generous margins on all sides.
- The colours look washed out or dull. LinkedIn re-encodes the file and strips some metadata on upload, which can flatten colours. Fix it by exporting as a JPG in the sRGB colour space, with a slight lift in contrast and saturation before upload, and by avoiding HDR files that LinkedIn will flatten anyway.
Two of these symptoms often appear together, usually a tight crop plus a small file, and fixing only one of them leaves the photo looking mediocre. Work through the list in order, fix the framing first, then the file size, then check the result on both devices. That order matters, because a perfectly framed 300 pixel file will still look soft, and a sharp 1,000 pixel file with the head cut off is still a bad photo.
Tools That Fix a Bad Crop
You do not need paid software to fix a LinkedIn photo. The tools below are free or have a genuinely useful free tier, and each one covers a different part of the job. Pick the one that matches the problem you diagnosed, not the one with the longest feature list. When you need to fix cropped LinkedIn profile picture issues more than once, for a team page or a company profile as well as your own, a template based tool that remembers the right size is worth more than a powerful editor you open twice a year.
Canva
Canva is the easiest fix for most people, because it already knows the LinkedIn sizes and shows you the circular crop before you export. Search for the LinkedIn profile photo template, drop in your photo, drag it until your face sits in the centre of the circle, and export at 1,000 by 1,000 pixels. The free plan covers all of this, including the templates, the crop, and full resolution export.
Pro adds brand kits and premium stock that a profile photo does not need. Pro costs 18 dollars a month or 144 dollars a year in the United States according to an October 2026 check, but do not pay for it just to fix a profile photo. The free plan is enough, and the whole job takes about five minutes once the template is open.
Adobe Express
Adobe Express is the best pick when the photo needs a quick polish as well as a crop. Its free plan includes thousands of templates, a large stock photo collection, and a font library that makes text based banners look clean, and its background removal and retouching tools sit in the same editor as the crop. Premium costs 9.99 dollars a month and adds more assets and Firefly generative features, but the free plan handles the LinkedIn fix on its own.
Open the LinkedIn profile photo size, place your face inside the circular preview, adjust brightness and sharpness if the original is flat, and export as a JPG. Express is also the better choice if you already use Adobe products, since the interface and the file handling will feel familiar.
Photopea
Photopea is the best free option for a precise manual fix, because it is a full photo editor that runs in the browser with no install and no account. Open your photo, crop to a square with the fixed ratio tool, use the ellipse selection to preview exactly what the circle will keep, and export at 1,000 by 1,000 pixels. The learning curve is steeper than Canva, and the interface will feel busy if you have never used Photoshop, but the control is unmatched for free. Use Photopea when the crop needs pixel level care, for example when glasses sit near the edge of the circle and a drag and drop crop keeps cutting them off.
Snapseed
Snapseed is the best pick when the only device you have is your phone. Google’s free mobile editor covers crop, tune, details, and selective adjustments, and its crop tool lets you set a square ratio and drag the frame exactly where you want it. Export the edited photo at full size, then upload it to LinkedIn from the desktop browser for the finer preview. The phone app alone can fix framing and brightness, but the desktop upload step is still worth doing, because the larger preview shows the circle crop more clearly than the phone screen does. Snapseed costs nothing, shows no ads, and works offline, which makes it the most practical tool for a fix done on the move.
Built-in Phone Editors
The editor already on your phone is often enough, and it is the fastest option when the photo only needs a small adjustment. On an iPhone, the Photos app crops to a square, adjusts exposure and sharpness, and exports at full resolution. On Android, Google Photos does the same, with an added auto enhance that usually helps a flat photo. The weakness of both is the preview. Neither shows you the LinkedIn circle, so you must leave extra space around the head and check the result after upload. Use the built in editor for a quick fix, and move to Canva or Photopea when the first attempt still cuts something off.
Mobile vs Desktop, and Why the Fix Belongs on Desktop
LinkedIn crops differently on mobile and desktop, and that difference explains a large share of repeat complaints. The desktop site shows a larger preview with a draggable crop frame, while the mobile app shows a smaller preview and fewer controls. A crop that looks centred on a phone can sit off centre on a laptop, because the two views scale the same square differently. Desktop also renders the banner differently, with the lower left corner hidden behind the profile photo, while mobile cuts the sides of the banner instead. Designing on one device and checking on the other is the only way to catch both.
The practical rule is simple. Prepare the file on whichever device holds the original, but do the upload and the final check on desktop. Open your profile in a desktop browser, upload the square, adjust the crop in the larger preview, save, and then open the profile on your phone to confirm. If the phone view cuts something the desktop view kept, tighten the crop and leave more space around the head. The extra five minutes this takes is far cheaper than uploading three versions from the app and hoping one of them lands right. To fix cropped LinkedIn profile picture trouble permanently, the desktop preview is the step that makes the result repeatable instead of lucky.
When the Photo Is Too Small or Too Blurry
A crop fix cannot rescue a file that has no detail in it. LinkedIn accepts a minimum of 400 by 400 pixels, but a 400 pixel file that has already been compressed by a messaging app will look soft after LinkedIn compresses it again. The symptoms are easy to recognise. The face looks smooth and waxy, eyelashes and fabric texture disappear, and edges pick up a faint halo. If your photo looks like that, stop adjusting the crop and go back to the source file.
The first move is always to find a larger original. Check the camera roll on the phone that took the photo, check cloud backups, and check whether a colleague or a photographer has the full resolution version. A file straight from the camera, even an older one, will beat a screenshot or a downloaded copy every time. If no larger original exists, the honest options are to take a fresh photo or to accept a softer result. AI upscaling tools can add apparent sharpness to a small file, and they help with a 600 pixel original, but they cannot rebuild a face from a 200 pixel thumbnail, and they sometimes invent detail that looks strange at full size.
Taking a fresh photo is faster than most people expect, and it is the right call when the existing photo is more than a few years old anyway. Stand near a window in daylight, face the light, keep the background plain and uncluttered, and take the photo at arm’s length or ask someone to take it from about a metre away. Frame from the chest up, leave space above the head, and take five or six shots so you can pick the sharpest one. A fresh photo taken in daylight will beat any amount of editing on a five year old compressed file, and it updates the profile at the same time.
The Safe Zone Rule That Prevents the Next Bad Crop
The safe zone is the habit that makes every future upload work the first time. Think of the square as three zones. The centre circle is the safe zone, and everything that matters must sit inside it. The corners are the dead zone, and anything there will be cut away. The ring between the circle and the square is the risk zone, where hair, shoulders, and earrings may or may not survive depending on the device. A photo composed with the face in the centre circle, the chin clearly inside the lower curve, and the eyes slightly above the horizontal middle line will survive every version of the LinkedIn crop.
Apply the same thinking to the banner. The banner safe zone is the centre of the 1,584 by 396 pixel frame, away from the lower left corner where the profile photo sits on desktop and away from the sides that mobile cuts off. Keep text, logos, and faces inside that centre band, and treat the rest of the banner as decoration. A banner that reads well in the centre will read well everywhere.
A banner that depends on text at the edges will fail on half the devices that view it. The fastest way to fix cropped LinkedIn profile picture problems for good is to make the safe zone a habit, so the next upload is composed correctly before it ever reaches the platform.
Mistakes That Keep the Photo Cropped
The most common mistake is uploading a rectangular photo and trusting LinkedIn to crop it well. Its default crop centres on the middle of the frame, which is often a shoulder or a background object rather than a face. Crop the square yourself first, every time, and the platform has nothing left to guess. The second mistake is reusing a photo that has already been through another app. Every round of compression and cropping removes detail, and a photo that has been through a messaging app, a social feed, and a screenshot is three rounds poorer than the original. Go back to the camera file whenever you can.
The third mistake is framing too tight. A head that fills the whole square looks bold in the editor and terrible in the circle, because the circle cuts the top and the sides at once. Leave space above the head and on both sides, even if it feels like wasted space in the square.
The fourth mistake is checking the result on one device only. A photo that looks right on a laptop can lose the eyes on a phone, and a photo that looks right on a phone can look off centre on a laptop. Check both, every time, and keep the face centred with generous margins.
The fifth mistake is ignoring the file size. A photo under 400 pixels on a side will be rejected or upscaled into blur, and a photo over 8 MB will fail to upload at all. Export at 1,000 by 1,000 pixels as a JPG under 1 MB, and the size problem disappears. People who need to fix cropped LinkedIn profile picture issues twice usually made two of these mistakes at once, most often a tight crop plus a small file, and fixing both together is what finally solves it.
Frequently Asked Questions
What size should a LinkedIn profile picture be?
Upload a square image at least 400 by 400 pixels, in JPG or PNG format, under 8 MB. For the sharpest result, export at 1,000 by 1,000 pixels as a JPG at quality 90 or higher, and keep the file under 1 MB. That size survives LinkedIn compression, stays crisp on retina screens, and still looks clear when the platform scales it down to 40 by 40 pixels in search results and messages.
Why does LinkedIn cut off the top of my head?
LinkedIn stores the photo as a square and displays it as a circle, so the corners disappear. If your head touches the top of the square, the circle cuts into it. The fix is to go back to the original, leave clear space above the head, place your eyes slightly above the horizontal middle line, and preview the circular crop before you save. To fix cropped LinkedIn profile picture framing like this, crop the square yourself first, because LinkedIn’s default crop centres on the middle of the frame rather than on your face.
Can I upload a rectangular photo to LinkedIn?
Yes, LinkedIn accepts rectangular uploads, but it forces a square crop before saving, and the default crop is rarely where you want it. A wide photo becomes a square centred on the middle, which may be your shoulder rather than your face. Crop the photo to a square yourself, compose it for the circle, and upload the square instead. The result is far more predictable, and you keep control of what gets cut.
How do I make my LinkedIn photo less blurry?
Find the largest original file you can, ideally straight from the camera, and export it at 1,000 by 1,000 pixels as a high quality JPG. Avoid screenshots, messaging app copies, and images downloaded from social media, because each round of compression removes detail that LinkedIn compression then removes again. If no larger original exists, take a fresh photo in daylight from about a metre away, framed from the chest up with space above the head.
Does LinkedIn compress profile photos?
Yes, LinkedIn re-encodes every upload, which softens detail and can flatten colours. A file near the 400 pixel minimum has almost no detail left after that pass, which is why a 1,000 pixel export looks so much better. Export in the sRGB colour space, keep the file under 1 MB, and avoid HDR files, since LinkedIn strips HDR data on upload and the result can look dull.
Why does my photo look different on mobile and desktop?
LinkedIn renders the same square at different sizes and crops across feed, search, messages, and profile views, and the mobile app and desktop site scale the image differently. A photo that looks centred on one can sit off centre on the other. Upload and adjust the crop on desktop, where the preview is larger, then check the result on your phone. Keep the face dead centre with generous margins, and the photo will hold up on both. Anyone trying to fix cropped LinkedIn profile picture differences between devices should start with that desktop preview, since it is the step most people skip.
Should I use an AI headshot instead of a real photo?
An AI headshot can work when no good real photo exists, and the better tools produce clean, professional results. The risk is that it looks slightly unlike you, which matters when the photo is meant to help people recognise you in person. A real photo taken in daylight near a window, framed from the chest up, is still the safer choice for most people, and it takes less time than generating and checking an AI version. If you do use an AI headshot, pick a tool that starts from your real photos, check the result at small size, and make sure it still looks like you.
The Final Word
A cropped LinkedIn photo is a framing problem, not a platform problem, and it is fixed by composing for the circle before you upload. Export a square at 1,000 by 1,000 pixels, keep your face in the centre with space above the head and below the chin, preview the circle, upload on desktop, and check the result on your phone. That sequence takes about fifteen minutes and it works on almost every photo.
If the original is too small or too old, take a fresh one in daylight instead of fighting the file. Your profile photo is the smallest image on the page and the most seen one you own, so it deserves those fifteen minutes. Fix cropped LinkedIn profile picture trouble once, properly, and the next upload will take five.