
The same photo looks sharp in your gallery and soft on your Facebook profile. That gap is not your camera and it is not your eyes. It is the journey the photo takes between your phone and the profile circle, and every step on that journey can steal sharpness. To fix blurry facebook profile picture problems you have to trace that journey, since the cause decides the cure. Upload a small image and Facebook stretches it. Upload a huge image and Facebook crushes it. Upload a screenshot of a screenshot and there is nothing left to save. The good news is that the damage has only five common causes, and each one has a fix that takes minutes.
This guide works through all five, in the order you should check them. First you will diagnose which cause is yours, using a short checklist that takes two minutes. Then you will fix the source file, upload it at the right size, turn on the high quality upload setting, and check the result on both a phone and a computer.
The fix that matters most is the upload size, since Facebook displays a profile photo at about 170 by 170 pixels on desktop and about 128 by 128 pixels on mobile, yet the photo you upload should be far larger than either number. Upload a 170 pixel image and Facebook has nothing to work with. Upload a 2,048 pixel image and it has plenty.
The numbers in this guide come from Facebook own size guidance as reported by photo and social media guides in 2026. Where guides disagree, this guide says so and gives the safer number. Nothing here needs paid software. Every fix uses a free tool or a setting already on your phone.
Fix Blurry Facebook Profile Picture: The Five Causes at a Glance
Before you change anything, learn which cause is yours, because the fix for a small file does nothing for a bad crop, and the fix for a bad crop does nothing for a double compressed file. The five causes are a file that is too small, a file that is too compressed, a wrong shape or crop, the wrong file format, and an upload that went through a low quality path. Most blurry profile photos have two of these at once, which is why a single fix sometimes seems to fail. Work the checklist, fix every cause you find, and the result will be sharp.
The table below summarises the five causes, how to spot each one, and the fix that follows. The sections after it explain each cause in full, with the exact steps.
| Cause | How to spot it | Fix |
|---|---|---|
| File too small | Photo looks soft everywhere, edges look smeared | Re upload at 2,048 by 2,048 pixels |
| Double compression | Photo was already a small JPEG before upload | Export once at high quality, then upload |
| Wrong crop or shape | Face or logo cut off, corners missing | Use a square image, keep the subject centred |
| Wrong format | Text or logo looks fuzzy, colours look banded | Use PNG for graphics, JPEG for photos |
| Low quality upload path | Photo sent through chat or a screenshot first | Upload the original file direct from the gallery |
A word of warning before the detail. No tool can put back detail that was never in the file. If the only copy of your photo is a 200 pixel thumbnail saved from a chat message, upscaling it will make a larger blurry photo, not a sharp one. The fixes in this guide work when a good original exists somewhere, on your phone, in your camera roll, or in the app that created the image.
Why Facebook Makes Photos Blurry
Facebook compresses every photo you upload. It has to, since it stores billions of images and serves them to phones on slow connections around the world. Compression shrinks the file by throwing away fine detail, and the more detail it throws away, the softer the image looks. Facebook also resizes your photo to fit its layouts. A profile photo is stored at a high resolution and then displayed small, at about 170 pixels on desktop and 128 pixels on mobile, with larger versions shown when someone clicks through to your profile. That display size is small, which is why a slightly soft photo can look acceptable in a comment and terrible when viewed full size.
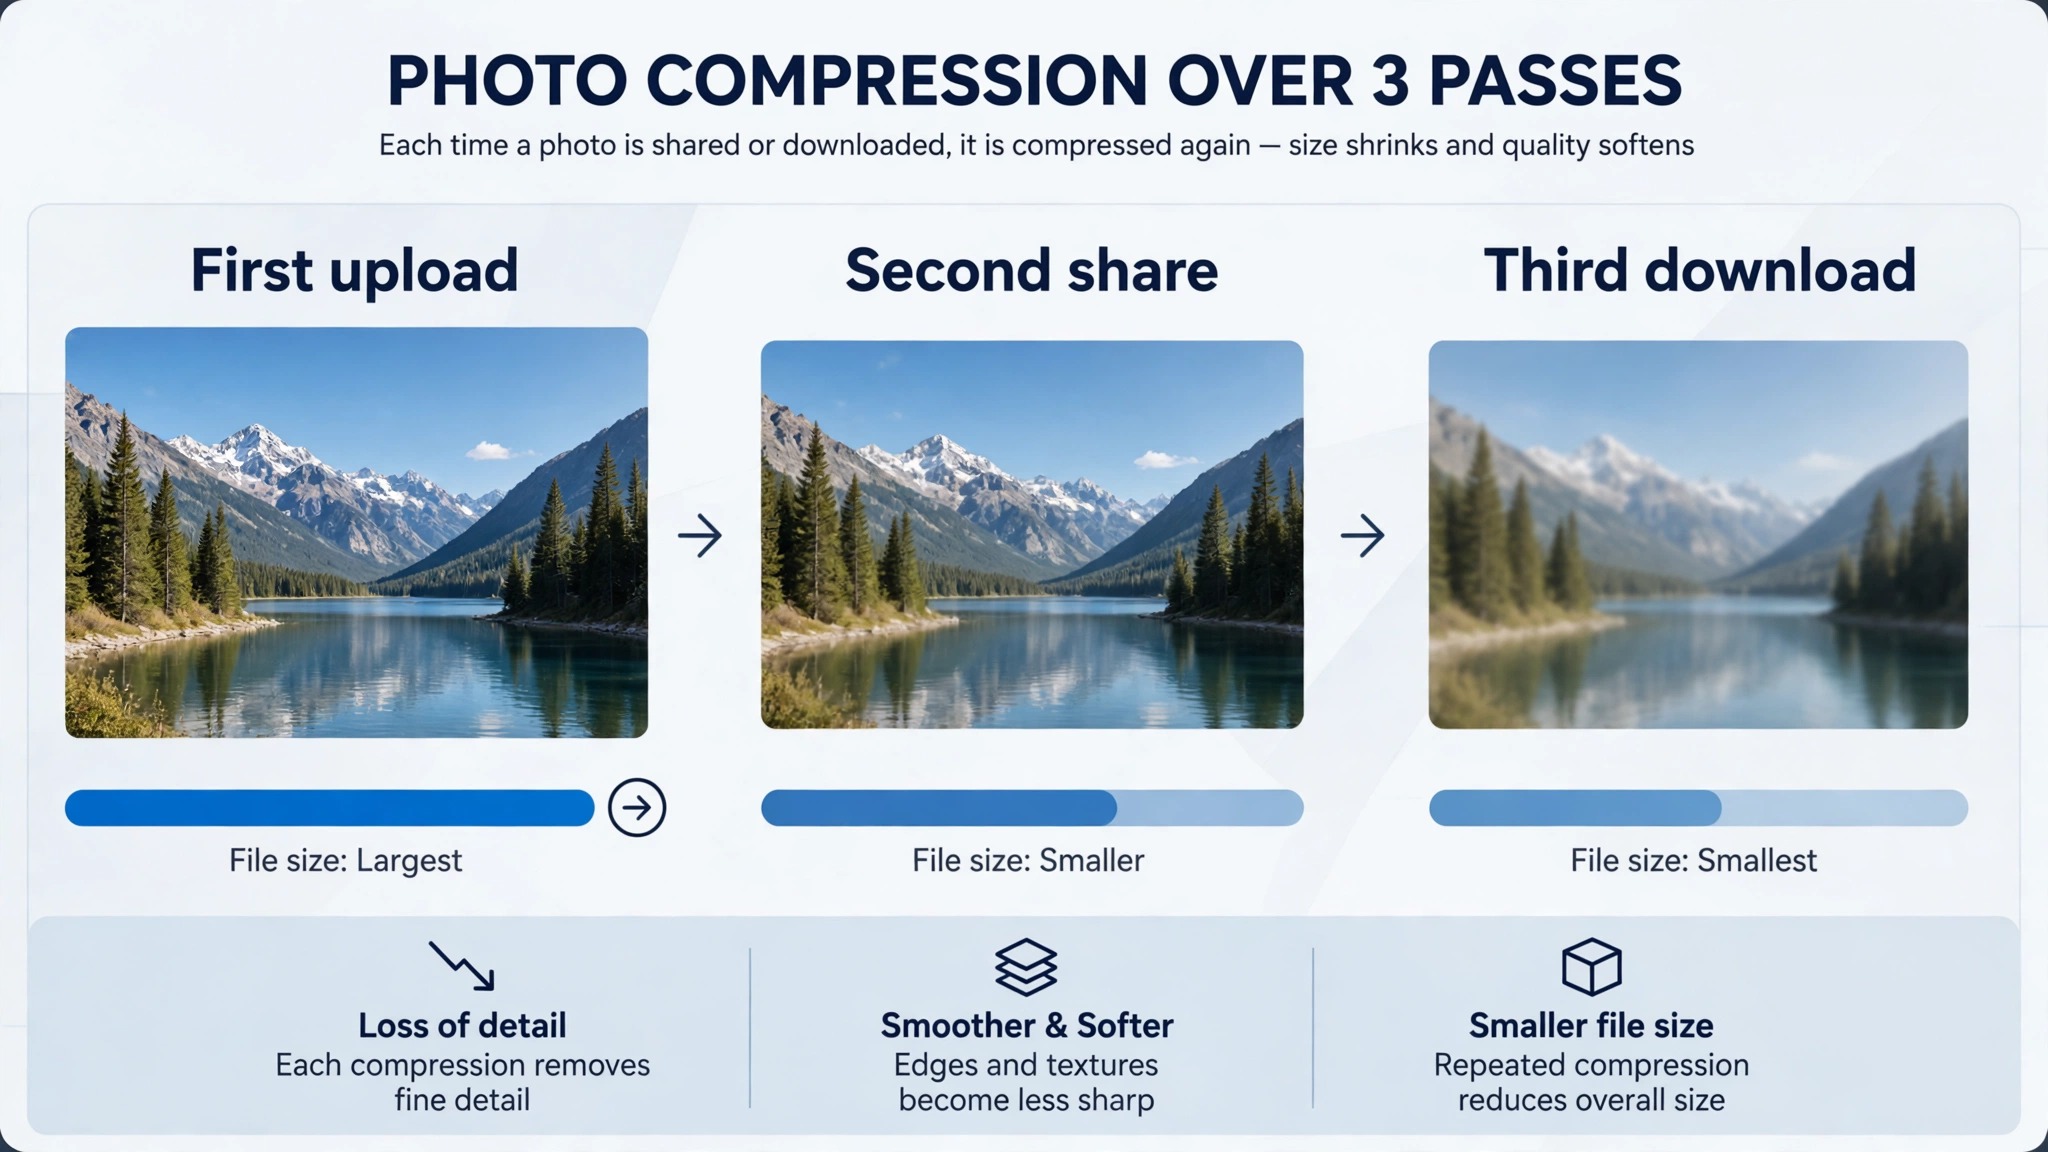
The compression is heaviest when the file you upload is already compressed. Imagine a photo saved as a low quality JPEG, then sent through a chat app that compresses it again, then uploaded to Facebook for a third pass. Each pass throws away more detail, and the third pass has little left to work with. This is the double compression problem, and it is the most common cause of blurry profile photos after small files.
Facebook also caps the size it will store. Guides report that photos are typically stored at up to about 2,048 pixels on the long edge, and that uploading at 2,048 pixels gives Facebook the best version to compress. Uploading a 4,000 pixel photo does not help, since Facebook will shrink it anyway. Uploading a 500 pixel photo hurts, since Facebook must stretch it to fill the display sizes.
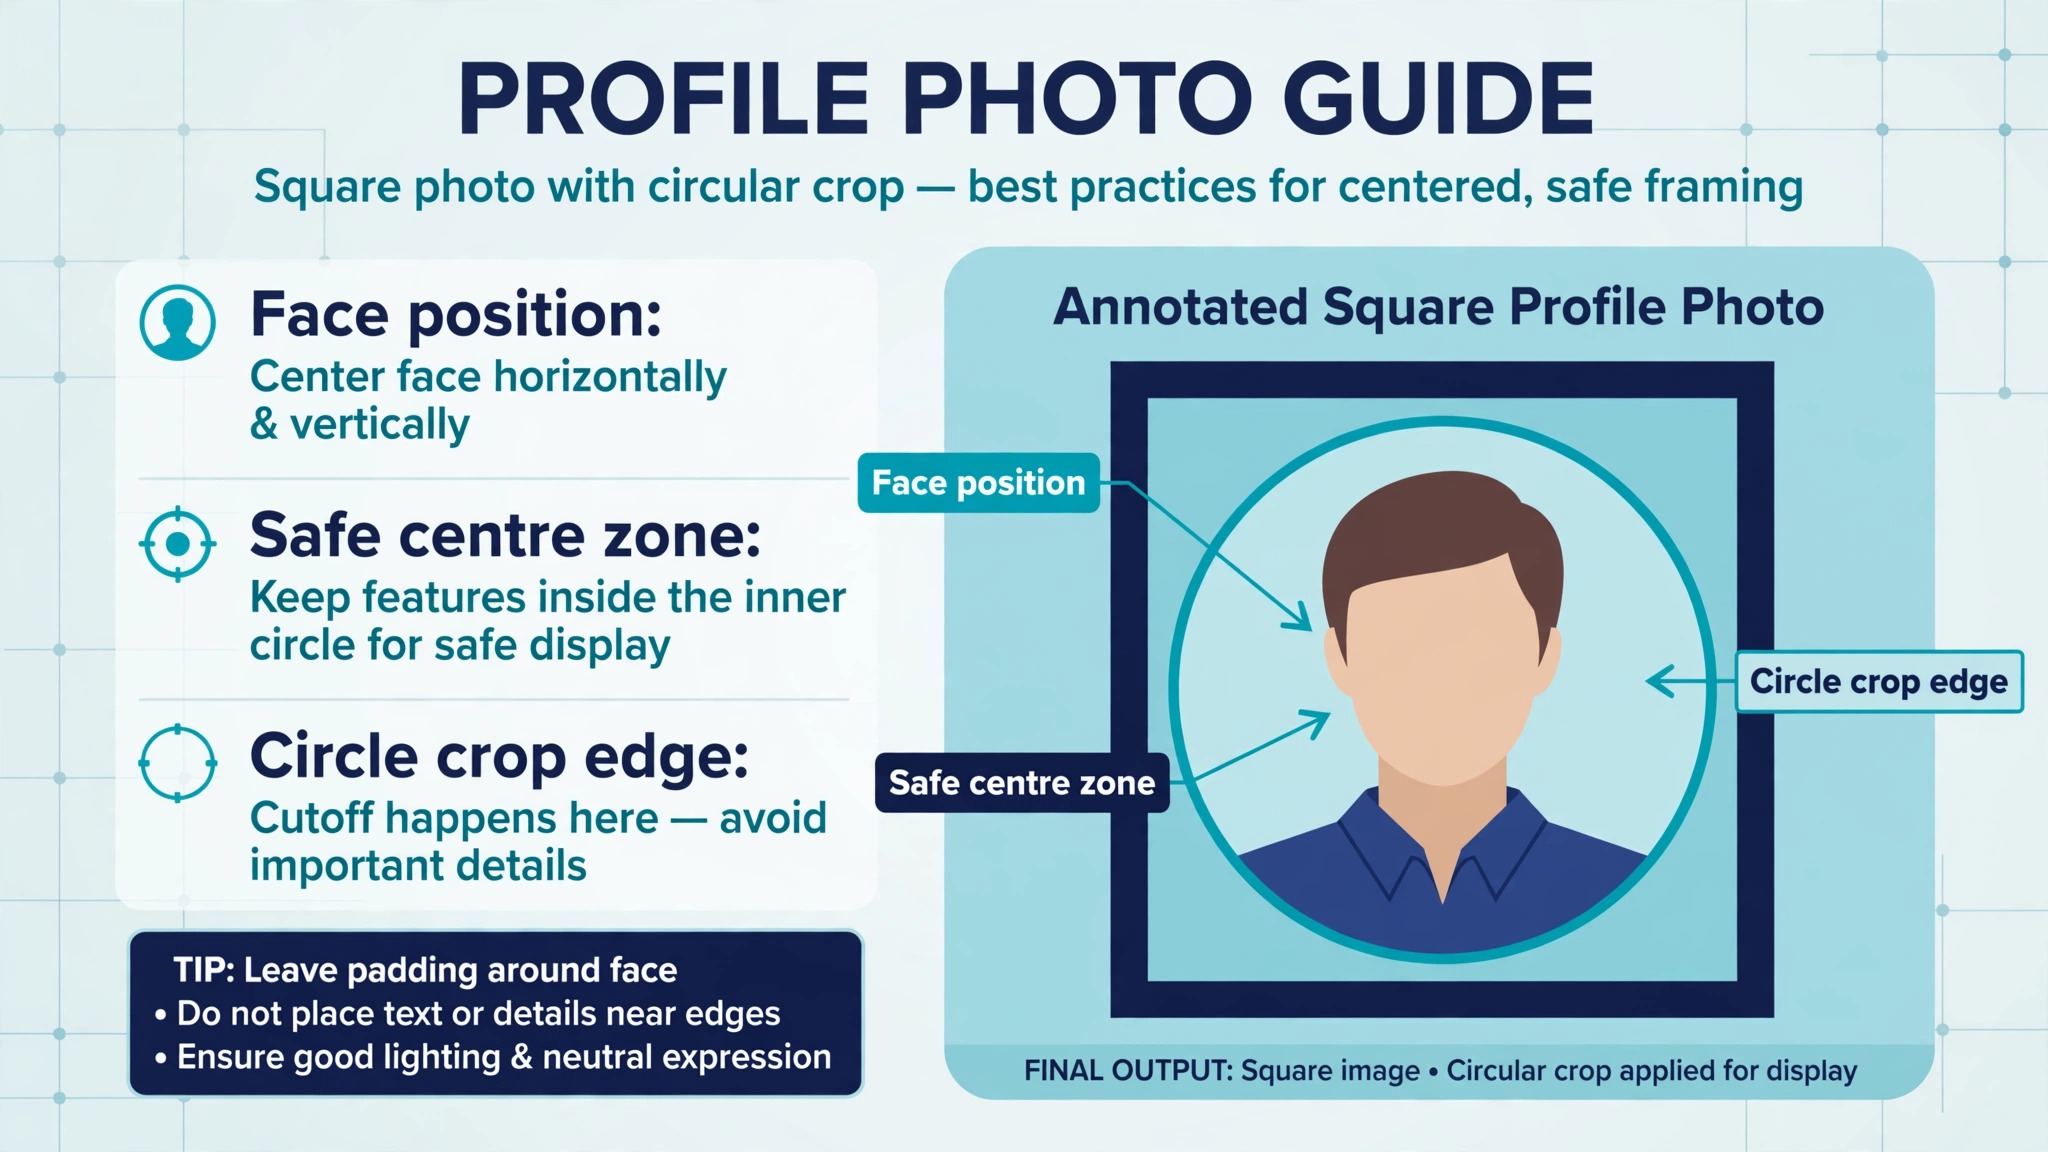
One more piece of the picture is the circle crop. Facebook displays profile photos as a circle, so the corners of your square image are cut off. A face near the edge, a logo near a corner, or text that runs to the edge will be clipped. The fix is to keep the important parts inside the centre of the square, with clear space around them, and to preview the circle before you save.
Diagnose Your Photo in Two Minutes
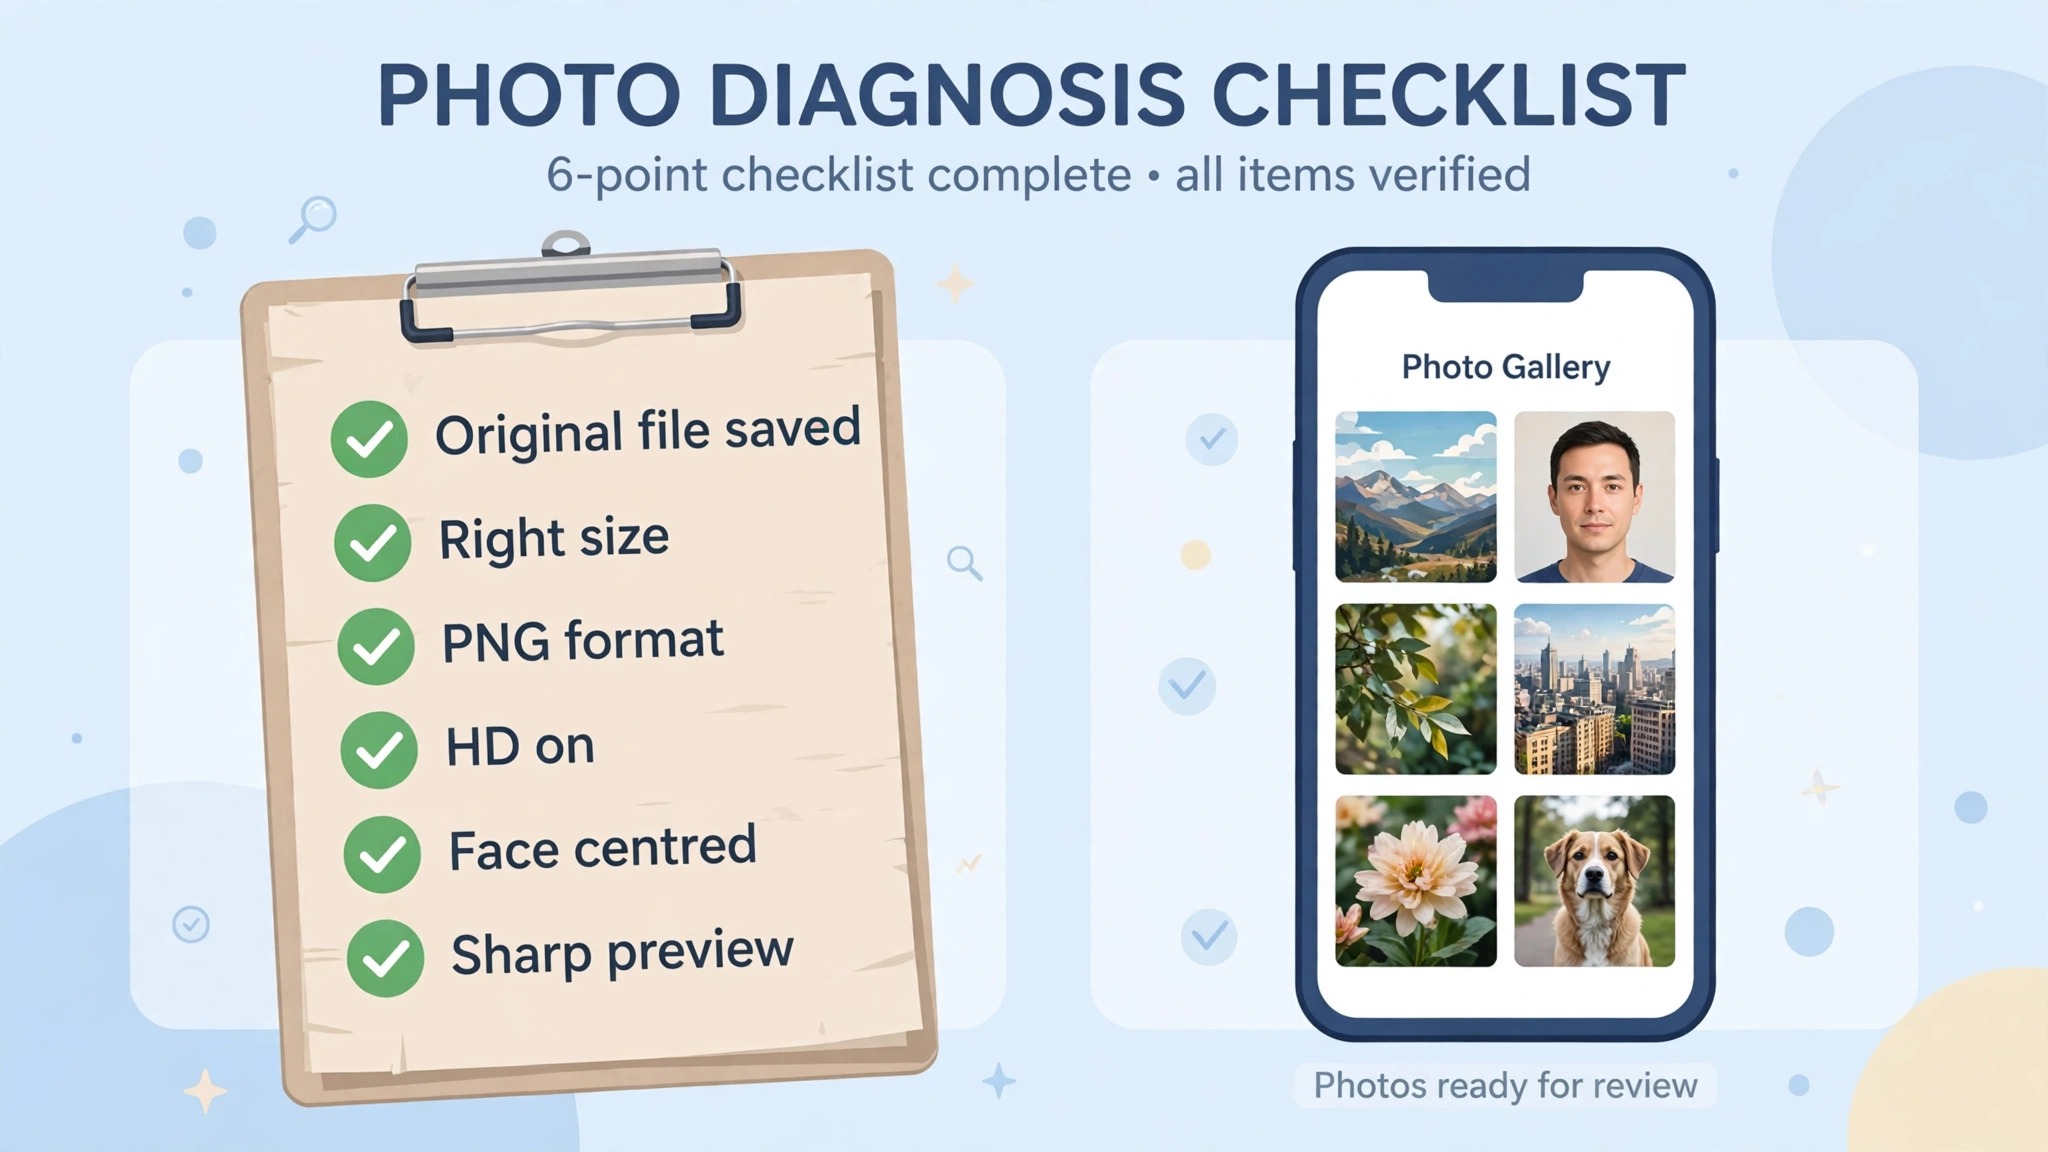
Run this checklist before you change anything. Each item takes seconds, and the answers tell you which of the five fixes to apply. This checklist is the fastest way to fix blurry facebook profile picture problems without guessing, so answer honestly, since guessing wastes the next half hour.
- Open the original photo on your phone and pinch to zoom in on a face or a line of text. If it looks sharp zoomed in, the original is good and the problem is the upload. If it looks soft zoomed in, the original is the problem.
- Check the file size of the original. On most phones, the photo details screen shows the dimensions. If the longest side is under 800 pixels, the file is too small. If it is 2,048 pixels or more, the size is fine.
- Ask where the file came from. If it arrived through a chat message, was downloaded from a social app, or is a screenshot of another photo, it has already been compressed at least once. Go back to the original camera file or the app that created it.
- Look at the shape. If the photo is a wide rectangle with the face near one edge, the circle crop is cutting into your subject. You need a square crop with the subject centred.
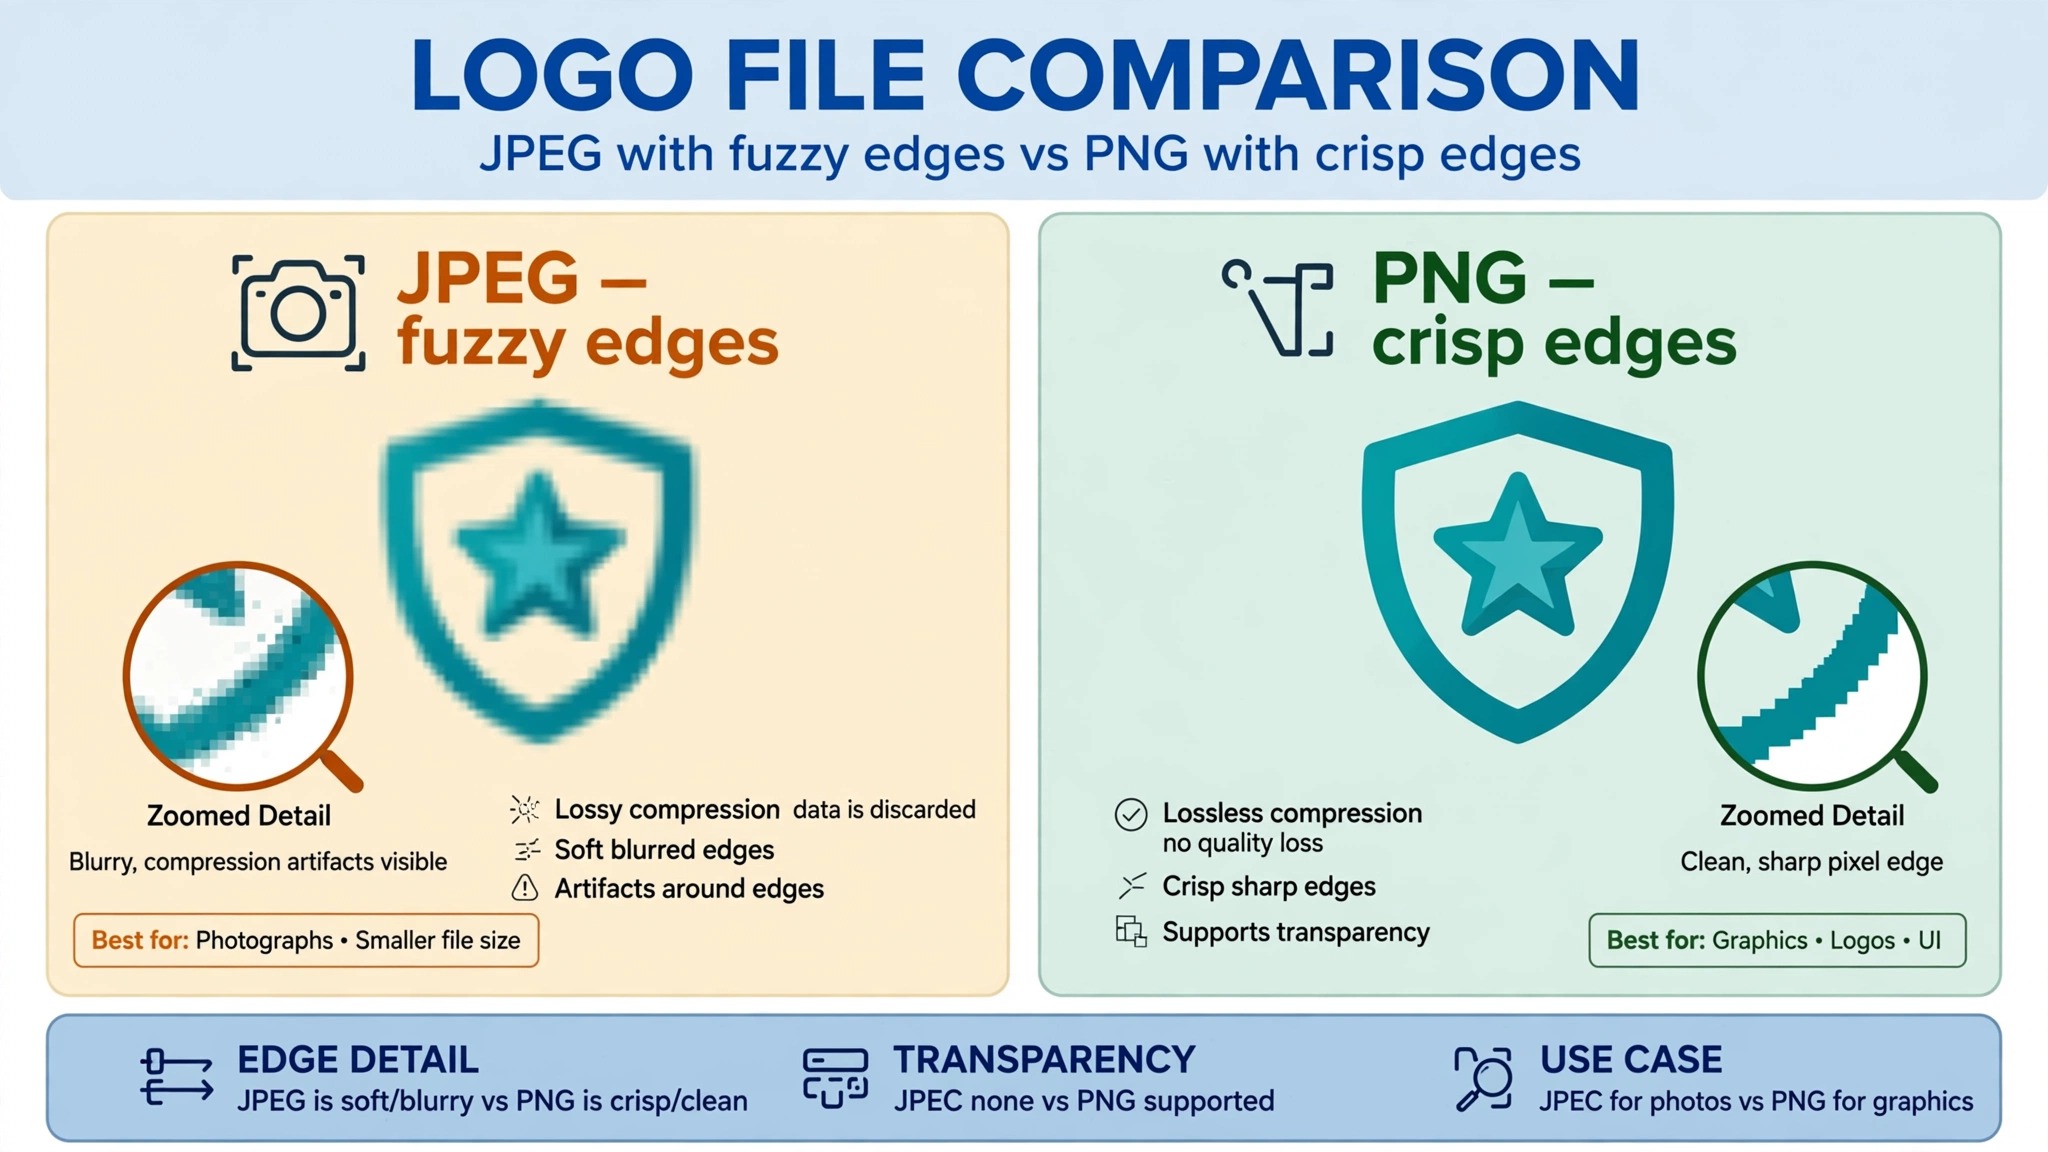
- Look at what the image contains. If it is a logo, a graphic or text, and it looks fuzzy while photos look fine, the format is the problem. Graphics need PNG, while photos are fine as JPEG.
- Check how you uploaded it last time. If you uploaded from a chat attachment, from a screenshot, or from a browser with a weak connection, the upload path may have downgraded the file. Upload direct from the gallery next time.
If you found one cause, fix that one first and re upload. If you found two or three, fix them all before you re upload, since a half fixed photo will still look soft and you will not know which fix failed. The next five sections walk through each fix in order, starting with the one that matters most.
The Five Fixes, One Cause at a Time
Work through these fixes in order, and re upload only after you have applied every fix your diagnosis found. Each fix is independent, so skip the ones that do not apply to your photo.
Fix 1. Upload a Larger File
A file that is too small is the most common cause, and the fix is the simplest. Facebook displays your profile photo small, but it stores a larger version, and it needs that larger version to produce a sharp display. Guides disagree on the exact minimum, with some giving 320 by 320 pixels and others giving 800 by 800, but they agree on the ideal. Upload at 2,048 by 2,048 pixels and you give Facebook the best version it will store. That single change fixes most blurry profile photos outright.
To resize, open the photo in a free editor such as Photopea, Canva or the photo app on your phone, and export a square copy at 2,048 by 2,048 pixels. Do not upscale a tiny file and expect a miracle. Upscaling a 200 pixel thumbnail to 2,048 pixels makes a large blurry image, since the detail was never there. If your original is under 800 pixels on the long side, the honest fix is a new photo, not a resize.
Fix 2. Stop the Double Compression
Double compression happens when a photo is saved as a low quality JPEG, then compressed again by a chat app, then compressed a third time by Facebook. Each pass throws away detail, and the result looks soft even when the original was sharp. The fix is to break the chain. Go back to the original file on the phone or camera that took the photo, and upload that file direct to Facebook without passing it through any other app first.
When you export, save as JPEG at 80 to 90 percent quality for a photo, which keeps the file well under the 15 megabyte per photo limit Facebook applies to uploads while preserving visible detail. Avoid saving the same JPEG twice, since every save re compresses the file. If the photo reached you through WhatsApp, Messenger or email, ask the sender for the original file, since the version in the chat is already compressed and will never look sharp as a profile photo.
Fix 3. Fix the Crop and the Circle
Facebook shows profile photos as a circle, and the circle cuts off the corners of your square image. A face near the edge of the frame, a logo near a corner, or text that runs to the edge will be clipped. The fix is to crop to a square first, with the subject in the centre and clear space around it, and then preview the circle before you save. Facebook shows a preview during upload, and you can drag to reposition the photo inside the circle. Use that preview every time.
For a personal photo, keep the face in the middle third of the square, with the top of the head well inside the frame. For a business logo, use a square version of the logo with generous padding, since a logo that fills the square will lose its edges to the circle. Avoid text near the edges entirely, since text becomes unreadable when it is small and clipped.
Fix 4. Use the Right File Format
Format matters more for graphics than for photos. JPEG is the right format for a real photograph, since it handles smooth tones and gradients well at a small file size. PNG is the right format for a logo, a graphic, or any image with text and sharp lines, since PNG preserves crisp edges without the smearing that JPEG adds. Upload a logo as a JPEG and the edges will look fuzzy. Upload a photo as a PNG and the file will be large for no benefit, though it will still look fine.
Facebook accepts JPEG and PNG for profile photos, and some guides report a file size limit near 4 megabytes for profile photos specifically, against the 15 megabyte limit for general photo uploads. Keep your file under 4 megabytes to be safe. A 2,048 by 2,048 JPEG at 85 percent quality usually lands well under that limit.
Fix 5. Upload Through the High Quality Path
The path your photo takes to Facebook matters as much as the file itself. Uploading from a screenshot, from a chat attachment, or from a browser tab that saved a preview copy all deliver a downgraded file. Upload direct from the gallery or the camera roll in the Facebook app, using the original file.
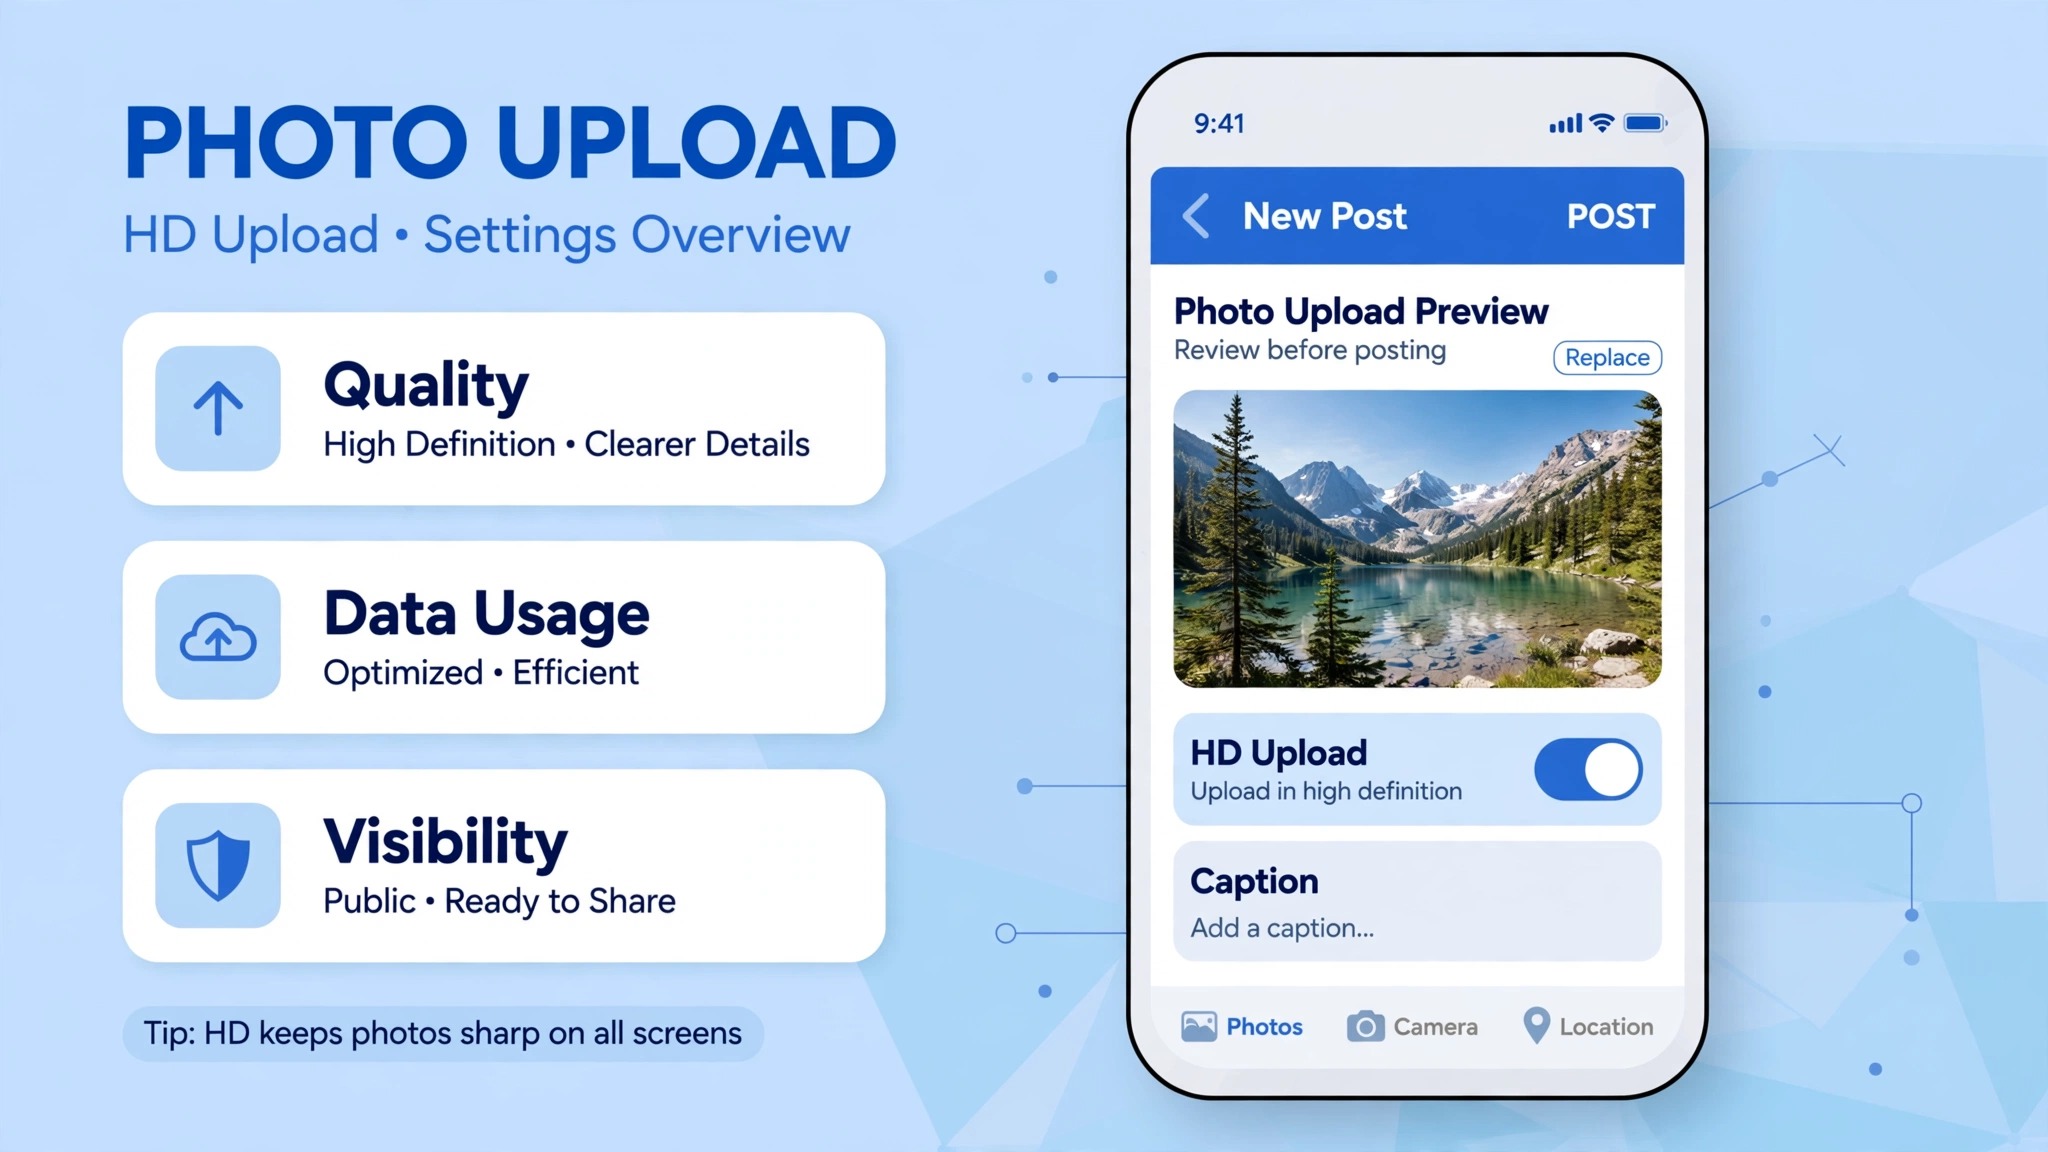
On the Facebook app, check the media settings first. Go to Settings and Privacy, then Settings, then Media, and turn on Upload photos in HD where the option appears. The exact menu names change with app updates, and some versions of the app no longer show the toggle, but when it is present, turning it on stops the app from shrinking your photo before it reaches Facebook.
Connection matters too. Upload on a stable WiFi connection rather than a weak mobile signal, since a stalled upload can be retried at a lower quality by the app. If the upload fails or the photo looks wrong, delete the profile photo and upload again from the original file rather than re uploading the blurry version that Facebook already stored.
Each re upload of the same damaged file only repeats the damage. The direct path, original file, HD setting on, stable connection, is the combination that gives Facebook the best material to work with.
The Right Size, Format and File for Every Case
The numbers in this section are the reference to keep. Facebook own guidance and the guides that track it give slightly different display sizes, since Facebook changes its layouts over time. The display sizes below are the ones reported most consistently in 2026, and the upload sizes are the safe targets that satisfy all of them.
| Image type | Display size | Upload at | Format |
|---|---|---|---|
| Profile photo, desktop | About 170 by 170 pixels | 2,048 by 2,048 pixels | JPEG for photos, PNG for graphics |
| Profile photo, mobile | About 128 by 128 pixels | 2,048 by 2,048 pixels | JPEG for photos, PNG for graphics |
| Profile photo, clicked view | Larger, up to stored size | 2,048 by 2,048 pixels | JPEG for photos, PNG for graphics |
| Cover photo | 851 by 315 pixels | 2,048 pixels wide | JPEG or PNG |
| Single photo post | 1,200 by 630 pixels minimum | 2,048 pixels on the long edge | JPEG at 80 to 90 percent quality |
The profile photo row is the one that surprises people. The display is tiny, yet the upload should be large, and that gap is the key to fix blurry facebook profile picture quality for good. Facebook stores the large version and shrinks it for display, and a shrink from a clean large file looks far sharper than a stretch from a small one. A 320 by 320 upload, which some guides list as the recommended size, will look acceptable in the small circle but soft when a visitor clicks through to the larger view. A 2,048 by 2,048 upload looks sharp in both places, and it costs you nothing extra. There is no reason to upload small.
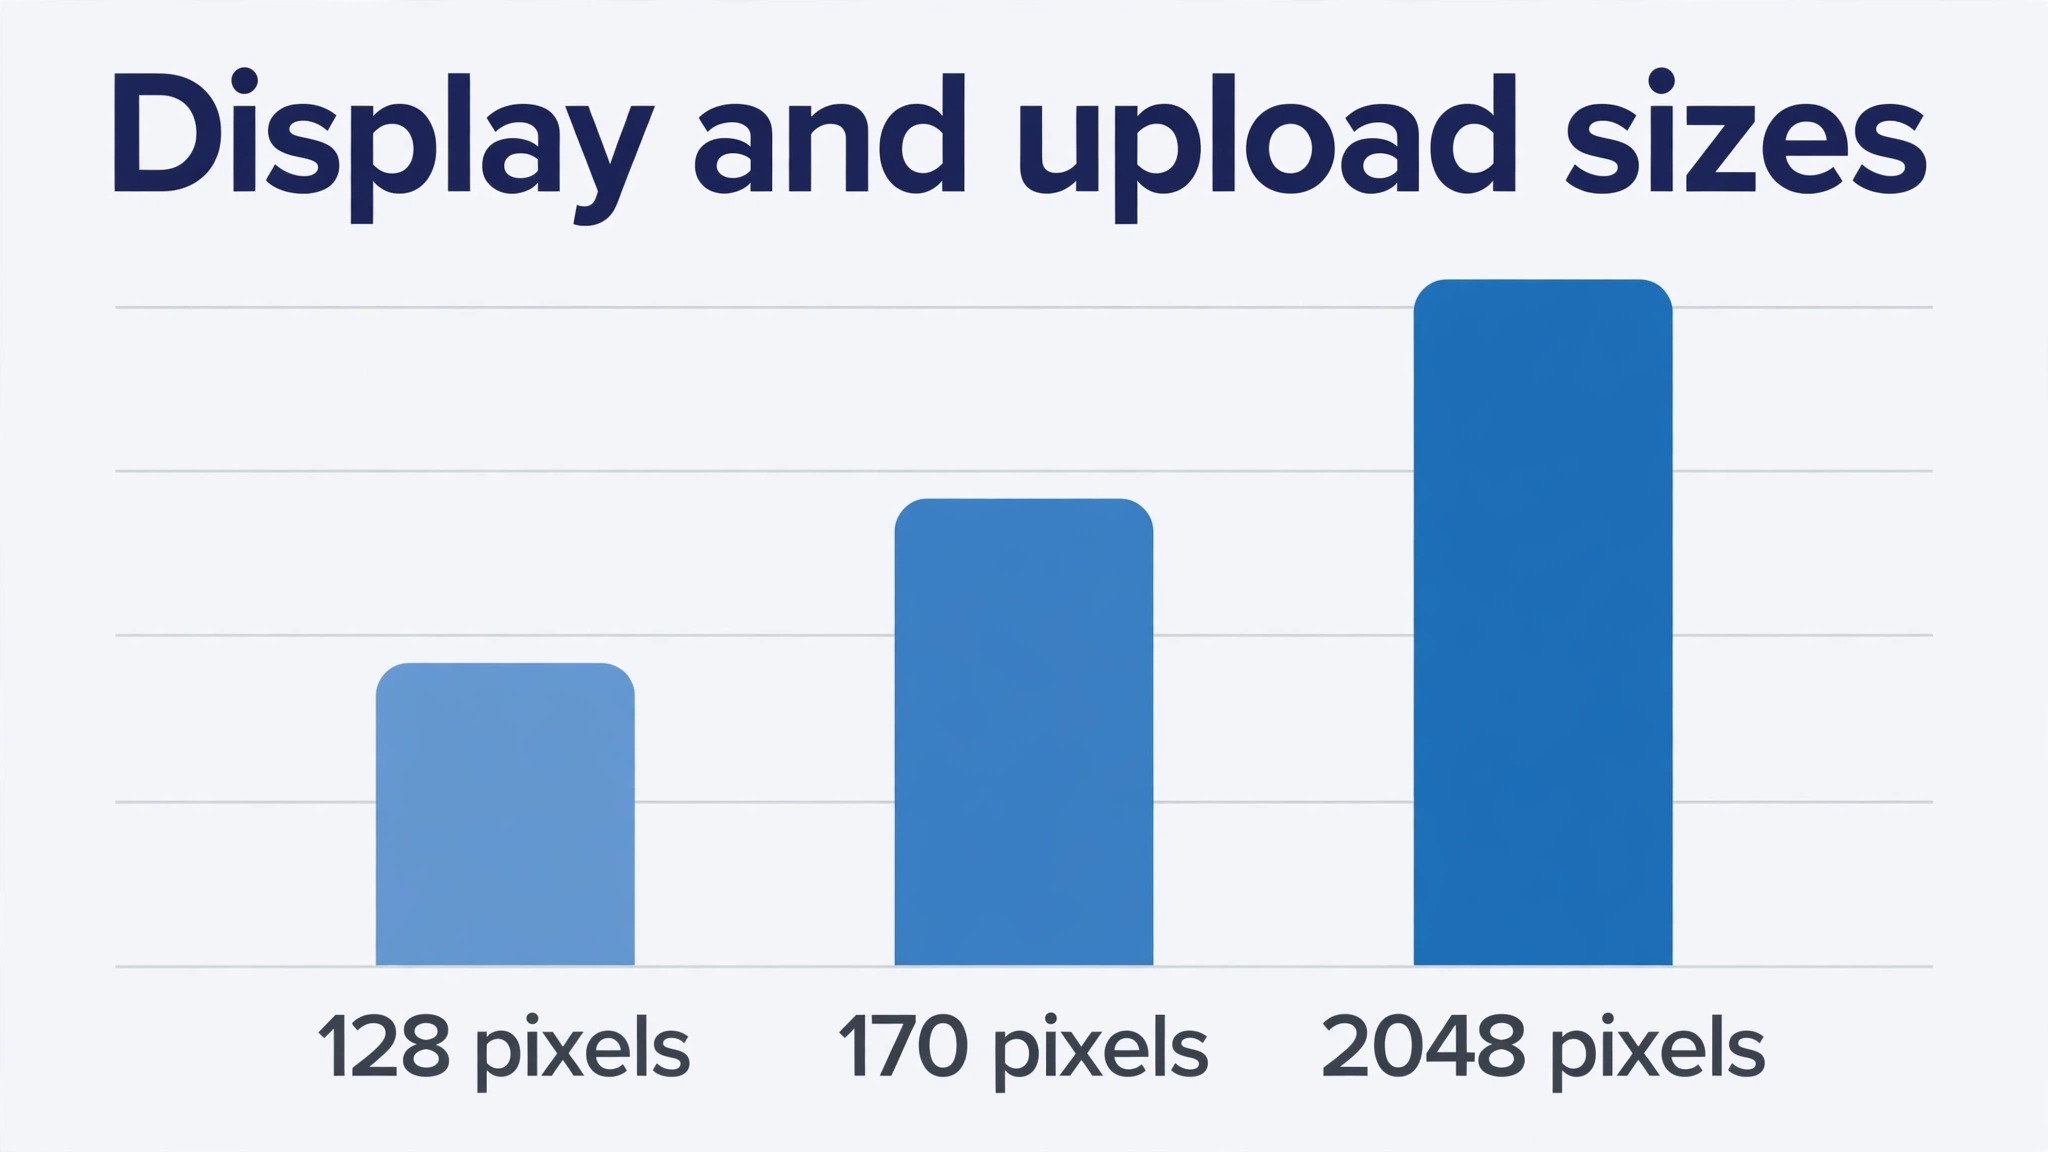
The cover photo row is included because many people fix the profile photo and then notice the cover looks soft too. A cover displays at 851 by 315 pixels on desktop, and uploading at 2,048 pixels wide gives the same advantage as the profile photo. Keep text out of the lower part of a cover photo, since the profile circle and the page name overlap it on some layouts. The same rule about one clean export applies. Export once at high quality, upload direct, and do not re save the file through other apps first.
File size deserves a final note. Facebook applies a 15 megabyte limit per photo for general uploads, and guides report a limit near 4 megabytes for profile photos specifically. A 2,048 by 2,048 JPEG at 85 percent quality is usually 1 to 3 megabytes, which fits both limits comfortably. If your file is larger, lower the JPEG quality to 80 percent rather than shrinking the dimensions, since quality reduction at the same size preserves more visible detail than a smaller image stretched back up.
Re Upload Your Photo Step by Step
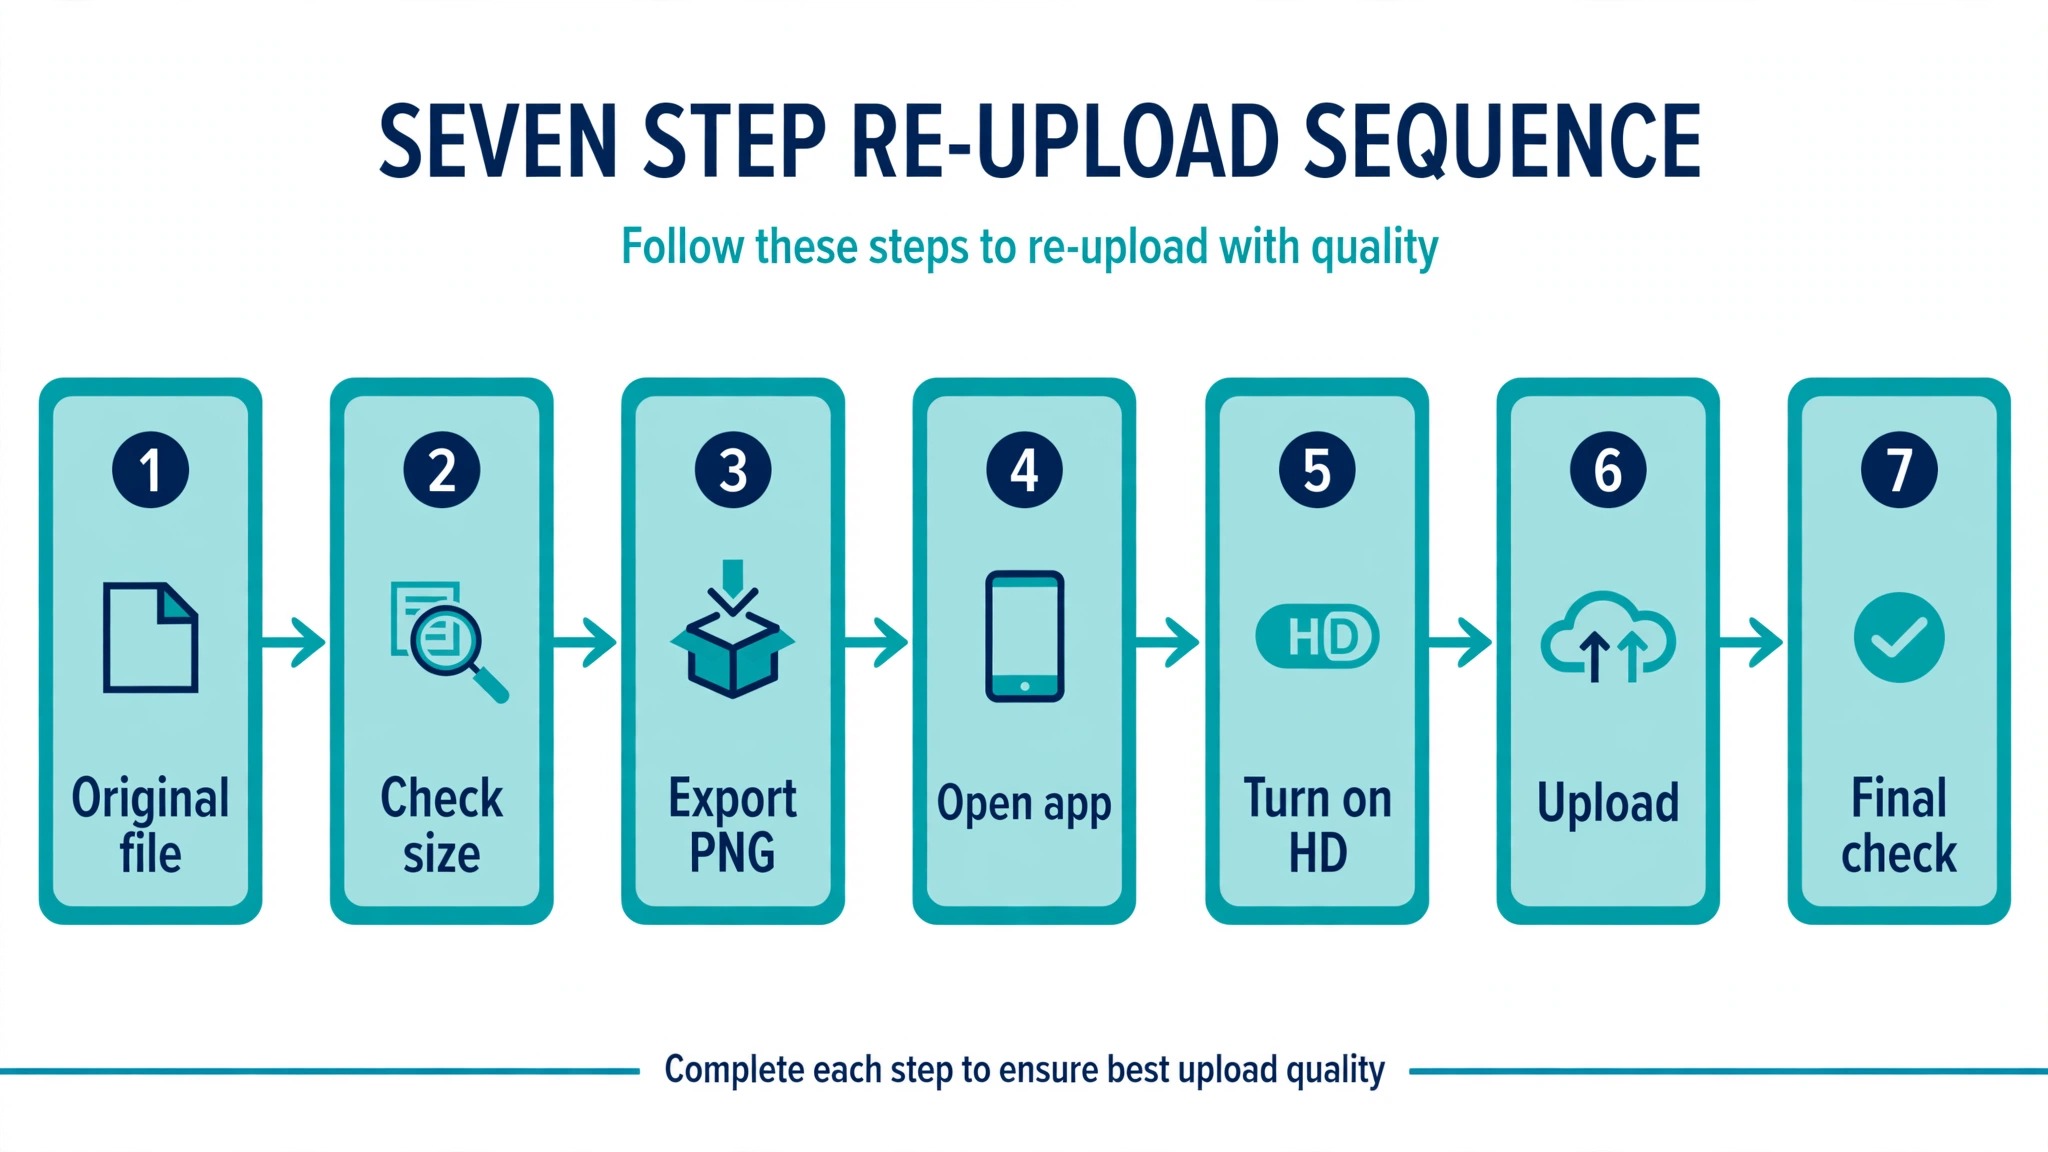
This is the exact sequence to follow once the fixes are applied. Do not skip a step, since each one prevents a specific repeat of the problem. The whole sequence takes about ten minutes, and most of that time is the export.
- Find the original photo on the phone or camera that took it, not the copy in a chat or a screenshot. Check the dimensions and confirm the longest side is at least 2,048 pixels, or take a new photo if it is not.
- Open the original in a free editor such as Photopea or Canva, crop it to a square, centre the face or logo, and leave clear space around the subject for the circle crop.
- Export once as JPEG at 80 to 90 percent quality for a photo, or as PNG for a logo or graphic. Save the file to the gallery, and check the file size is under 4 megabytes.
- Open the Facebook app, go to Settings and Privacy, then Settings, then Media, and turn on Upload photos in HD if the option is shown on your version of the app.
- Go to your profile, tap the profile photo, choose Upload Photo, and select the exported file direct from the gallery. Do not select a copy from a chat or a recent screenshot.
- In the preview, drag to reposition the photo inside the circle, and check that the face or logo sits in the centre with nothing important near the edges. Save the photo.
- Wait a minute, then view your profile on a second device, ideally a computer as well as a phone. If the photo looks sharp on both, the fix worked. If it still looks soft on one of them, check the troubleshooting notes in the next section before you upload again.
If the photo still looks blurry after this sequence, the problem is almost always the original file. Open the exported file on your phone and zoom in. If it looks soft there, the export or the original is at fault, and no upload setting will save it. Go back to step one with a better original, or take a new photo in good daylight with the rear camera, which produces a larger and sharper file than the front camera on most phones. To fix blurry facebook profile picture results that survive a correct re upload, the answer is nearly always a better source file, not a different setting.
Check the Result on Phone and Computer
A profile photo can look sharp on your phone and soft on a computer, or the reverse, because the two screens show different sizes. The phone shows the photo at about 128 pixels, where small flaws hide. The computer shows it at about 170 pixels, and the clicked view shows it larger still, where the same flaws become visible. Check both screens before you declare the fix done. Ask a friend to open your profile on their phone as well, since Facebook sometimes shows you a cached version of the old photo on your own device while visitors see the new one.
Cache is the other reason a fix can seem to fail. After you change a profile photo, your own app may keep showing the old blurry version for hours. Close the app fully and reopen it, or view the profile in a browser while logged out, to see what visitors see. If the new photo looks sharp in the browser and soft in the app, wait a day before you upload again.
Lighting and subject distance also affect the result. A photo taken in dim light with a front camera will look soft even at 2,048 pixels, since the sensor adds noise that compression then smears. A new photo taken outdoors in daylight, with the rear camera, will beat any amount of editing on a dim indoor selfie. If you are fixing a business logo rather than a face, rebuild the logo at 2,048 by 2,048 pixels in the editor rather than stretching the small version from your website.
Tools That Can Help, and One That Cannot
Free tools cover every fix in this guide. Photopea is a free browser based editor that crops to exact pixel sizes and exports JPEG and PNG at a quality you choose. Canva offers free photo editing and square templates. The photo app built into your phone can crop to square and adjust brightness, which is enough when the original is already good. GIMP is a free desktop editor for larger jobs, such as rebuilding a logo at the right size.
AI upscalers deserve an honest note. Tools such as Topaz Photo AI and the free Upscayl can enlarge a small photo and sharpen its edges, and they sometimes rescue a photo that would otherwise be unusable. They cannot invent detail that was never there, and they can add a waxy or artificial look to faces when pushed too far. Use an upscaler only when no better original exists, and compare the result with the original at full size before you upload it.
One tool cannot help at all, and that is a second upload of the same blurry file. Re uploading the photo that Facebook already compressed does not restore detail, since Facebook stores the compressed version. The same applies to downloading your current profile photo from Facebook and uploading it again. That file is the compressed result, not the original, and uploading it again only compresses it further. Always go back to the source file, and if the source file is gone, take a new photo or rebuild the graphic.
Mistakes That Keep the Photo Blurry
The first mistake is fixing only one cause when two are present. A photo that is both small and double compressed will still look soft after you fix the size alone, and you will conclude the size fix failed. It did not fail. It fixed half the problem. Diagnose fully, fix everything you find, and re upload once, since a half finished attempt to fix blurry facebook profile picture quality will always disappoint. The second mistake is upscaling a tiny file and expecting a sharp result. If the original is under 800 pixels, take a new photo.
The third mistake is ignoring the circle preview. A photo that looks fine as a square can lose a face or a logo to the circle crop, and the result looks wrong even when it is technically sharp. Always drag and reposition in the preview, and keep the subject centred with space around it. The fourth mistake is re uploading the blurry version Facebook already stored. Downloading your current profile photo and uploading it again only compresses it further. Go back to the source file every time.
Frequently Asked Questions
Why is my Facebook profile picture blurry when the original looks sharp?
Facebook compresses and resizes every photo you upload, and the damage is worst when the file you upload is already small or already compressed. Upload a square original at 2,048 by 2,048 pixels, saved once at high quality, direct from the gallery. That gives Facebook the best material to compress, and the result is usually sharp.
What size should I upload my Facebook profile picture at?
Upload at 2,048 by 2,048 pixels. Facebook displays the photo at about 170 by 170 pixels on desktop and about 128 by 128 on mobile, but it stores the larger version, and a shrink from a clean large file looks far sharper than a stretch from a small one. A 320 by 320 upload looks acceptable in the small circle but soft in the larger clicked view.
Should I use JPEG or PNG for my Facebook profile picture?
Use JPEG for a real photograph and PNG for a logo, a graphic or any image with text and sharp lines. JPEG handles smooth photographic tones well at a small file size. PNG preserves crisp edges without the smearing JPEG adds to graphics. Upload a logo as JPEG and the edges will look fuzzy.
How do I turn on HD uploads on Facebook?
In the Facebook app, go to Settings and Privacy, then Settings, then Media, and turn on Upload photos in HD if the option appears. The exact menu names change with app updates, and some versions no longer show the toggle. When it is present, turning it on stops the app from shrinking your photo before it reaches Facebook. Upload on stable WiFi as well.
Can I fix a blurry photo that is already on my profile?
Only by replacing it with a better file. Downloading the blurry version from Facebook and uploading it again will not help, since that file is the compressed result. Go back to the original photo on your phone or camera, export it at 2,048 by 2,048 pixels, and upload it direct from the gallery. That is the honest way to fix blurry facebook profile picture damage when the original still exists. If no good original exists, take a new photo in daylight with the rear camera.
Why does my logo look blurry as a profile picture but fine on my website?
A website logo is usually a wide rectangle, and squeezing it into a square circle crop stretches or clips it. Rebuild the logo as a square version with generous padding, export it as a PNG at 2,048 by 2,048 pixels, and keep text away from the edges. A logo designed for a header will not survive as a profile photo without that rework.
Does Facebook still show my old blurry photo after I change it?
Sometimes, because your own app may keep a cached copy of the old photo for hours. Close the app fully and reopen it, or view your profile in a browser while logged out, to see what visitors see. If the new photo looks sharp in the browser and soft in the app, wait a day before you upload again, since repeated uploads only create more cached versions.
Sharp Again in Ten Minutes
A blurry profile photo is almost never a broken camera. It is a small file, a double compressed file, a bad crop, a wrong format, or a low quality upload path, and usually two of those at once. Diagnose first, fix every cause you find, upload a square 2,048 pixel file direct from the gallery, and check the result on a phone and a computer. Anyone can fix blurry facebook profile picture trouble with this routine. Do it once, do it properly, and the photo that greets every visitor will finally look like the person or the business behind it.