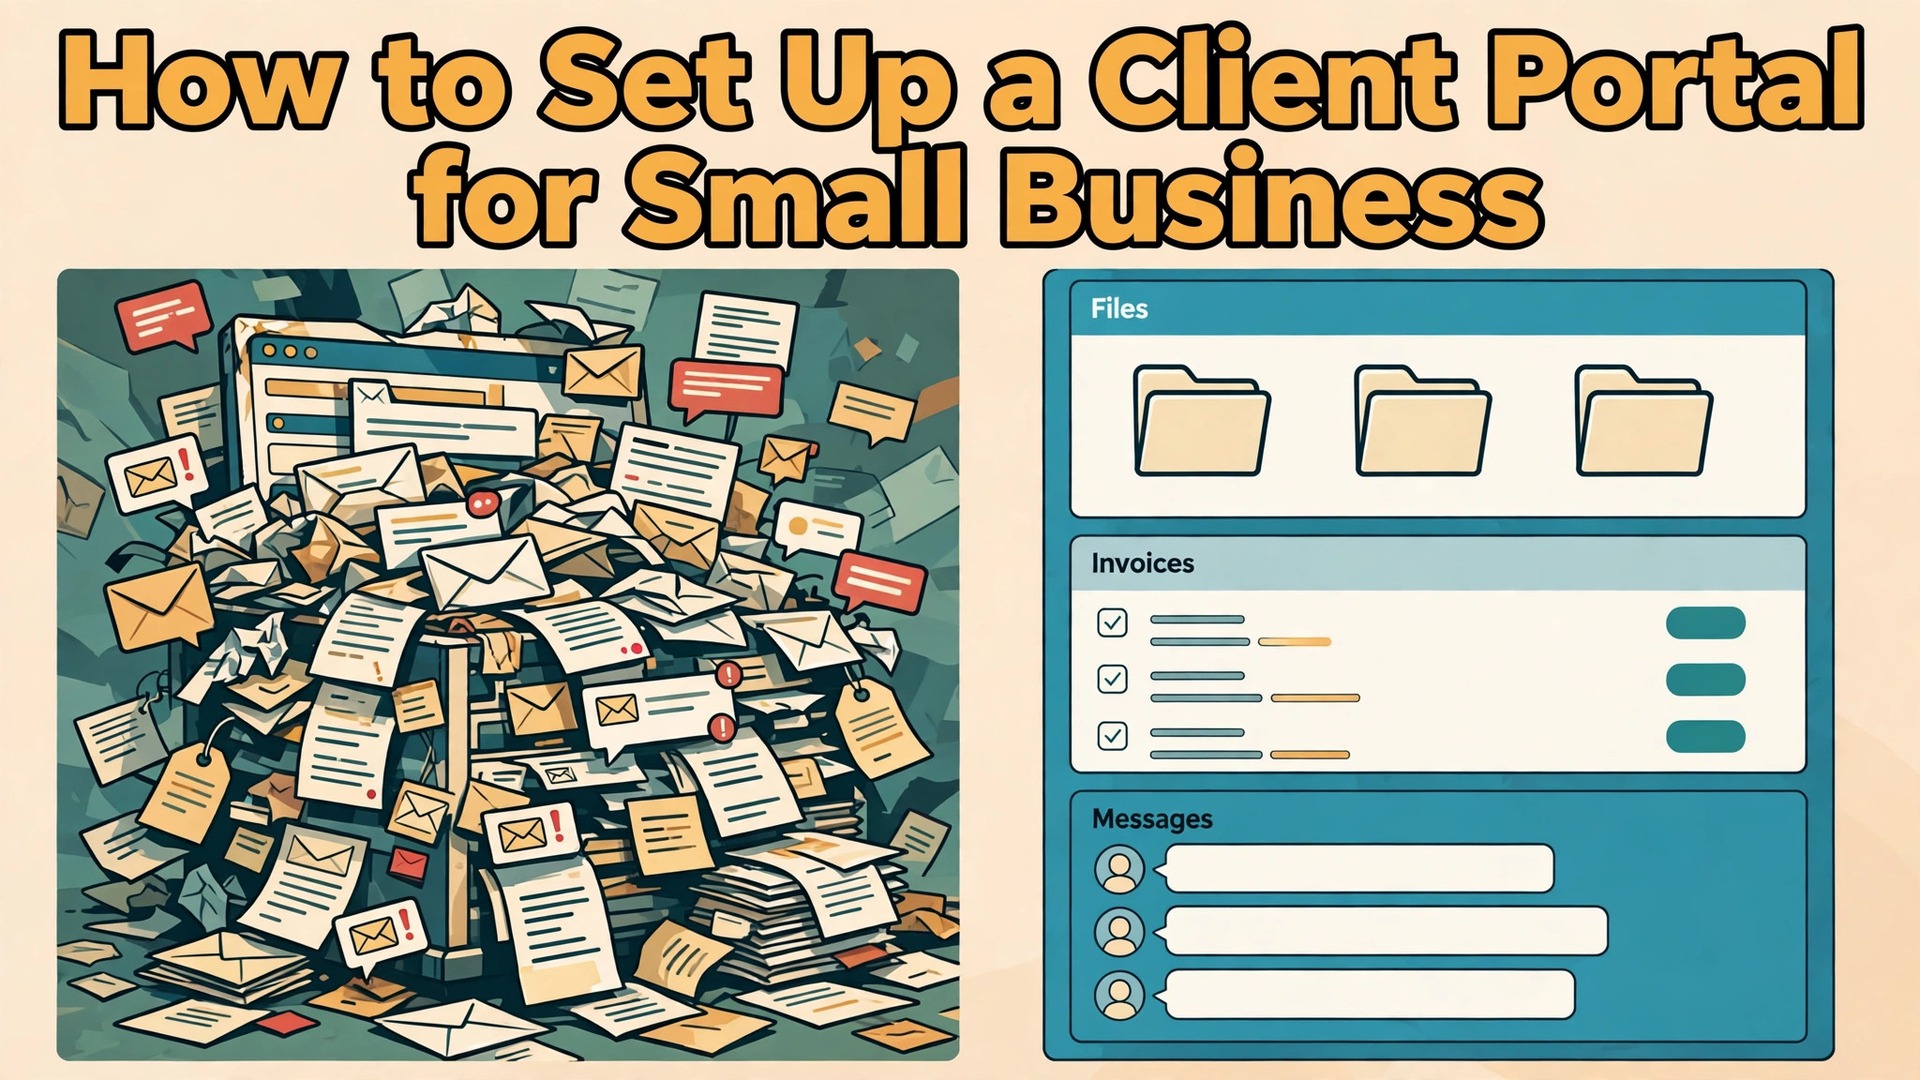
Your clients are chasing invoices in email threads, asking for the same file for the third time, and waiting days for a simple status update. That is the problem a portal solves, and learning how to set up a client portal for small business use is mostly a matter of deciding what clients should see, picking a tool that fits that list, and launching with a small group before you roll it out to everyone.
A portal is a private online space where each client logs in and finds their invoices, files, messages, tasks, and project status in one place. This guide walks through the full setup in eight steps, compares the tools small businesses actually use, and ends with a launch checklist.
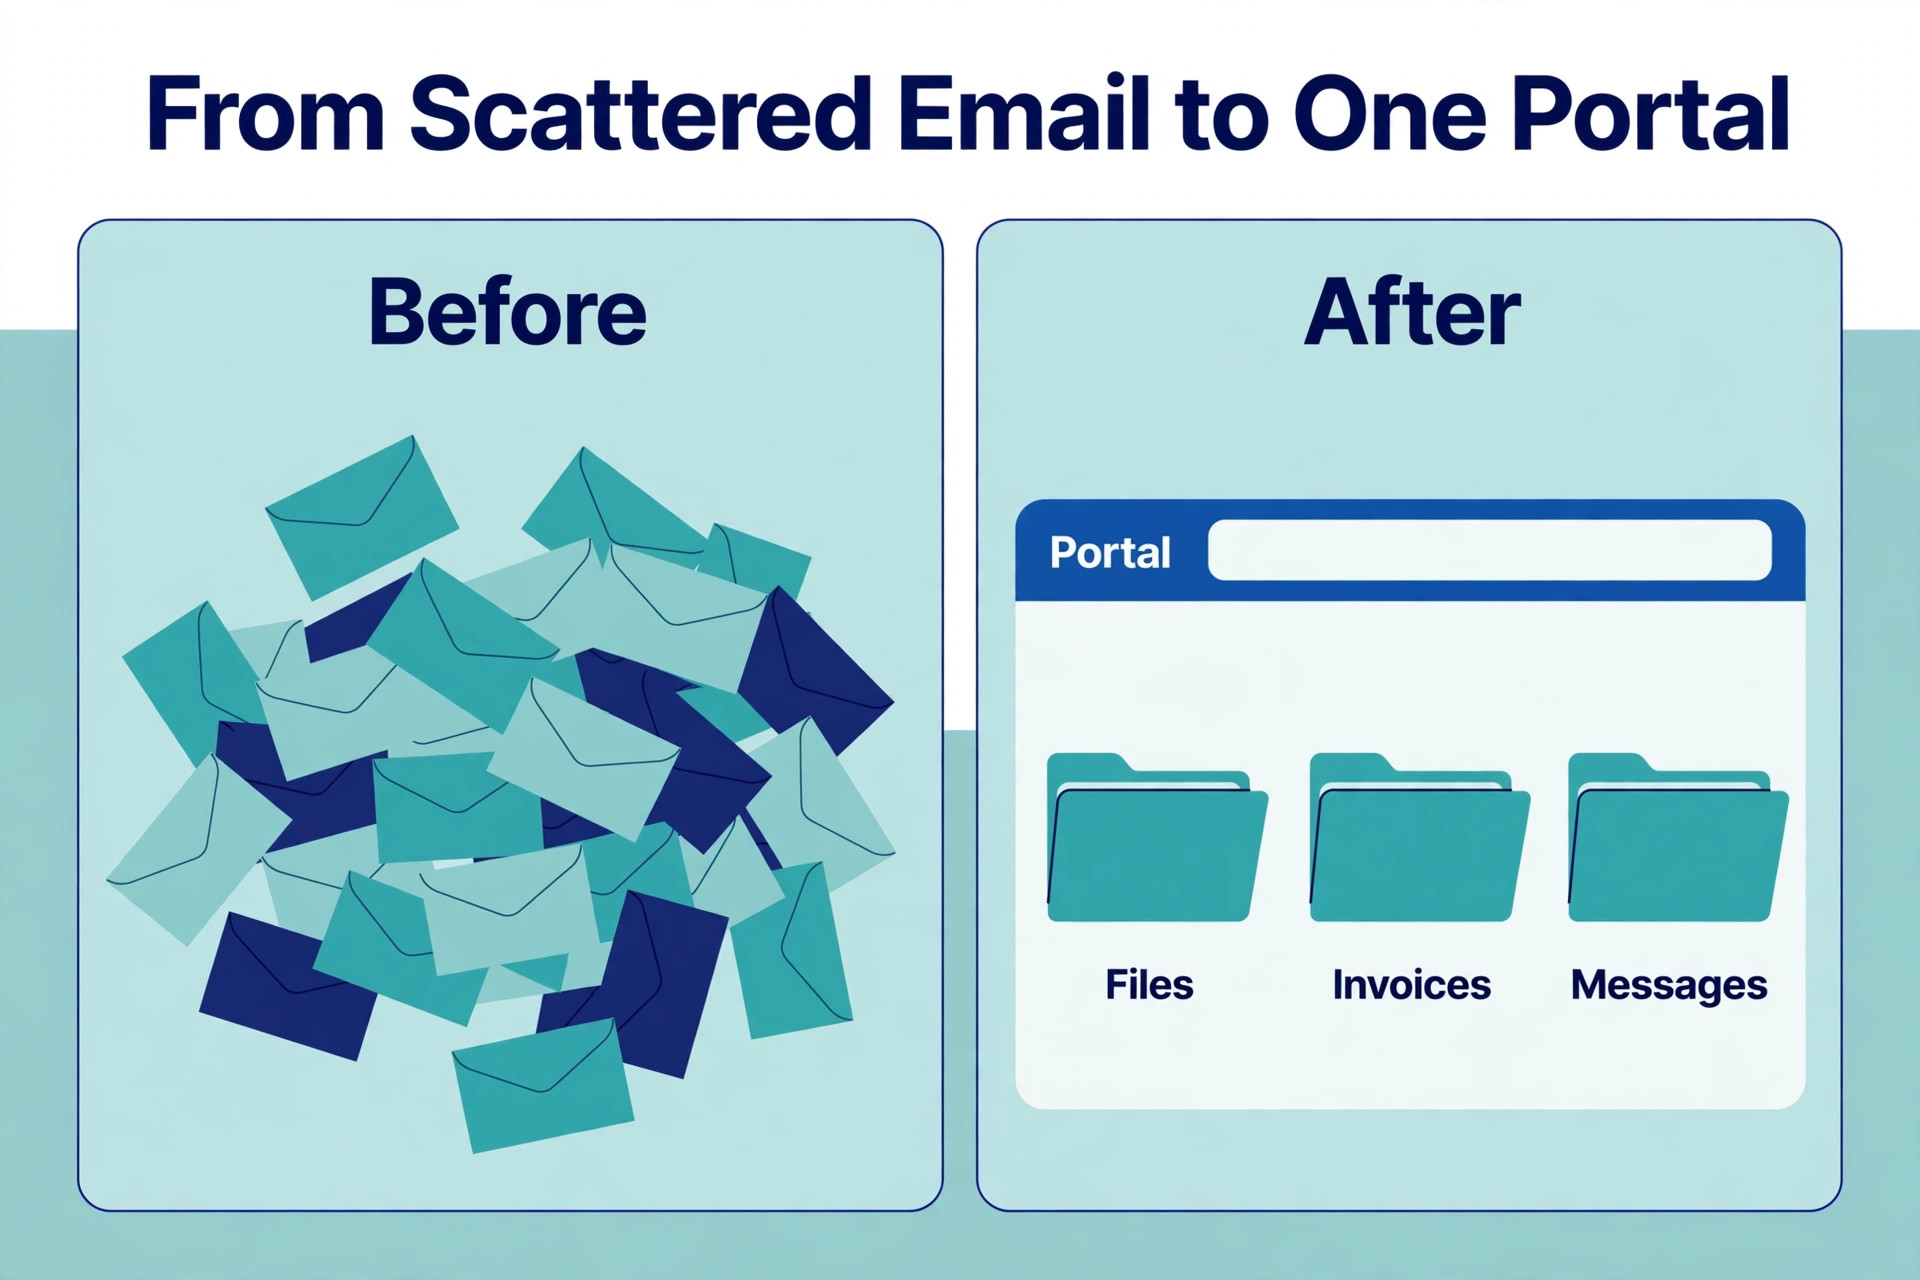
A client portal is not a website and it is not a shared folder. A website speaks to the public. A shared folder holds files but shows no status, no invoices, and no conversation history. A portal ties those pieces together behind a login, so a client sees only their own work. When a client asks where a project stands, the answer is already on their screen. When an invoice is due, the client can open it and pay it without a fresh email from you.
What a Client Portal Should Do for Your Clients
Before you look at any tool, write down what your clients actually ask for. Most small businesses hear the same five questions again and again. Where is my invoice. What is the status of my project. Can you send that file again. Who do I contact about this. When is our next meeting or deadline. A portal earns its keep when it answers those questions without a phone call.
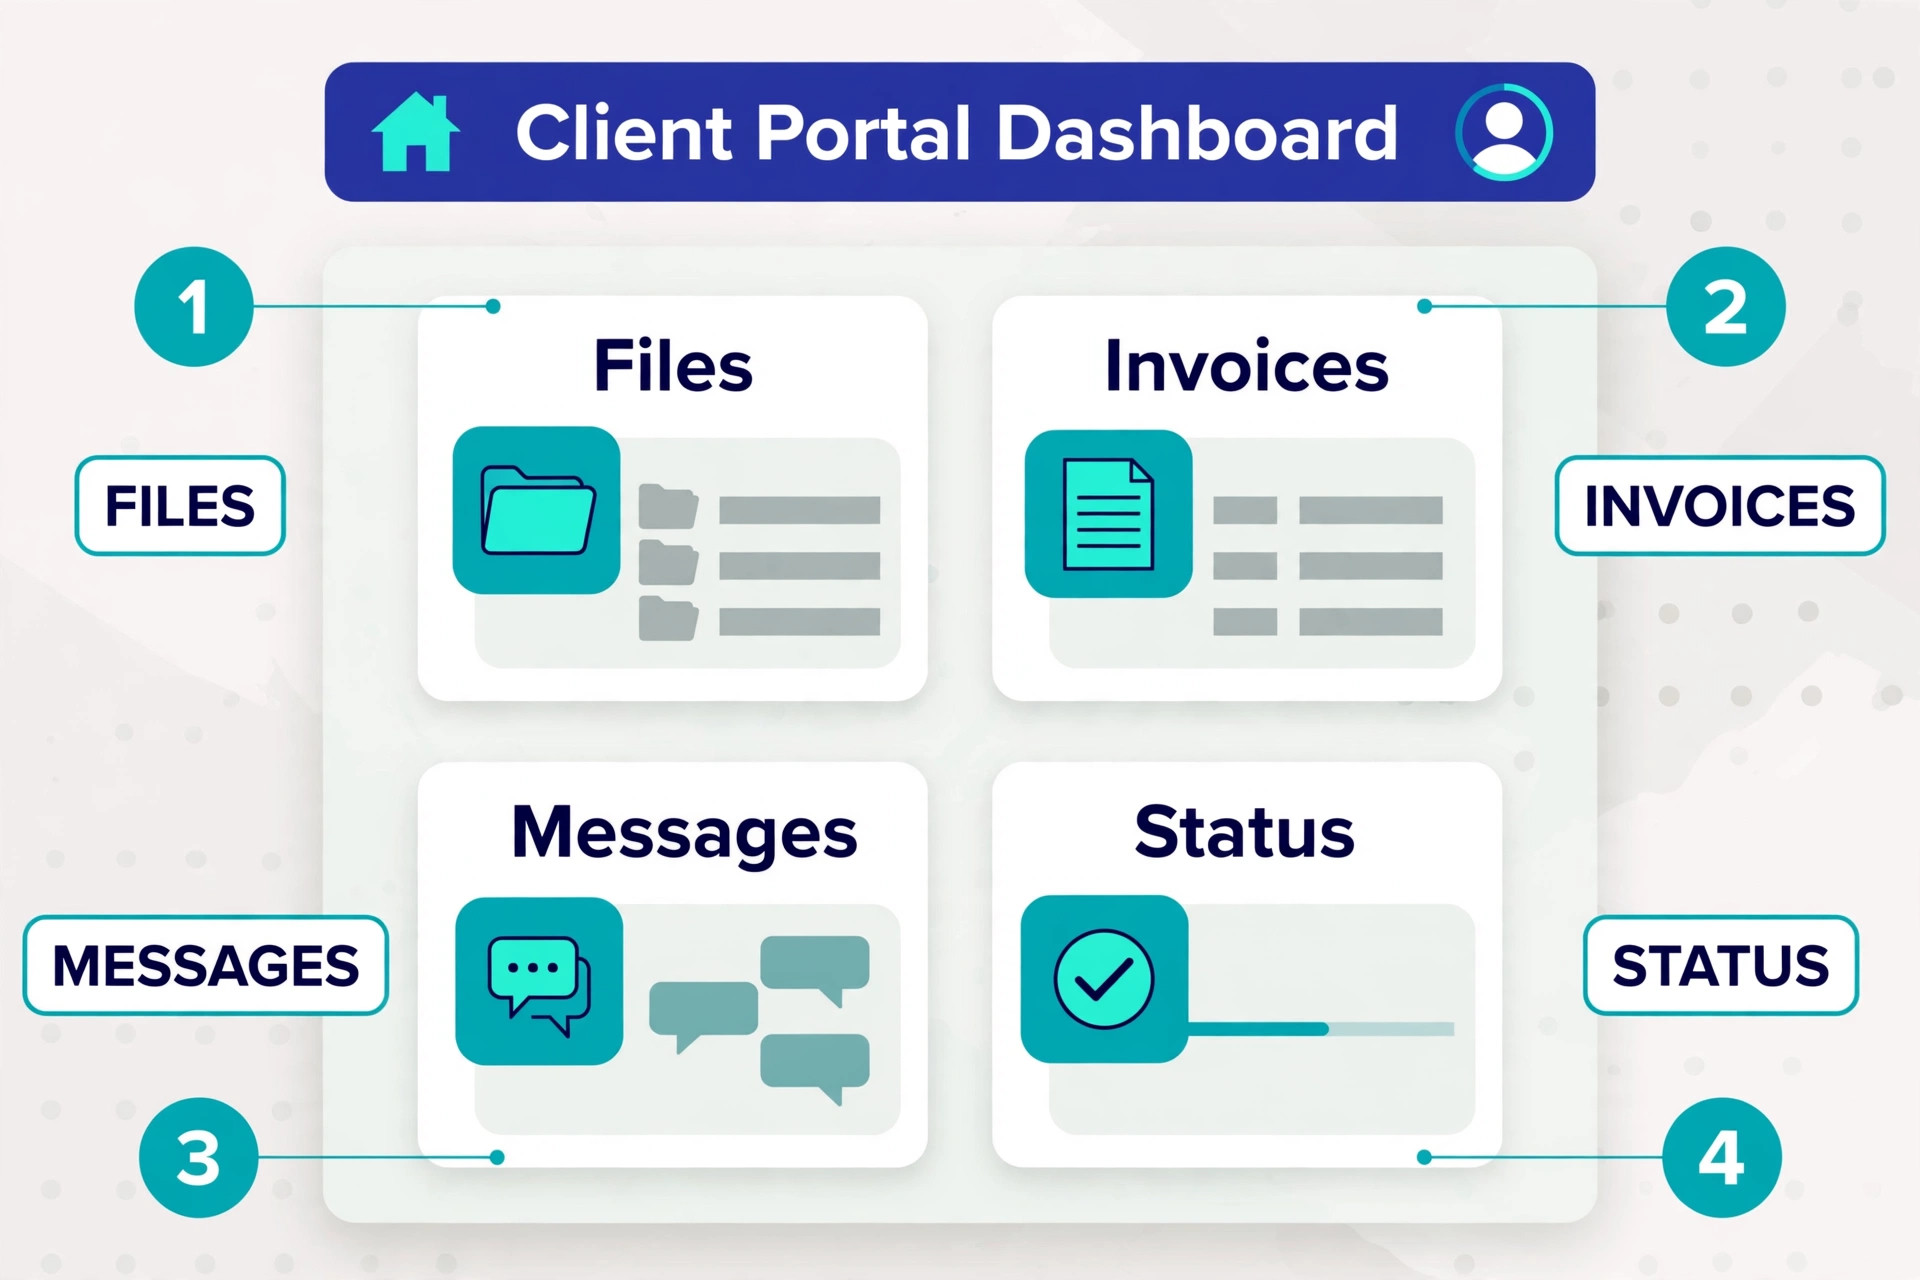
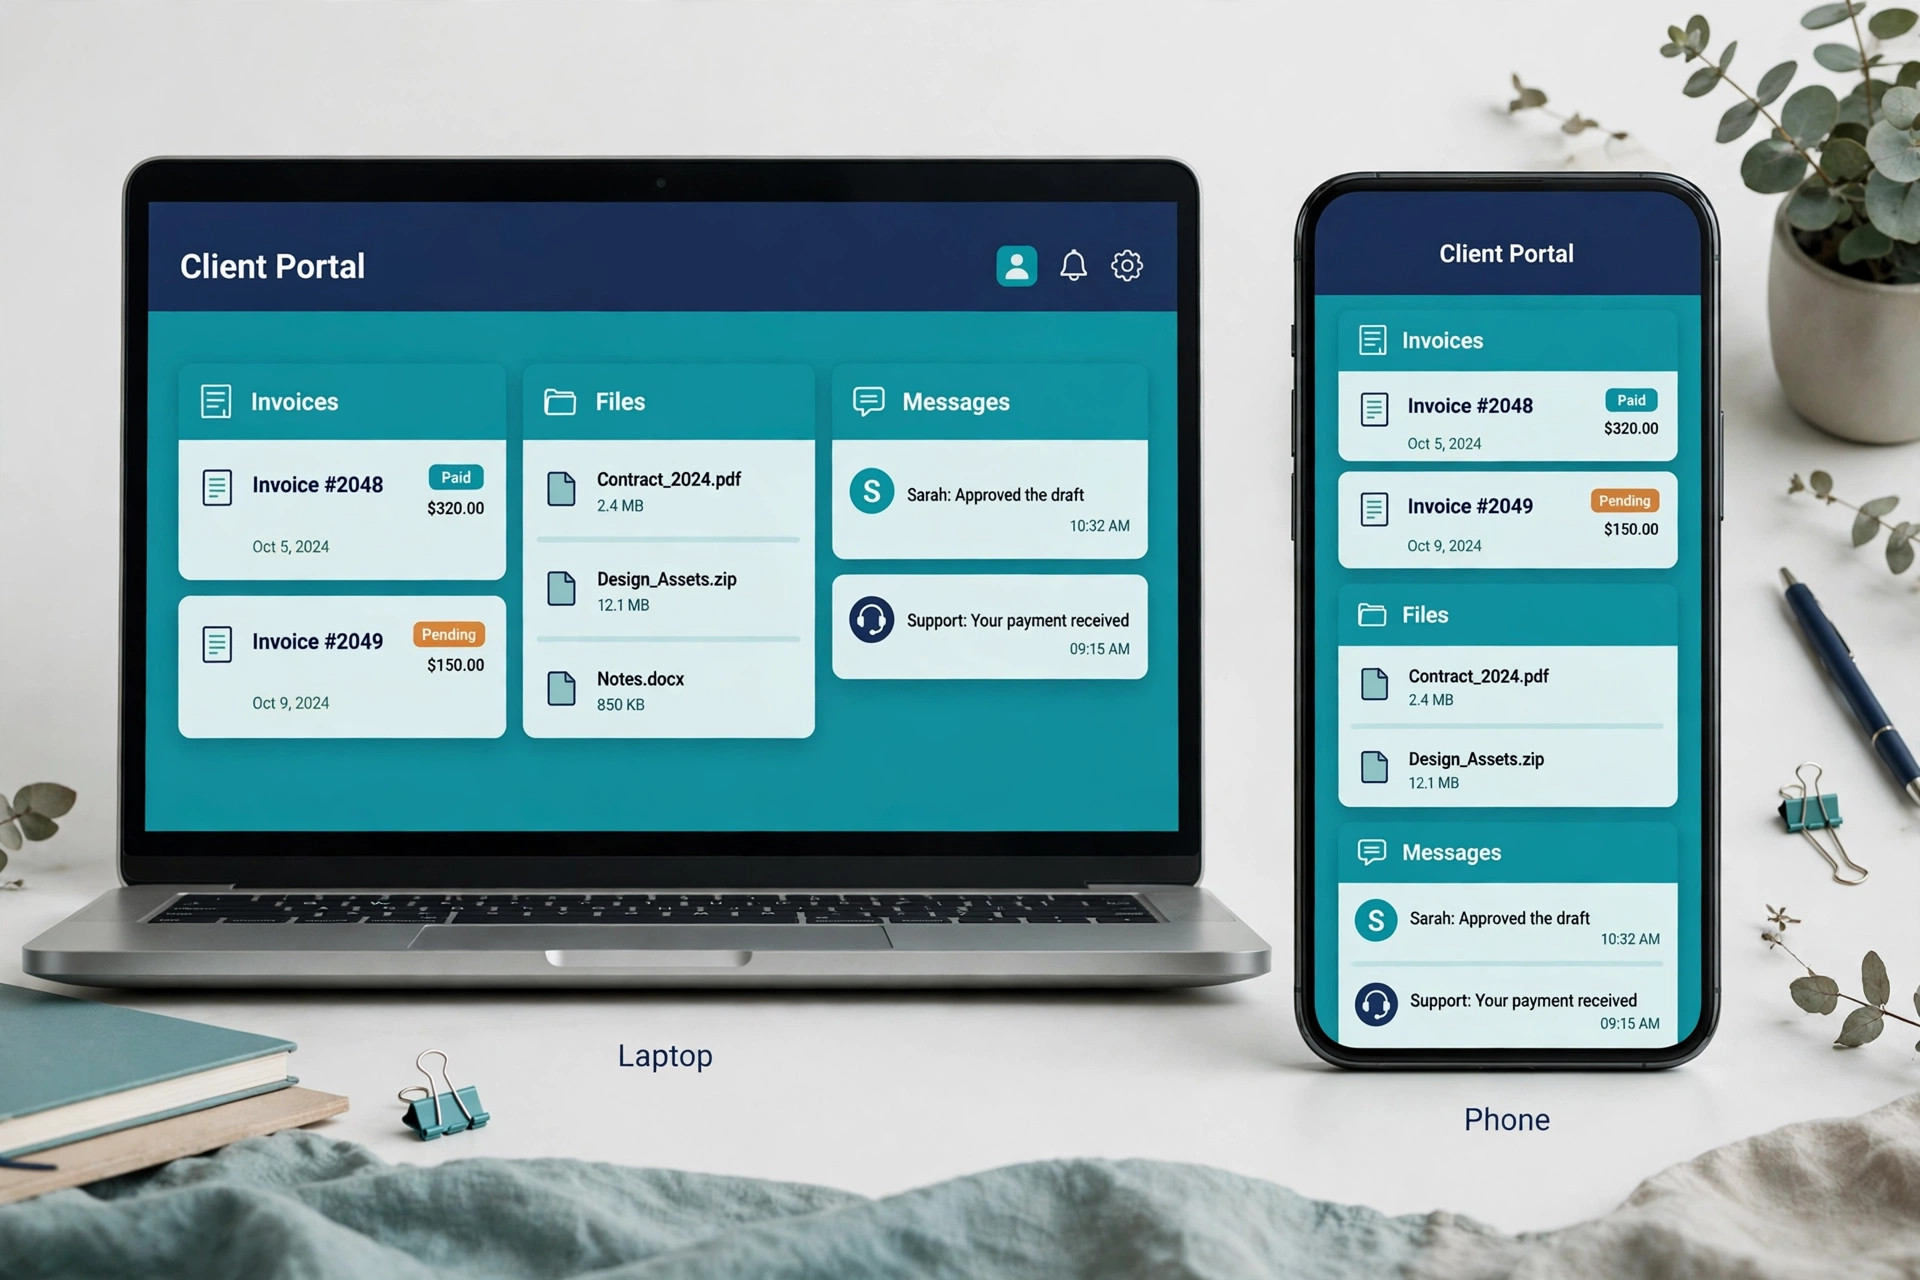
Start with the four building blocks every portal needs. The first is files, so clients can download contracts, reports, and statements without asking. The second is billing, so clients can view invoices, see what is owed, and pay online. The third is messaging, so questions and answers stay attached to the project instead of scattered across inboxes. The fourth is status, so clients can see tasks, milestones, and deadlines at a glance.
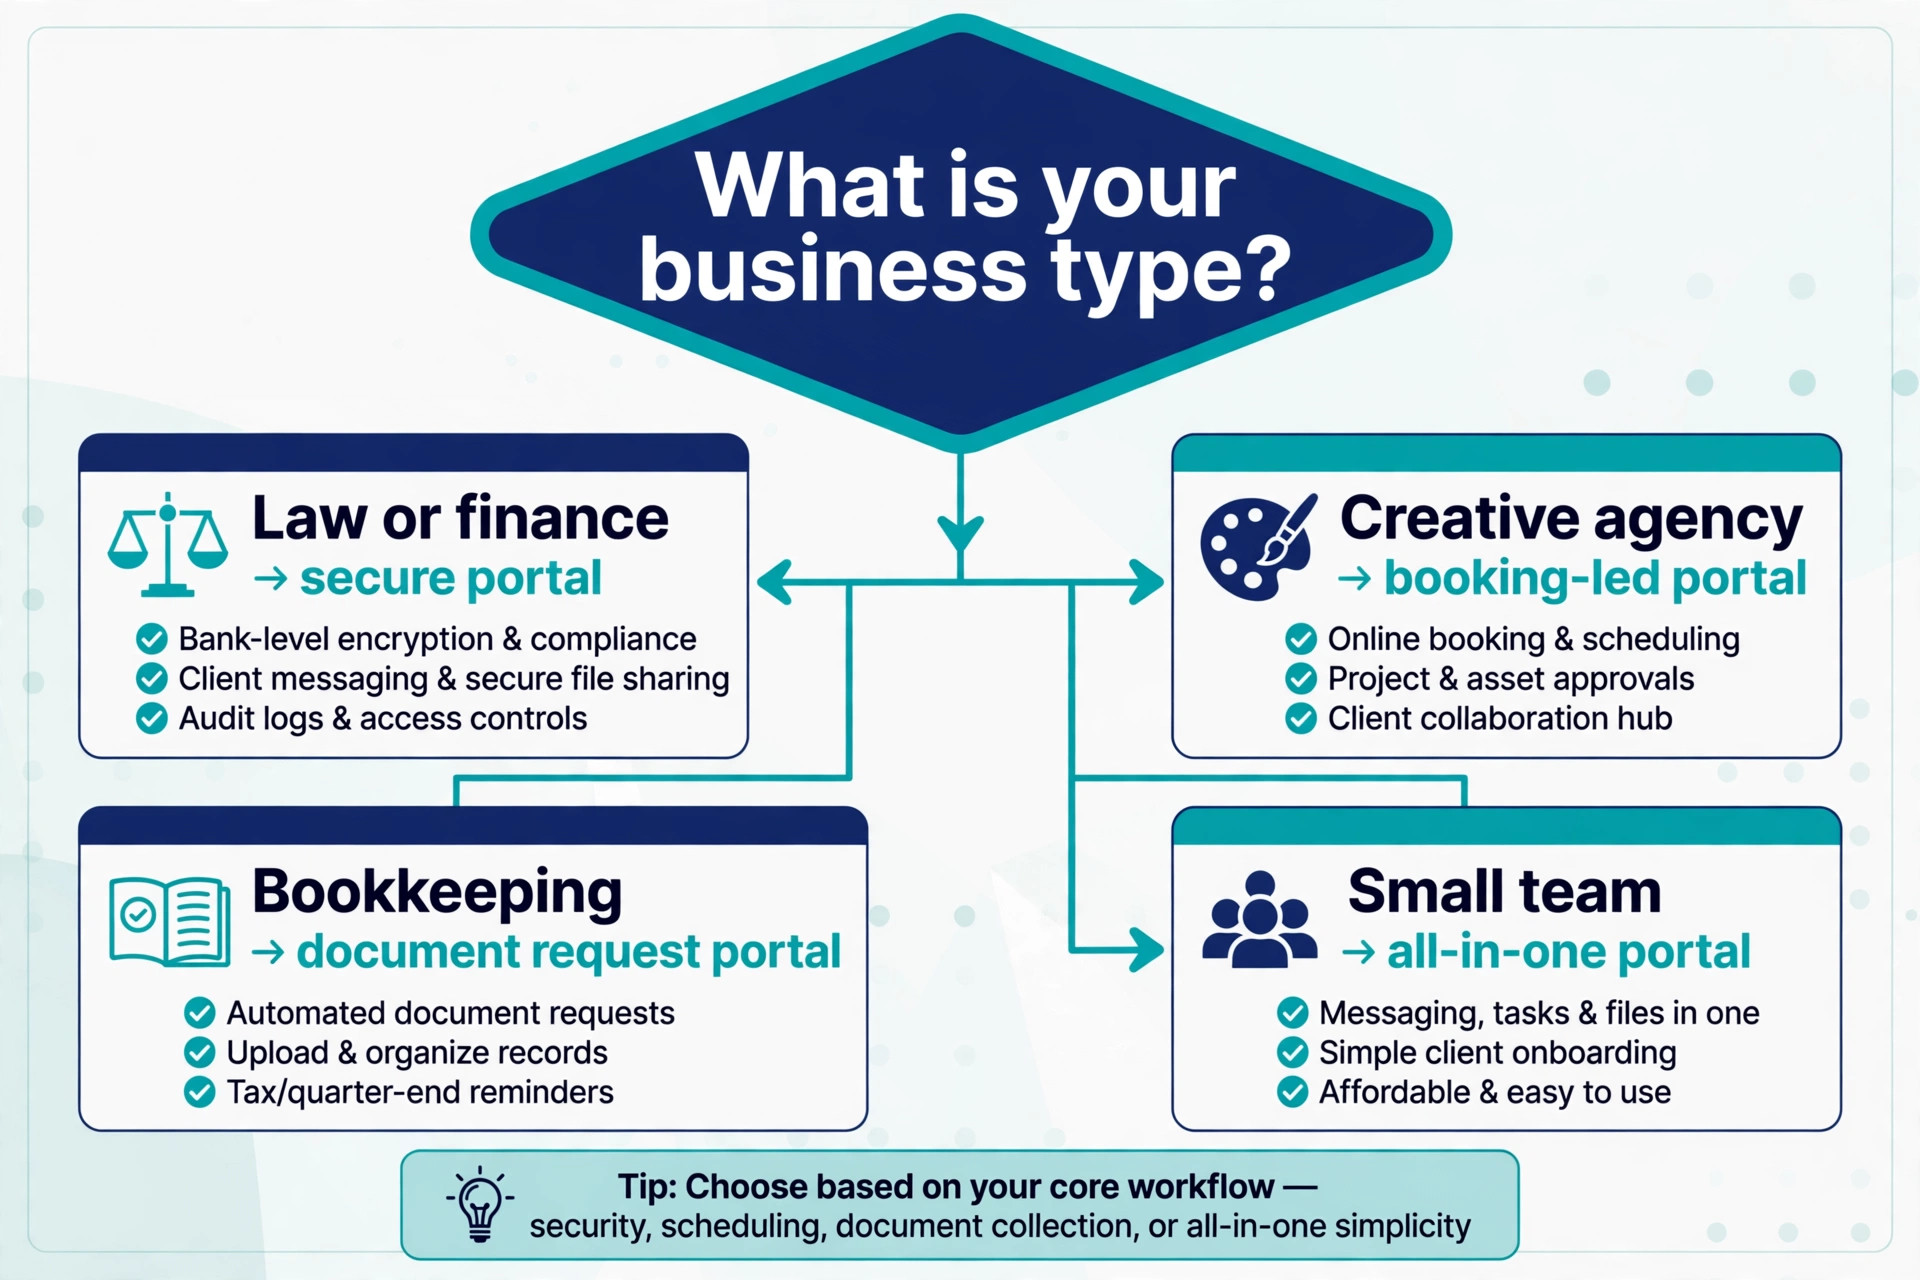
Some businesses need more. A law firm needs secure document sharing and e-signatures. A marketing agency needs approvals on drafts. A bookkeeping firm needs a way to request missing documents. An IT provider needs support tickets. Write your own extra list before you shop, because the extras decide which tool fits. A tool that is perfect for an agency can be wrong for an accountant, and the difference is usually one missing feature that matters every week.
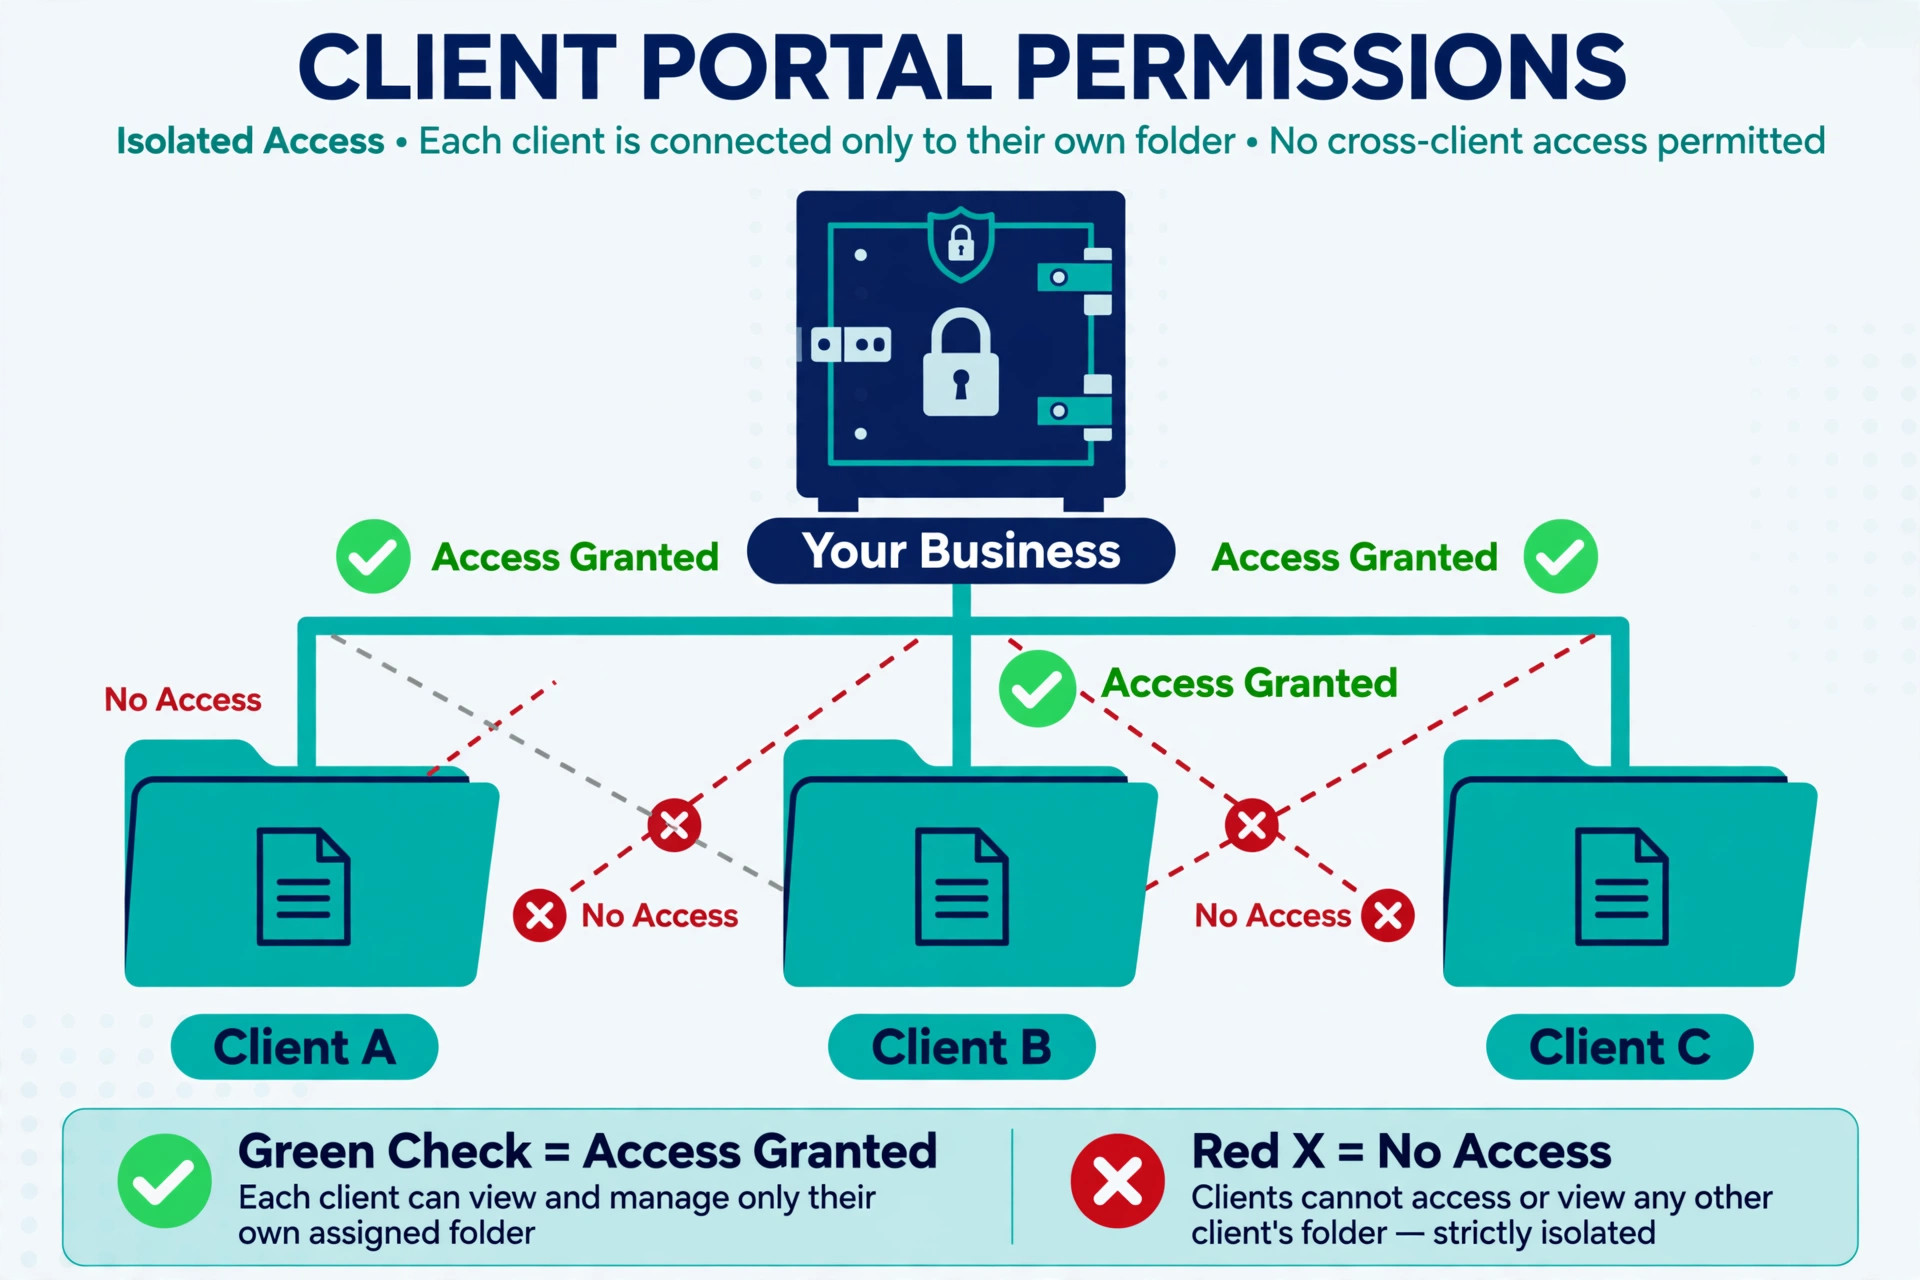
Security deserves a line in this plan from the start. Clients trust a portal with contracts, financial records, and personal details, so the login must be protected and the permissions must be right. Each client should see only their own data, never another client’s files. Look for password protection at minimum, two factor login where it is offered, and the ability to set who on your team can see what. Test permissions with a test account before you invite anyone real.
How to Set Up a Client Portal for Small Business
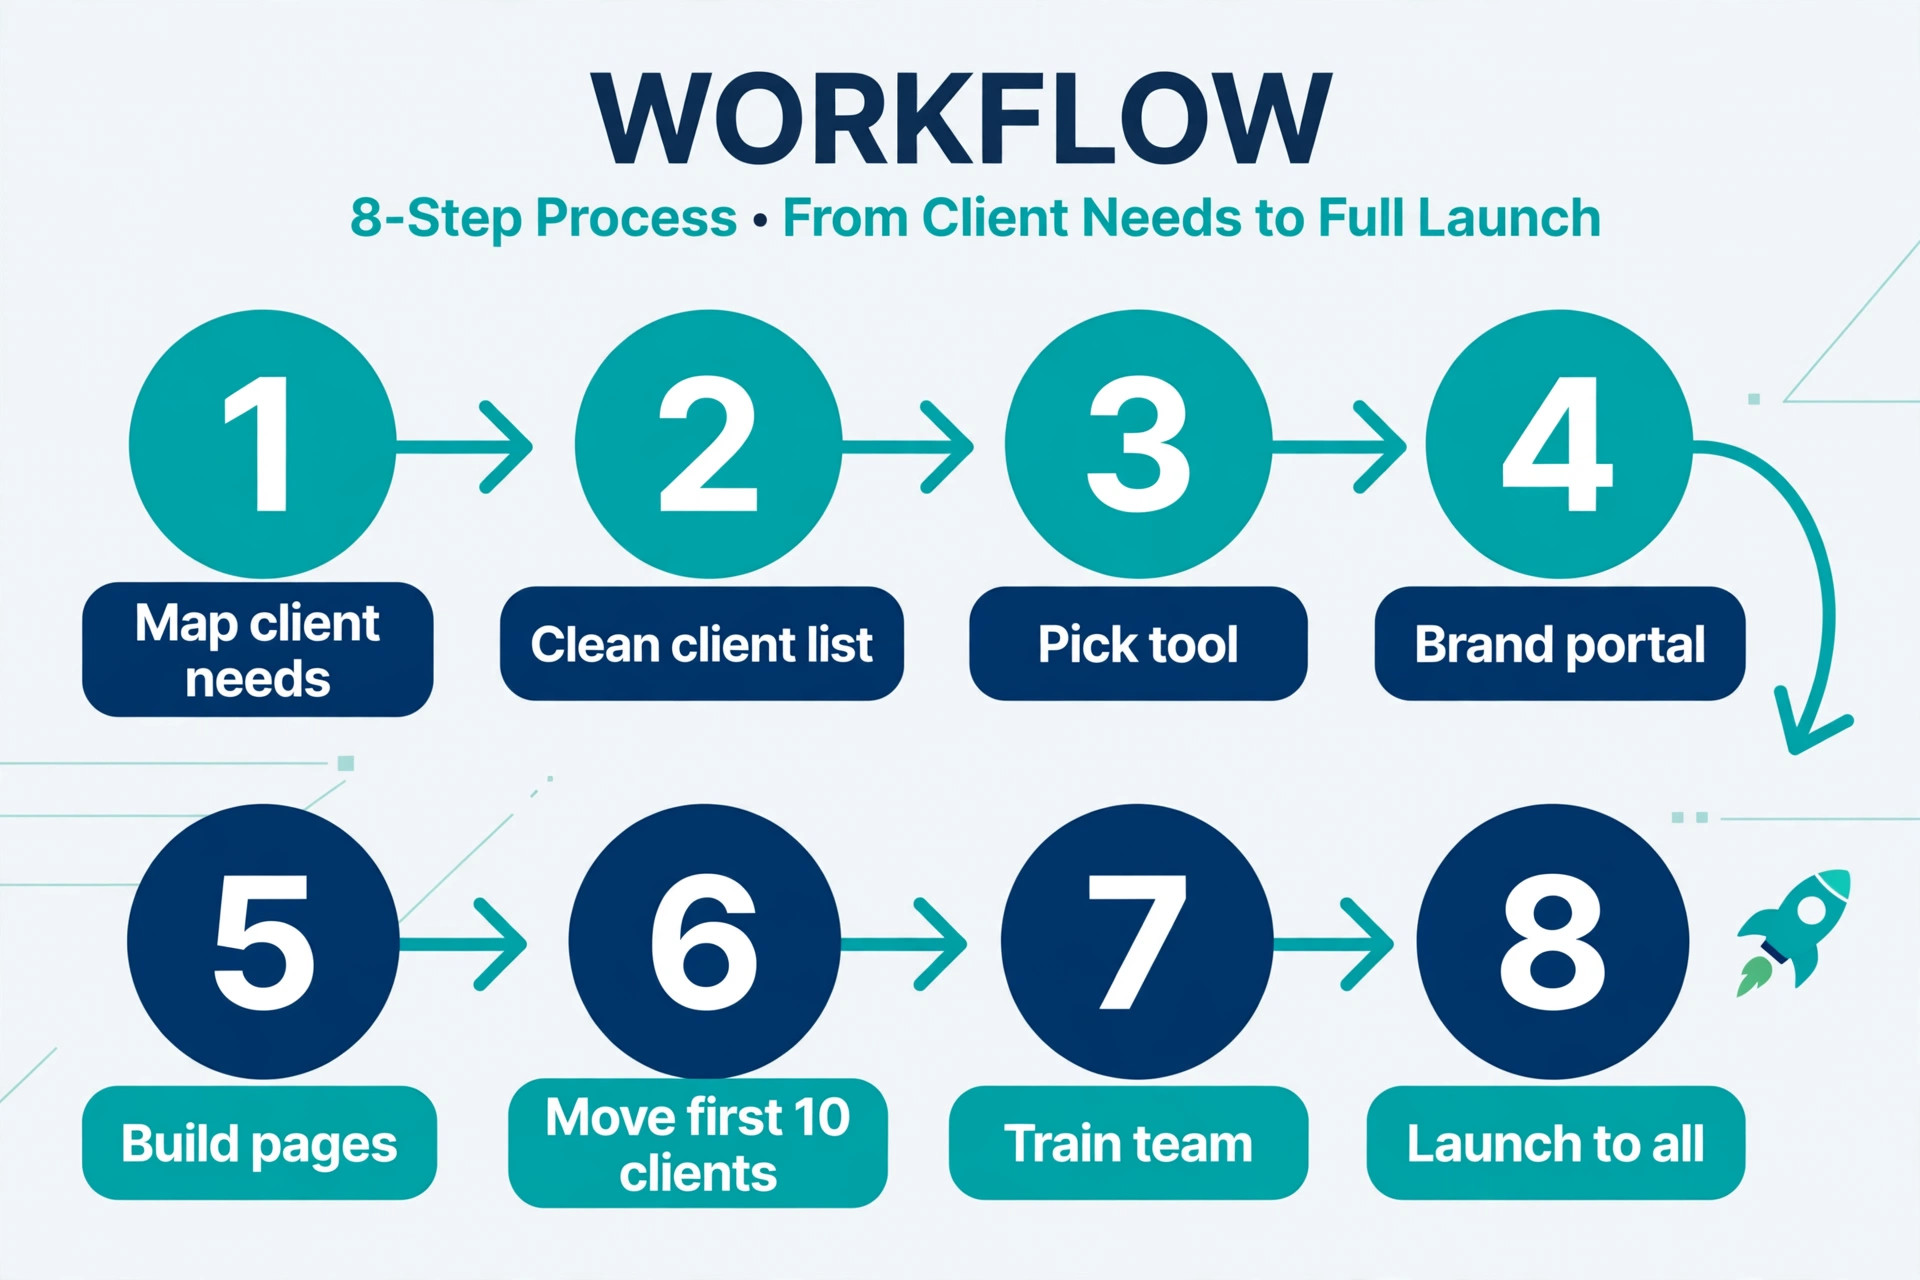
This is the part of the guide where the work happens, and the question of how to set up a client portal for small business owners breaks into eight steps you can run in order. The steps are written for a business with one to twenty staff and a client list that fits on a single spreadsheet, because that is where a portal pays back fastest. A larger firm can follow the same steps and add more review rounds, but the sequence stays the same. Work through one step at a time and do not skip the testing step, because a portal that launches with broken permissions or missing invoices creates more messages than it removes.
Step 1. Map What Clients Need to See
Open a blank page and list every document, message, and update a client receives from you in a normal month. Invoices and receipts belong on the list. Contracts and signed forms belong on it. Project files, reports, and photos belong on it. Meeting notes and deadlines belong on it too. Now mark each item as something the client should see in the portal, something that stays internal, or something that needs a client action such as a signature or a payment. The first group becomes your portal content, and the third group becomes your workflow.
Talk to two or three friendly clients before you finalise the list. Ask them what they look for when they contact you and what they wish they could find on their own. Clients often name something you forgot, such as a copy of an old invoice for their tax return. Those answers shape the portal more than any feature list on a vendor website, because they come from the people who will actually log in.
Step 2. Clean Up Your Client List and Files
A portal launch exposes every mess in your client records, so clean them first. Merge duplicate client entries, fix misspelled names and old email addresses, and confirm who the main contact is for each account. A client who logs in and sees another company’s name on their dashboard will lose trust in the whole system.
Do the same for files. Gather the current versions of the documents each client needs, name them clearly, and remove old drafts from the folders you plan to share. A file named final v3 revised actually final confuses everyone, so rename it to what it is, such as Service Agreement 2026 or October Report. If a file is out of date, either update it or leave it out of the portal. Keep internal drafts out of the shared folders entirely.
Step 3. Pick the Portal Tool That Fits Your Work
This step decides the next five years of your client experience, so compare tools on your list from Step 1 rather than on marketing claims. The comparison section later in this guide covers the leading options with prices, but the short version is that most small businesses land on one of three patterns. An all in one platform such as SuiteDash or HoneyBook runs the portal alongside billing, CRM, and project work for a flat monthly fee. A focused portal tool such as Copilot or Clinked gives you a polished client space and connects to the tools you already use.
Price the decision on total cost, not the headline number. A tool that charges per client or per user looks cheap at ten clients and expensive at two hundred, while a flat fee tool such as SuiteDash stays at 19 dollars a month no matter how many clients you add. Check what the entry plan actually includes, because white label branding, custom domains, and payment processing often sit on higher tiers. Start a free trial with your real data, not a demo account, and invite one colleague to act as a client. If the trial feels confusing to a colleague, it will feel confusing to a client.
Step 4. Brand the Portal So Clients Trust It
A portal that looks like a generic software page tells clients they are dealing with a vendor’s system, not with your business. Upload your logo, set your brand colours, and use your business name in the portal title and in the web address where the tool allows it. Most tools offer a custom subdomain or a custom domain on paid plans. A link that reads portal dot your business dot com feels like your service, while a link full of a vendor’s name feels borrowed.
Write the welcome text yourself, in plain language, and keep it short. Tell clients what they will find inside, how to reach you from the portal, and what happens next on their project. A client who opens the portal for the first time should understand it in ten seconds. Add a profile photo or a team photo on the dashboard where the tool allows it, because a face makes a digital space feel human.
Then send the portal link to yourself, open it on a phone, and check that the logo is clear, the text is readable, and the buttons are easy to tap. More than half of your clients will open the portal on a phone first, so the mobile view is the real first impression.
Step 5. Build the Pages, Forms, and Workflows
Now build the structure. Create one dashboard page that shows the client’s open tasks, unpaid invoices, recent files, and next deadline in a single view. Add a files page organised by project or by year, an invoices page with payment buttons, and a messages page where the client can write to your team. Keep the navigation to five items or fewer, because every extra menu item is another place for a client to get lost.
Next, build the forms and workflows that replace email chasing. A document request form lets you ask a client for a missing file with a deadline attached, and the portal tracks whether it arrived. An approval step lets a client approve a draft or a quote with one click, and the approval is recorded with a date. A payment link on each invoice lets the client pay without leaving the portal. Test each workflow end to end with a colleague playing the client, and confirm that the right notifications reach your team. A workflow that fails silently is worse than no workflow, because the client believes the task is done and your team never sees it.
Step 6. Move Your First Ten Clients In
Do not invite every client on day one. Pick ten clients who are friendly, active, and comfortable with online tools, and move them first. Send each one a short personal email that explains what the portal is, why you built it, and what they should do first, which is usually to log in, check their invoices, and confirm their contact details. Include the login link and offer a quick call if they get stuck. A personal invitation gets a far better response than a bulk announcement, and the first ten clients become your test group.
Watch what those ten clients do in the first week. Check who logged in, who paid an invoice through the portal, and who asked a question inside the portal instead of by email. Then call two of them and ask what confused them. Fix the confusing parts before you invite the next group, even if the fix is as small as renaming a menu item or adding a sentence to the welcome text. This pilot round is where most portals are saved from a weak launch, because real client behaviour always differs from what the team predicted in a meeting.
Step 7. Train Your Team and Set the Rules
A portal fails when the team keeps working in email while the client waits in the portal. Agree on simple rules before the full launch and write them down where the team can see them. Every client message gets an answer inside the portal, not by a separate email. Every file a client needs goes into the portal, not into an attachment. Every invoice is sent through the portal first.
Train the team in a single short session using a real client account, not slides. Show each person how to upload a file, send an invoice, answer a message, and set a task, and then ask them to do each action once while you watch. Give one person ownership of the portal, so there is a named owner for permissions, branding, and the client list. That owner checks new client setups, removes access when a project ends, and keeps the file structure tidy. Without an owner, the portal drifts, folders multiply, and clients start finding old files again within a few months.
Step 8. Launch to Every Client and Keep Improving
Once the pilot group is happy and the team is following the rules, invite the rest of your clients in small batches of twenty at a time. A batch approach lets you spot problems early and keeps the support load manageable. Each invitation should be personal, short, and clear about the first action. Add a short note to your email signature and your invoices that points clients to the portal, so new clients find it without a separate announcement.
After launch, review the portal once a month for the first quarter. Check which pages clients visit, which invoices are paid through the portal, and which questions still arrive by email. Every question that still arrives by email points to something missing or hard to find in the portal, so fix that thing. A portal is never finished, but a monthly review keeps it useful, and a useful portal is one clients return to without being asked.
Which Portal Tool Fits a Small Business
The tool market splits into all in one platforms, focused portal tools, and no code builders, and the right choice depends on whether you want the portal to replace other software or sit beside it. Prices were checked against vendor pricing pages and current 2026 roundups in November 2026, so confirm the price on the checkout page before you pay. The question of how to set up a client portal for small business use is easier once this choice is made, because the tool shapes the pages, the workflows, and the billing.
| Tool | Best for | Starting price |
|---|---|---|
| SuiteDash | All in one portal plus CRM and billing on a flat fee | 19 dollars a month |
| HoneyBook | Creatives who run bookings, contracts, and payments | 29 dollars a month billed annually |
| Copilot | A polished modern portal for client facing firms | 39 dollars a month |
| Clinked | Secure white label portals for professional services | 119 dollars a month |
| Softr | No code portals built on your existing data | 19 dollars a month |
| Bonsai | Freelancers who need contracts and invoices too | 9 dollars a month per user |
| Moxie | Small teams who want projects and portal together | 25 dollars a month for the portal plan |
| Zendo | Agencies selling services with built in billing | Free plan, paid from 25 dollars a month |
SuiteDash
SuiteDash is the value pick for small businesses that want the portal, the CRM, invoicing, project management, and file sharing in one subscription. The Start plan costs 19 dollars a month, every plan includes unlimited staff and unlimited clients, and white label branding is included from the start. That flat fee is the reason it appears at the top of so many small business lists, because the bill does not grow as the client list grows. The trade off is a learning curve, since the platform covers so much ground that the first setup takes longer than a focused portal tool.
HoneyBook
HoneyBook suits photographers, designers, coaches, and other creatives who sell a service through a proposal, a contract, and a payment. The client portal sits around that booking flow, so a client can accept a proposal, sign a contract, and pay an invoice without leaving the portal. The Starter plan costs 29 dollars a month billed annually, with Essentials at 49 dollars and Premium at 109 dollars, and prices rose in 2025, so check the current page. The portal is less flexible than a general portal tool for firms that need deep file organisation or support tickets, but for a booking led business it feels natural from the first login.
Copilot
Copilot is the pick when the client experience matters most. The portal looks modern, the navigation is simple, and clients find invoices, files, messages, and forms without a guide. Pricing starts at about 39 dollars a month, and the platform covers billing, contracts, and client messaging alongside the portal. The trade off is price, because a small firm pays more here than for SuiteDash or Softr. Choose Copilot when your clients are busy professionals who judge a service by how easy it is to use.
Clinked
Clinked is built for firms that share sensitive documents, such as accountants, lawyers, and financial advisers. The portals are white label, files carry versioning and watermarking, and the platform holds ISO 27001 certification, which matters when clients ask about security. Pricing starts at about 119 dollars a month, which puts it above the small business tools on this list. The cost is justified when document security is part of the service you sell, and it is hard to justify when the portal only needs to show invoices and a few files.
Softr
Softr builds portals from a template or a prompt, with data pulled from sources such as Airtable or Google Sheets, and no code is needed. The free plan lets you test the idea, and paid plans start at 19 dollars a month. This route fits a business that already keeps client data in a spreadsheet and wants a portal that reads from that data instead of duplicating it. The trade off is that billing, contracts, and e-signatures need other tools, so Softr works best as the front door to a system you already run.
Bonsai
Bonsai is the freelancer pick. The portal covers proposals, contracts, time tracking, invoices, and payments, and the entry plan costs 9 dollars a month per user. It is light, fast to set up, and priced for a one person business. The limit is scale, because the portal and the workflows are built around a single freelancer rather than a team. A team of ten will outgrow it within a year and face a migration.
Moxie
Moxie combines project management, CRM, invoicing, and a client portal in one place, and the portal itself starts on the Pro plan at 25 dollars a month. The entry plan at 12 dollars a month has no portal, so budget for Pro from the start. Moxie suits small creative and service teams that want one tool for the whole client journey, from lead to final invoice. The trade off is depth, because each feature is good rather than outstanding.
Zendo
Zendo is built for agencies and solo operators who sell services through a portal with quotes, invoices, and recurring billing built in. The free Essential plan covers unlimited client requests, the Core plan costs 25 dollars a month, and the Pro plan costs 49 dollars a month. White labelling and custom workflows sit on the paid plans. Zendo is the simplest route when the portal is also the shop front for your services, and clients can request work, accept a quote, and pay in the same place.
The Setup Checklist
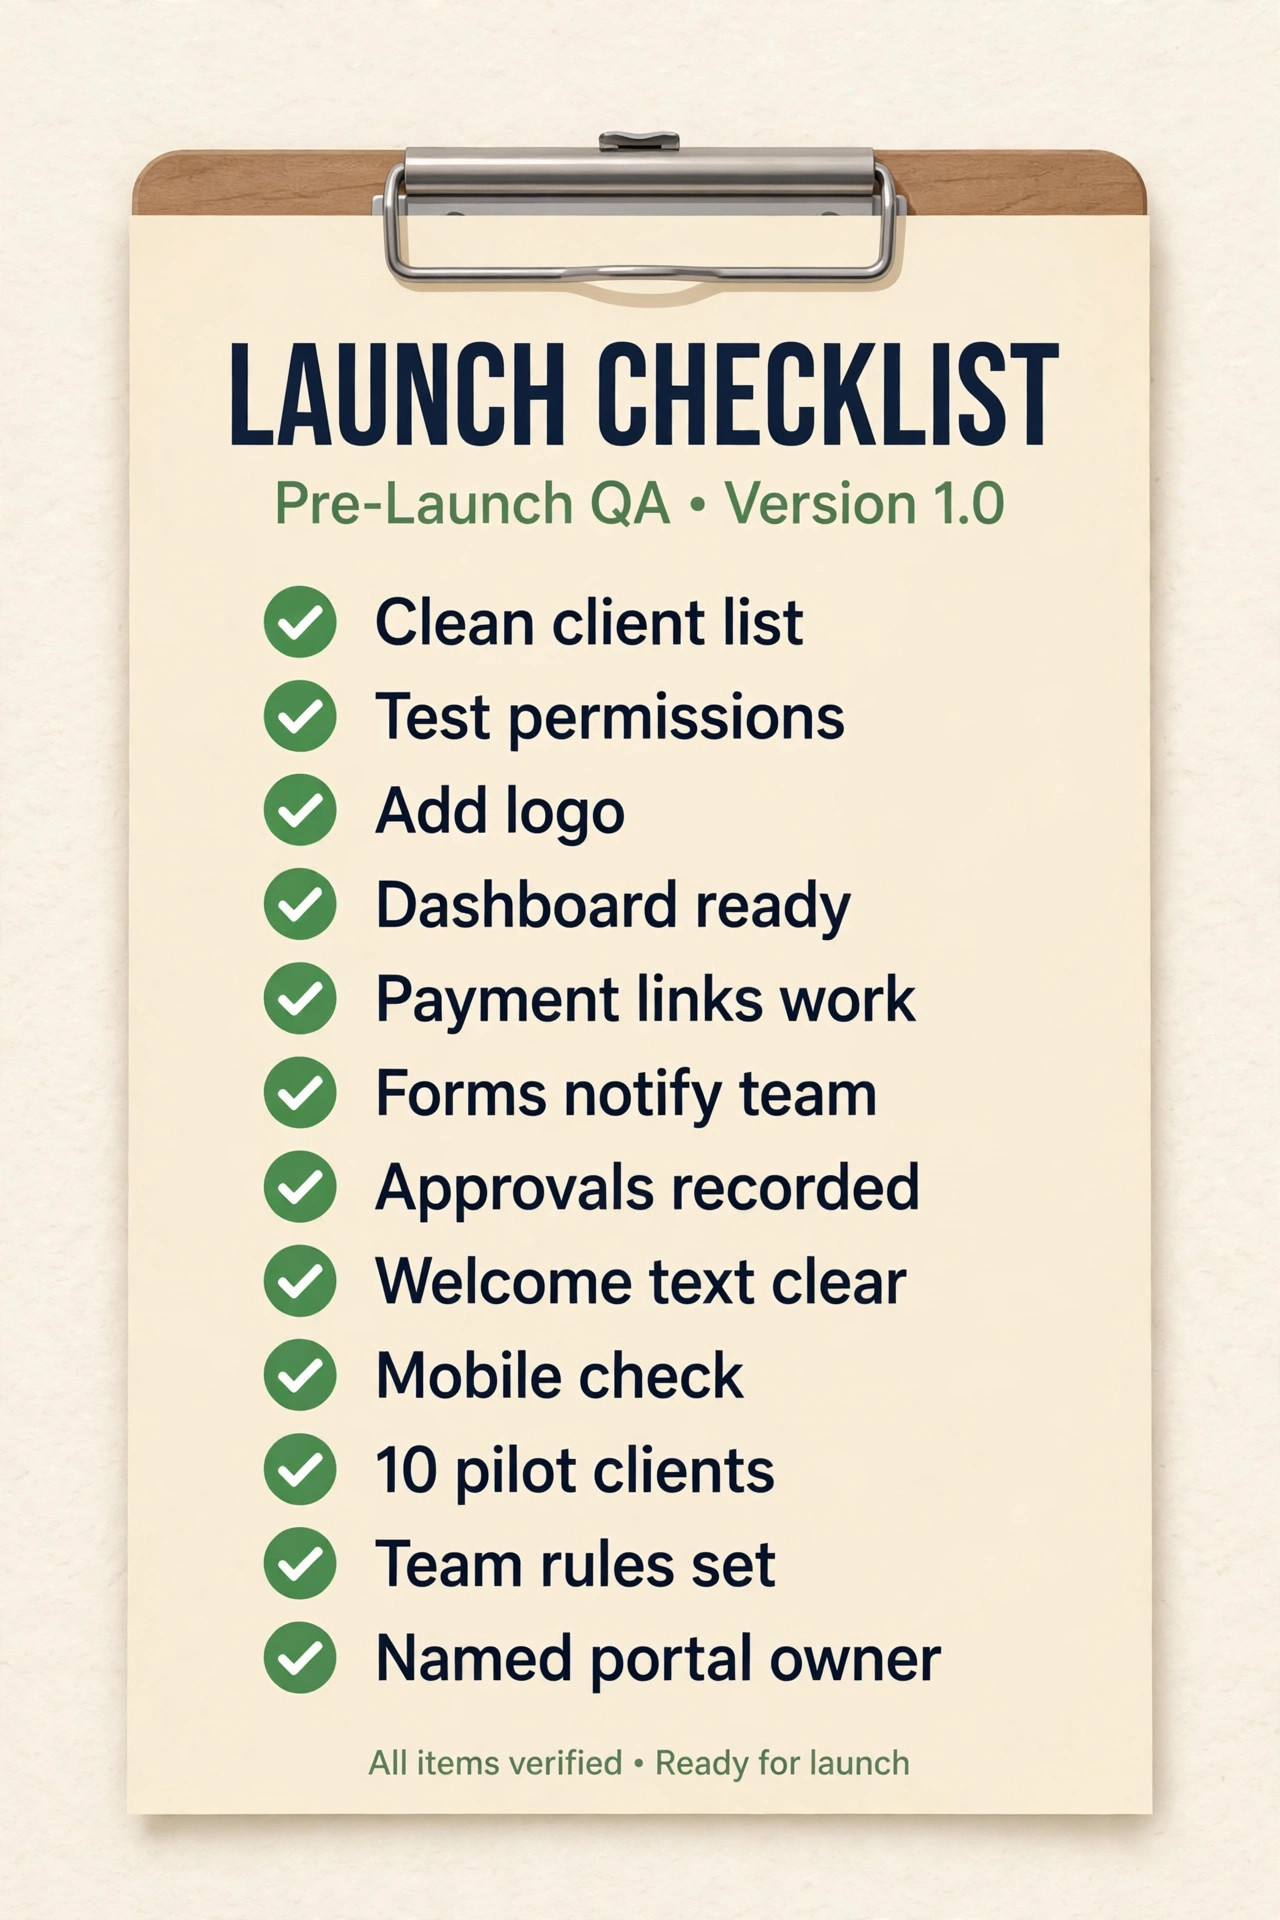
Run this checklist in order before you send the first real invitation. It is the same list we recommend to every small business that asks how to set up a client portal for small business clients without a false start, and each item takes minutes once the earlier steps are done.
- Confirm every client record has one correct name, one main contact, and one current email address.
- Confirm each client sees only their own files, invoices, and messages in a test login.
- Confirm the portal shows your logo, your colours, and your business name on every page.
- Confirm the dashboard shows open tasks, unpaid invoices, recent files, and the next deadline.
- Confirm every invoice carries a working payment link and a clear due date.
- Confirm the document request form sends a notification to the right team member.
- Confirm the approval step records the client name and the date of approval.
- Confirm the welcome text tells a new client what to do first in one short paragraph.
- Confirm the portal opens cleanly on a phone, with readable text and tappable buttons.
- Confirm ten pilot clients have logged in, and at least two have given you feedback you acted on.
- Confirm the team knows the three rules, which are answer in the portal, file in the portal, and invoice through the portal.
- Confirm one named person owns the portal, the permissions, and the monthly review.
What a Portal Costs in the First Year
The software subscription is the visible cost when you work out how to set up a client portal for small business use, and it usually runs between 19 and 119 dollars a month for the tools on this list. Budget ten to twenty hours of setup time, spread across the client cleanup, the file tidy, the branding, and the workflow tests. That time is the real investment, and it is also the reason a rushed launch fails. A business that pays for a tool and skips the setup hours ends up with a portal nobody uses, which is the most expensive outcome of all.
Add payment processing fees to the budget. Most portal tools pass card payments through a processor that charges around 2.9 percent plus 30 cents per transaction, and some tools add their own fee on top. A firm that collects 10,000 dollars a month through the portal pays roughly 300 dollars in processing fees, which dwarfs the software subscription. Check whether the tool lets you pass the fee to the client or absorb it, and state the choice on the invoice so there is no surprise.
White labelling, custom domains, and extra storage often sit on higher tiers, so read the plan table before you commit. A tool that costs 19 dollars a month can cost 49 dollars a month once you add your own domain and remove the vendor branding, and that is still a fair price if the portal is the face of your service. Pick the tier that includes the features from your Step 1 list, not the tier with the lowest number on the pricing page.
Mistakes That Slow a Portal Launch
The most common mistake when owners learn how to set up a client portal for small business use is inviting every client before the portal is tested. A bulk launch turns every small error into dozens of support messages, and the team spends the first week apologising instead of working. The pilot group of ten exists to catch those errors while they are still small. A second mistake is copying every old file into the portal on day one, including drafts and outdated versions. Share only current files, and add older files only when a client asks for them.
A third mistake is letting the team keep answering clients by email. When a client writes in the portal and gets an answer by email, the client learns that the portal is not where answers live, and the next question goes to email too. A fourth mistake is choosing a tool for its price alone. The cheapest portal that misses your one essential feature, such as e-signatures or secure file requests, costs more in workarounds than a pricier tool that covers it. A fifth mistake is forgetting to remove access when a project ends, so set a monthly habit of reviewing who still has access.
Getting Your Portal Live
SuiteDash is the pick for most small businesses that ask how to set up a client portal for small business use on a tight budget, because the 19 dollar flat fee covers unlimited clients, white label branding, CRM, invoicing, and project work in one subscription. HoneyBook is the pick for creatives whose work runs through proposals and bookings, because the portal follows that flow naturally. Copilot is the pick when the client experience is the product, and the extra monthly cost buys the cleanest portal on this list. Start with a two week trial of your top choice using real client data, run the ten client pilot, and launch in batches.
Frequently Asked Questions
How long does it take to set up a client portal for small business use?
Most small businesses can learn how to set up a client portal for small business use and launch a working portal in one to two weeks. The software setup takes a day or two, while the client list cleanup and the file tidy take most of the time. A pilot group of ten clients adds another week of testing and fixes. Businesses that skip the cleanup and the pilot can launch in a day, but they usually spend the following weeks fixing the errors that a pilot would have caught.
What does client portal software cost for a small business?
Expect 19 to 50 dollars a month for most small business tools, with focused or secure options such as Clinked starting near 119 dollars a month. Per user pricing can push the bill higher as the team grows, while flat fee tools such as SuiteDash stay steady no matter how many clients you add. Add payment processing fees of around 2.9 percent plus 30 cents per card transaction.
Do clients need training to use a portal?
Most clients need no formal training when the portal is simple. A short welcome message that tells them what they will find inside and what to do first is usually enough. Keep the navigation to five items or fewer, use plain labels such as Files and Invoices, and test the portal on a phone before launch. Clients who struggle usually struggle with the login step, so offer a one time login link where the tool supports it.
Is a client portal secure enough for contracts and invoices?
A portal from a reputable vendor is more secure than email attachments, because files sit behind a login with per client permissions instead of travelling through inboxes. Check that each client sees only their own data, turn on two factor login where it is offered, and remove access when a project ends. For regulated work such as legal or financial services, choose a tool with certifications and audit trails.
Can a client portal replace email completely?
A portal replaces most routine client communication, such as status updates, file sharing, and invoice delivery, but it does not replace every email. Urgent messages, introductions, and marketing still travel by email or phone. The goal is to move the repeatable work into the portal so email becomes the exception, not the daily habit.
What should I put in a portal on day one?
Put the four essentials in place first, which are current files, open and paid invoices, project status with the next deadline, and a way to message your team. Add document request forms and approval steps in the second week, once the basics work. Leave old files and internal notes out of the portal until a client asks for them, because a tidy portal earns trust faster than a full one.
Start with the client list, pick the tool that fits your work, test it with ten real clients, and launch in small batches. The first month takes effort, and every month after that gives the time back.