
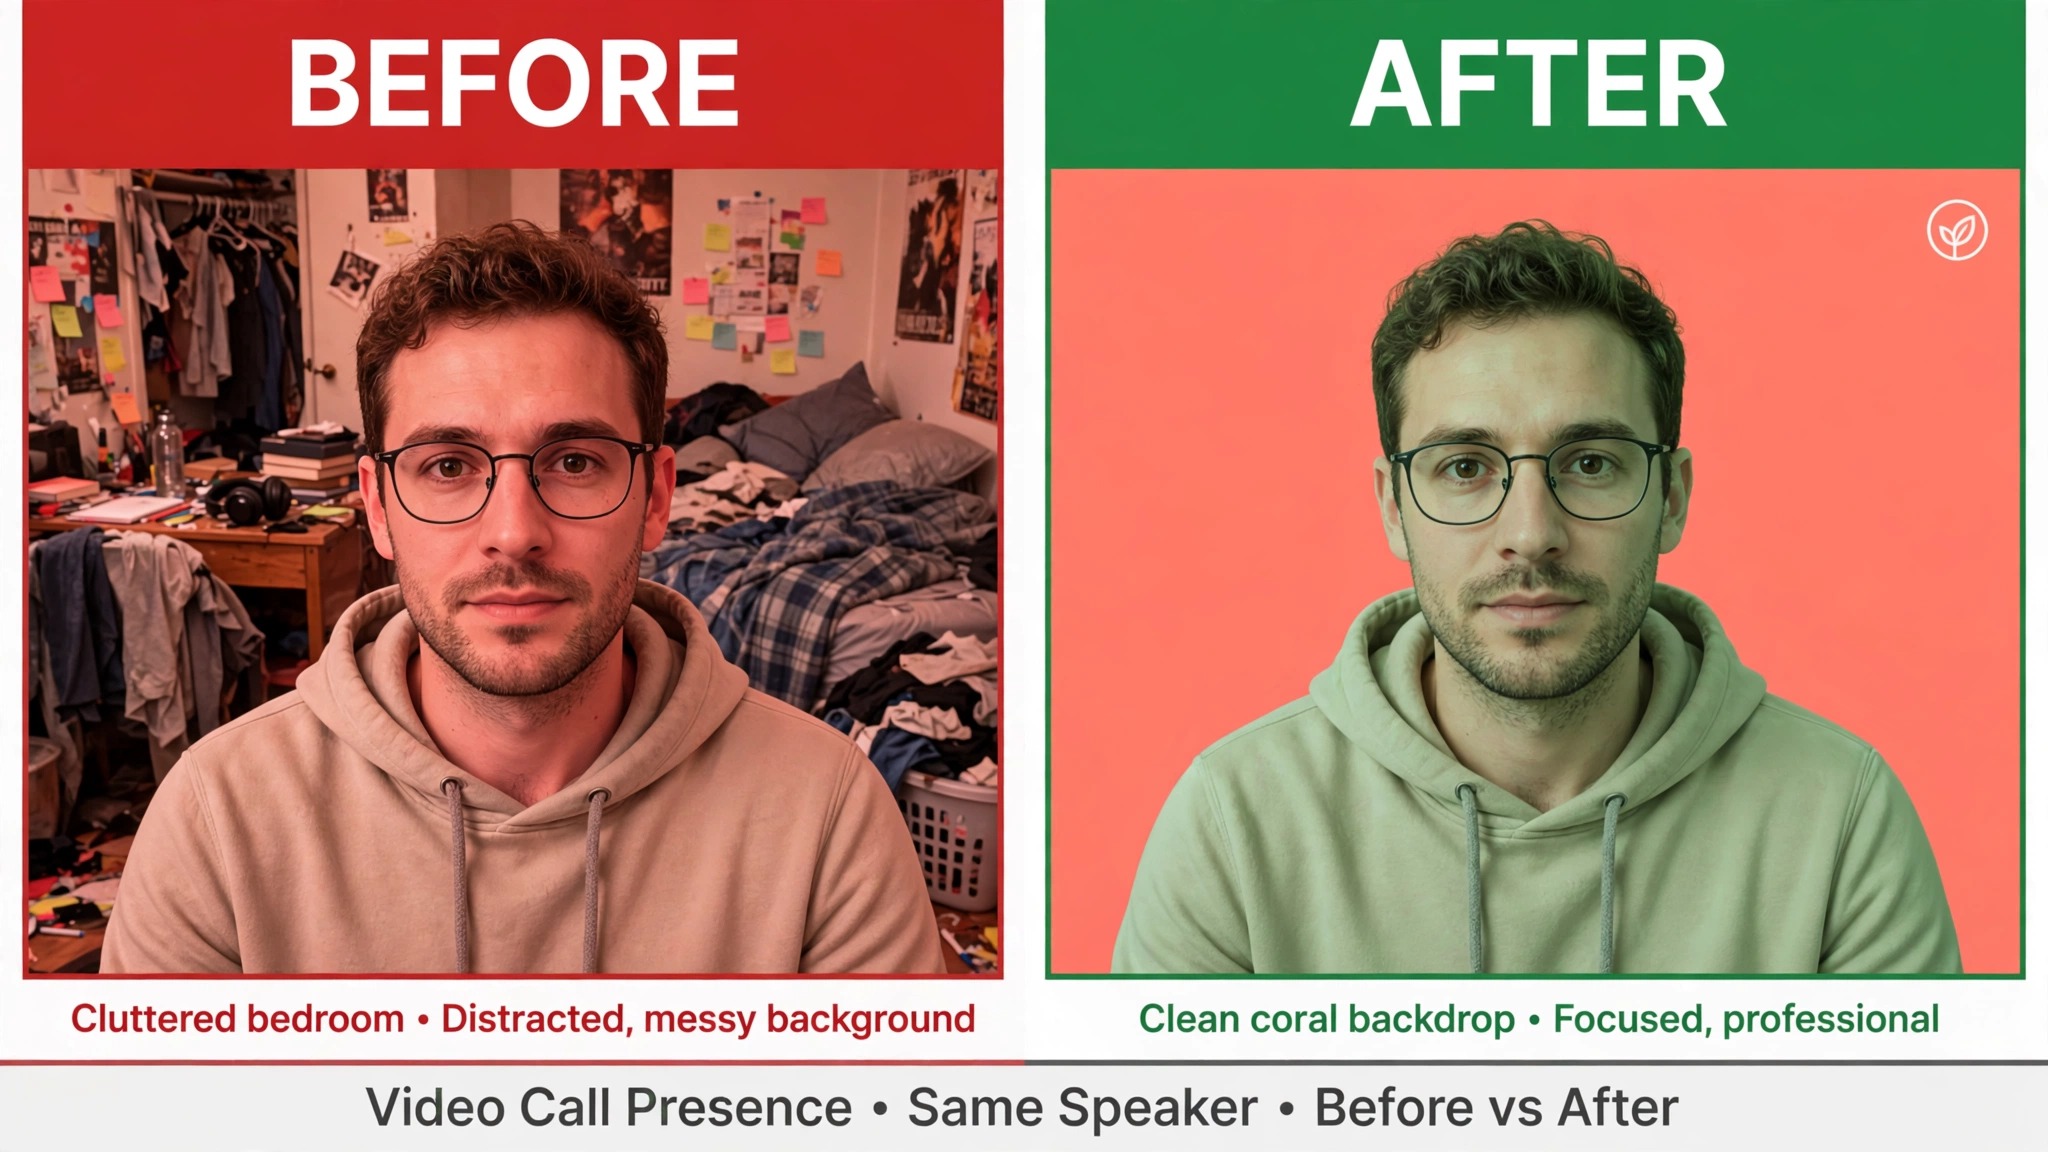
Your team looks different on every call. One person sits in front of a blank wall, another has a kitchen behind them, a third has a bookshelf, and the client sees all of it. The fix is not a new webcam. It is one shared background that puts your logo, your colours and a clean backdrop behind every person on the team, on every call. This guide shows how to make a Zoom background for your team from scratch, with the exact sizes Zoom asks for, the design rules that keep it readable, the tools that build it fastest, and a rollout plan that gets the whole team using it in a week.
A team background does three jobs at once. It hides the messy room, which makes every call look more professional. It carries your brand into every meeting, including calls with people who have never visited your website. And it makes the team look like a team, which matters when five people from your company join a client call and each one looks like they work somewhere different. None of that needs a designer. It needs the right canvas size, a few layout rules, and a file everyone can download.
The Size and Specs Zoom Actually Wants
Zoom publishes clear specs for virtual backgrounds, and following them is the difference between a sharp backdrop and a soft, stretched one. The table below lists the numbers that matter, taken from Zoom support pages checked in late 2026.
| Spec | Still image | Video |
|---|---|---|
| Size | 1920 by 1080 pixels | 1920 by 1080 pixels max |
| Ratio | 16 by 9 | 16 by 9 |
| Format | 24 bit PNG or JPG | MP4 or MOV |
| File size | 15 MB max | 15 MB max |
| Minimum | 1280 by 720 pixels | 480 by 360 pixels |
The key number is 1920 by 1080 pixels, which is full HD at the 16 by 9 ratio of a normal webcam. If your camera is set to 16 by 9, an image at that size fills the frame exactly, with no cropping and no stretching. A smaller image still works, and Zoom says 1280 by 720 is the minimum worth using, but it will look softer on a large screen. A larger image is fine as long as the file stays under the 15 MB limit. A photo straight from a camera can be 8 MB or more, so compress it before upload, or the file will be rejected.
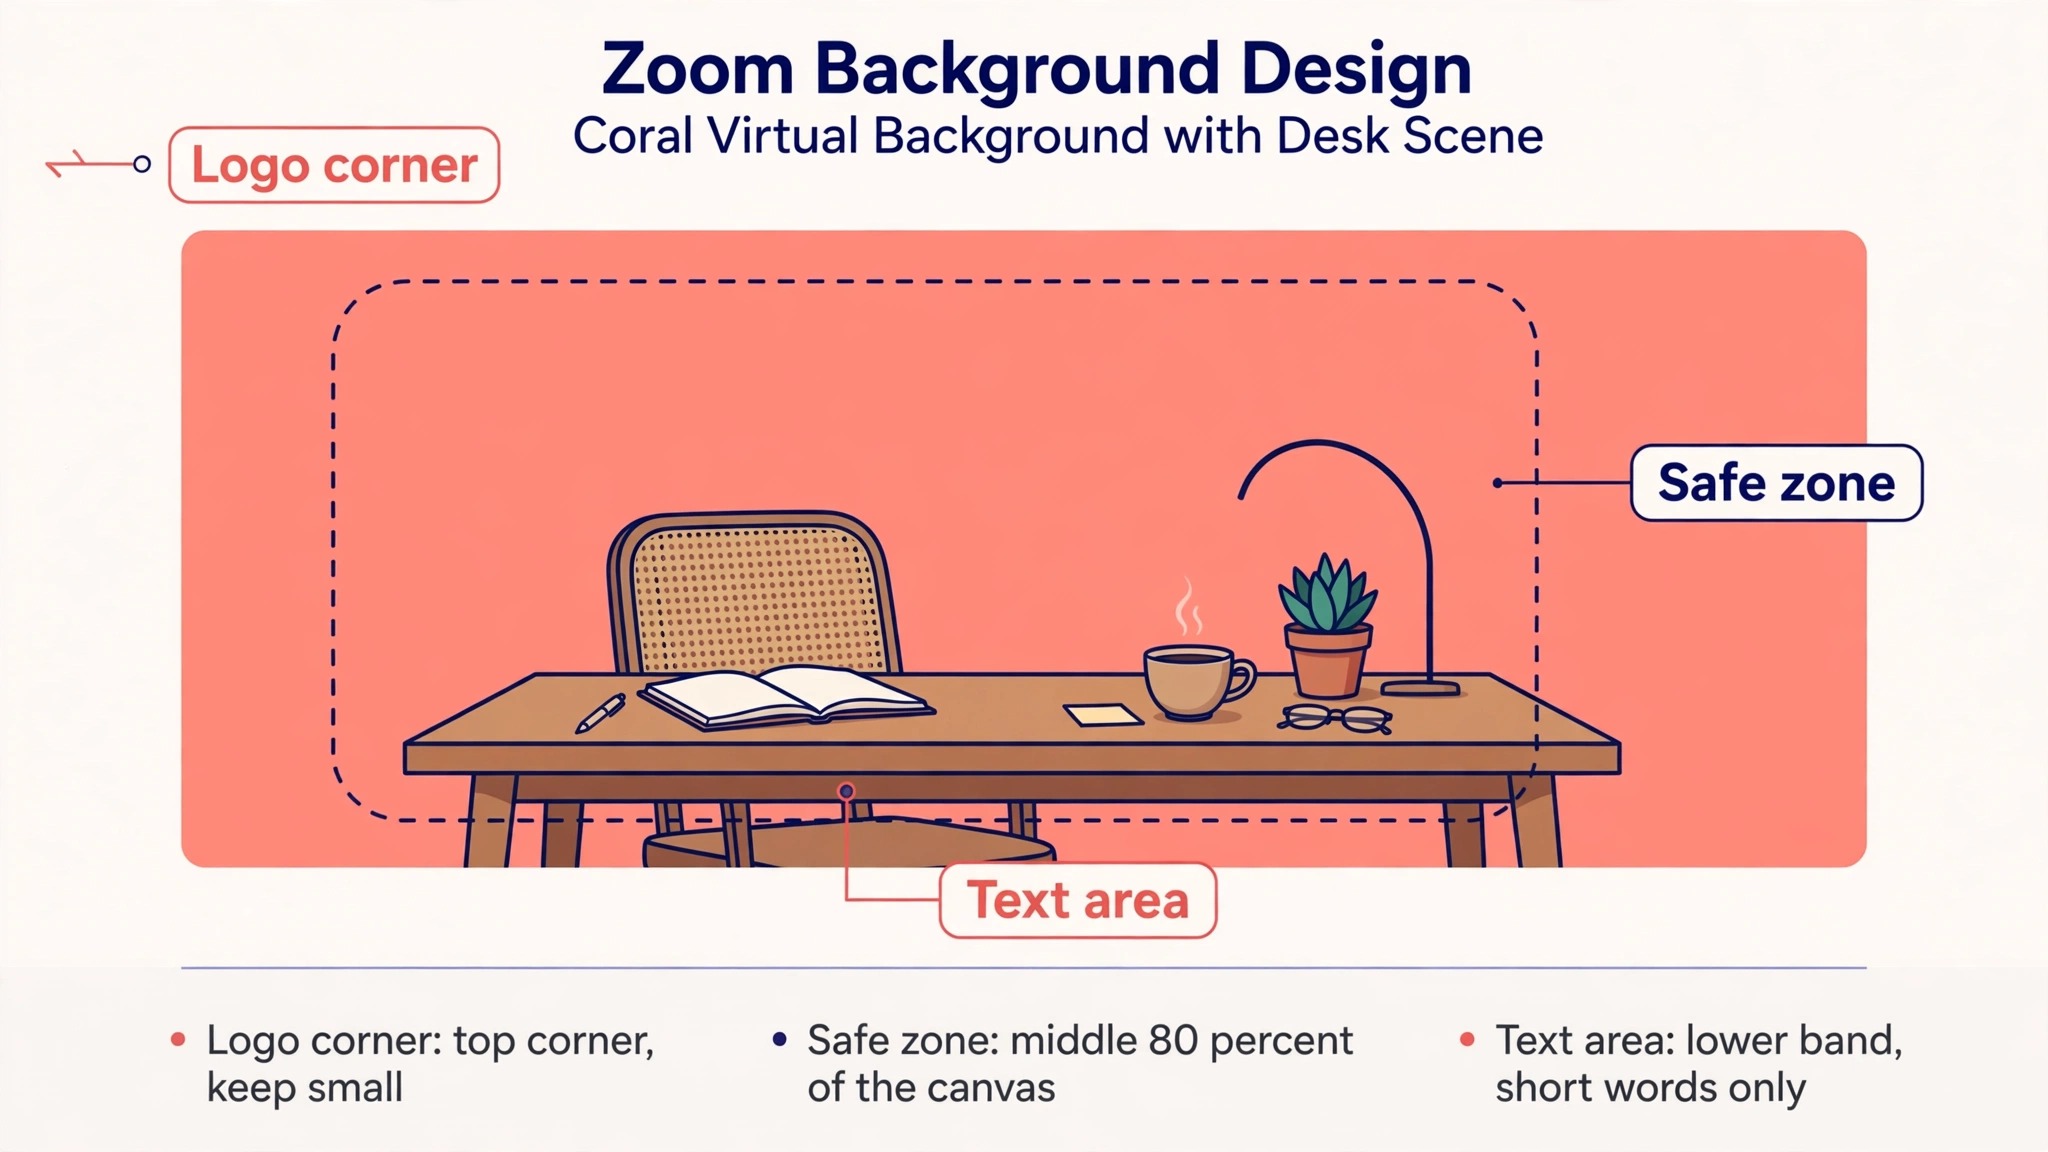
Match the ratio to the camera, not to the screen. Most webcams shoot at 16 by 9, so a 16 by 9 background fits. If a team member uses an older camera at 4 by 3, Zoom will crop the sides of the background to fit, and a logo placed near the edge will be cut off. The safe answer is to build at 1920 by 1080 and keep every important element inside the middle 80 percent of the canvas. That margin survives cropping on any camera.
Video backgrounds follow the same ratio, with a minimum of 480 by 360 pixels and a maximum of 1920 by 1080. Keep video clips short, under 30 seconds, and loop them smoothly, because a clip that jumps at the loop point distracts the whole meeting. A slow pan across an office or a gentle movement in an outdoor scene works. A fast cut or a flashing element does not, and it will make viewers tired before the meeting starts. Video backgrounds also need more computing power, so test them on the oldest laptop on the team before rolling them out.
Green screens are optional. Zoom removes the real background without one on most modern computers, using software to separate the person from the room. A green screen still gives a cleaner edge, especially for people with curly hair or glasses, but the team does not need to buy one. What the team does need is good light on the face. A person sitting with a bright window behind them will turn into a silhouette no matter how good the background is, so the guide should tell people to face the light, not sit in front of it.
How to Make a Zoom Background for Your Team That Looks Professional
A background that looks good on a design screen can fail on a call, because the person sits in the middle of it. Design for the person first and the brand second. The middle of the frame belongs to the speaker, so keep it clear. Put the logo and the text where the speaker is not, which means the top corners, the bottom corners, or one side. A logo placed dead centre will sit behind the speaker’s head, and nobody will see it.
Text on a background has to be big or it has to go. A tagline in 14 point type looks fine in the editor and turns to mush on a call, because Zoom compresses the video and the text is already small. If the background carries words, make them at least 60 points on a 1920 by 1080 canvas, and limit the text to five words or fewer. A company name, a short tagline or a web address is enough. A paragraph is not a background, it is a document, and nobody can read it.
Colour choice matters more than most teams expect. A background that is too bright competes with the face, and a background that is too dark makes the speaker look like they are in a cave. Mid tone colours work best, with enough contrast against skin tones that the person stands out from the backdrop. Avoid pure white, because it blows out on camera and makes the automatic background removal work harder. Avoid busy photos with strong lines behind the head, because the lines will look like they grow out of the speaker. A soft office photo, a plain colour with a subtle texture, or a gentle gradient all work. A crowded street scene does not.
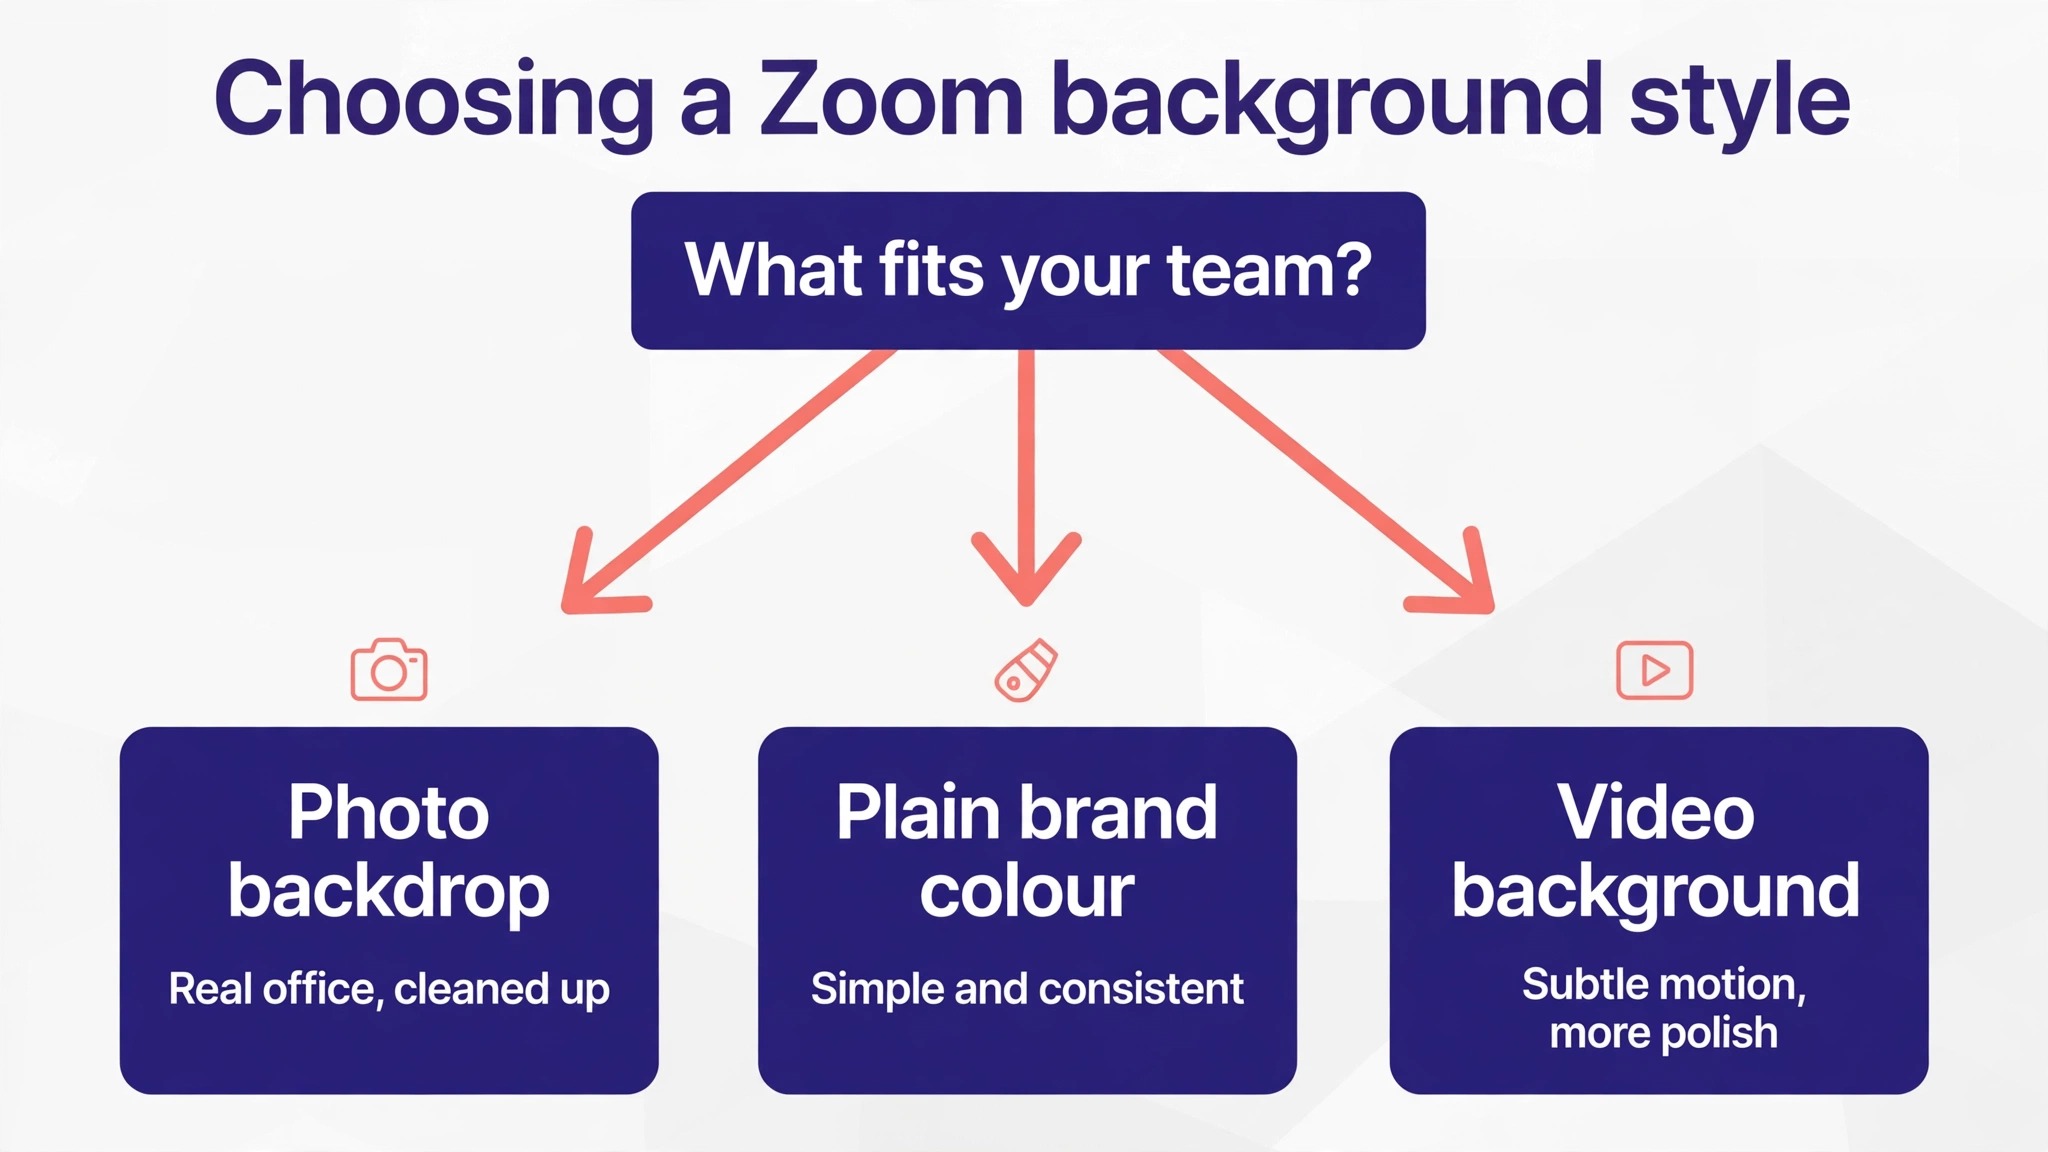
Give the team more than one background. A single background gets tired fast, and people stop using it. Build a small set of three or four. The first is the formal one, with the logo and the brand colour, for client calls. The second is a plain office scene for internal meetings. The third is a lighter seasonal or event version for team socials. Four options feel like a choice. Twenty options feel like a chore, and nobody will sort through them before a call.
Test the design on a real call before you share it. Open Zoom, set the background, and look at yourself on video with the camera at the angle you actually use. Check that the logo is visible, that no text sits behind your head, and that the edges of your hair and shoulders look clean. Then ask a colleague to look at the recording of a test call, because a background that looks fine in a small preview window can look wrong at full size. Fix it once, then share it.
The Step Workflow
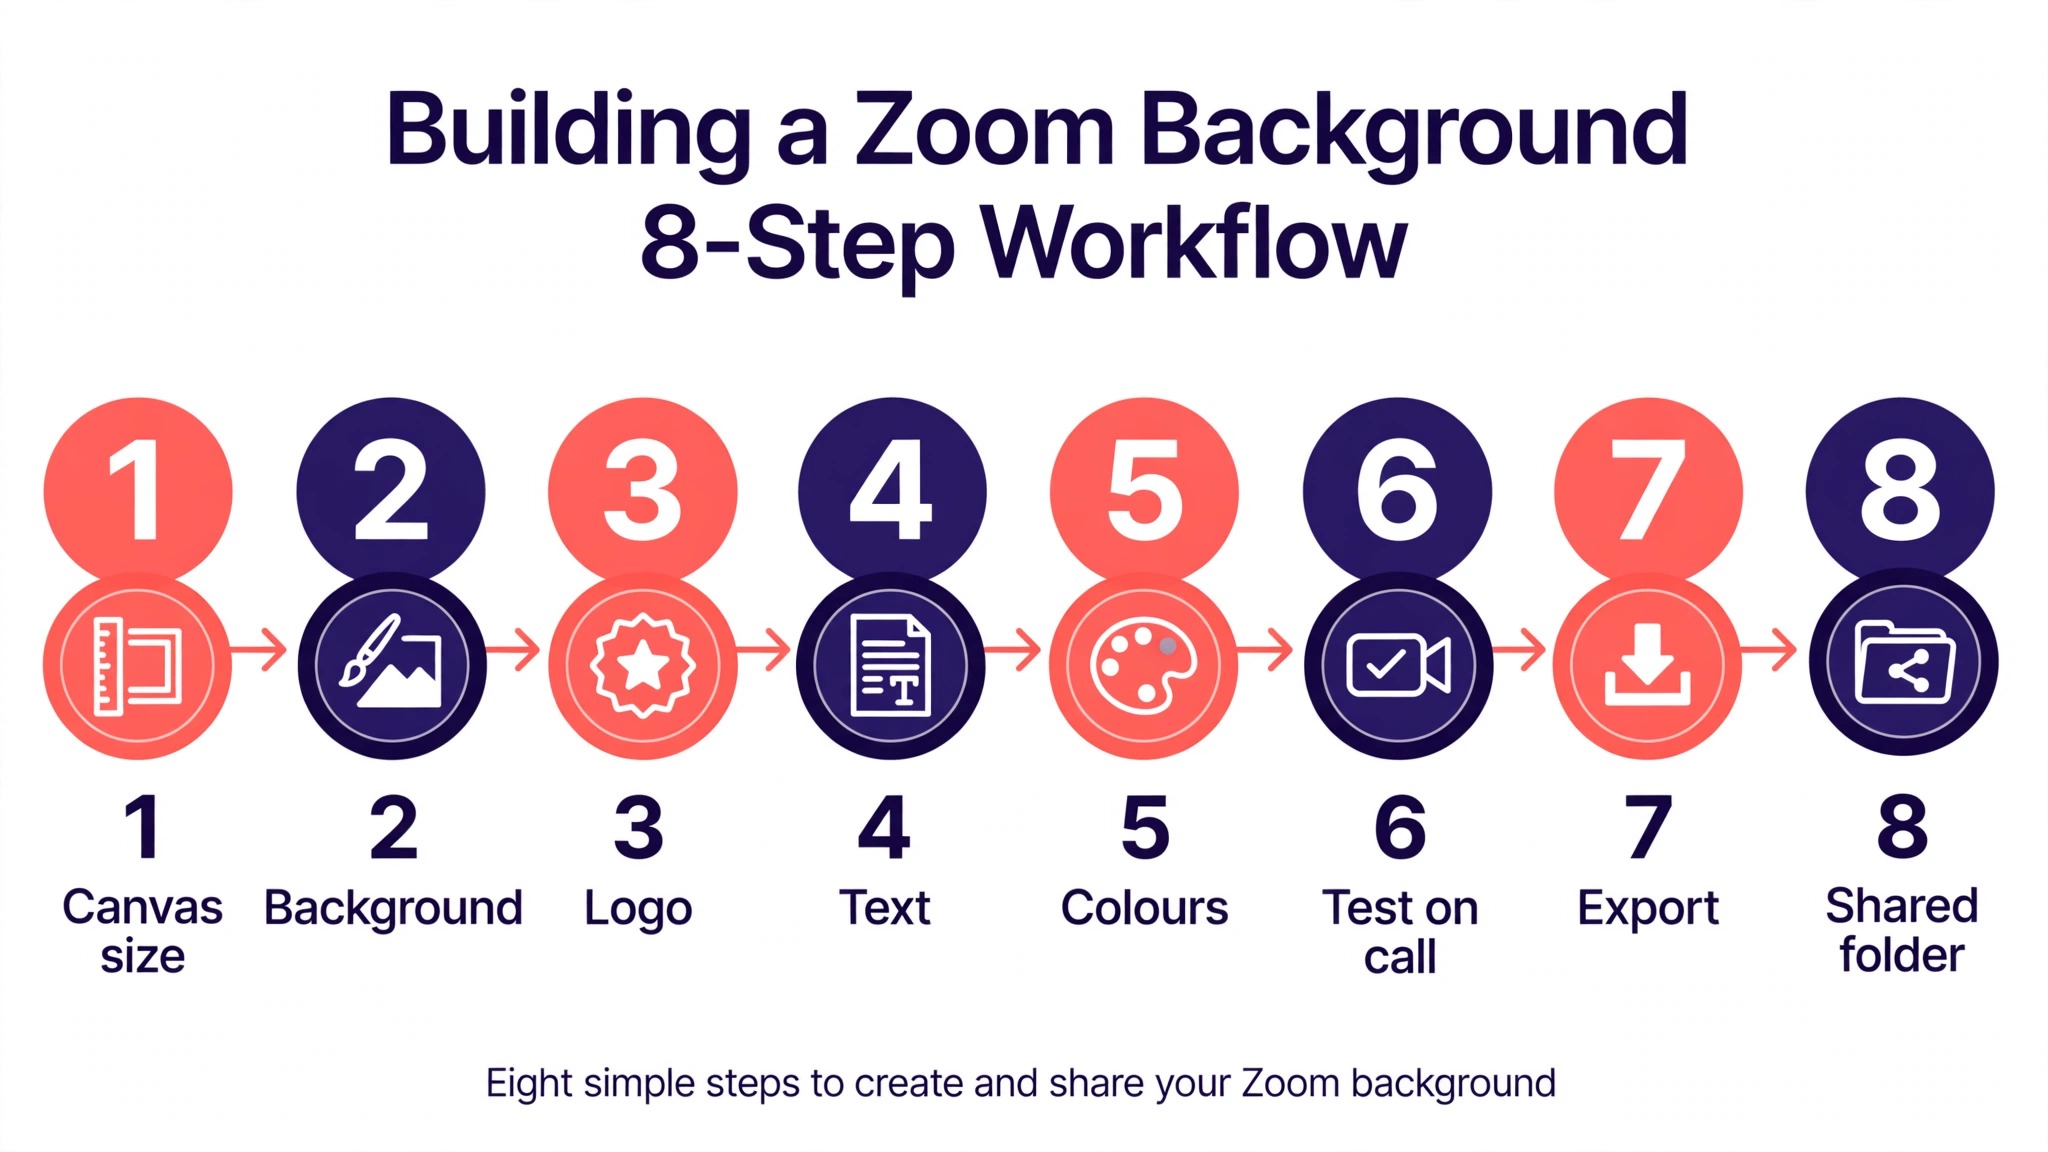
Build the background in this order and you will not have to redo it. Each step has a clear result, so you can stop at any point and pick up later without losing work.
- Pick the canvas size first. Open your design tool, start a new design at 1920 by 1080 pixels, and confirm the ratio is 16 by 9. Building at the right size from the start saves a resize that would crop the logo later.
- Choose the backdrop. Pick a photo of your office, a plain brand colour, or a soft texture. If you use a photo, darken it slightly or add a light colour overlay so the person stands out from it. If you use a colour, pick a mid tone from your brand palette, not the brightest one.
- Place the logo in a corner. Put it in the top left or top right, at a size you can read on a small preview window. Keep it at least 80 pixels from the edge so it survives cropping on cameras with a different ratio.
- Add no more than five words of text. A short tagline or a web address is enough. Set the text at 60 points or larger, in a colour that contrasts with the backdrop, and keep it in a corner the speaker will not cover.
- Mark the safe zone. Draw a rectangle in the middle 60 percent of the canvas and check that nothing important sits inside it. That rectangle is where the speaker will be, and anything inside it will be hidden behind a head and shoulders.
- Export the file as a JPG or PNG at 1920 by 1080 pixels, and check the file size. If it is over 15 MB, compress it or export as JPG at 85 percent quality. Name the file clearly, such as Team Background Client Call, so people can find it later.
- Test it on a real call. Upload it in Zoom, join a test meeting, and look at the result on video. Check the logo, the text, the edges around your hair, and the lighting on your face. Fix what fails, then export again.
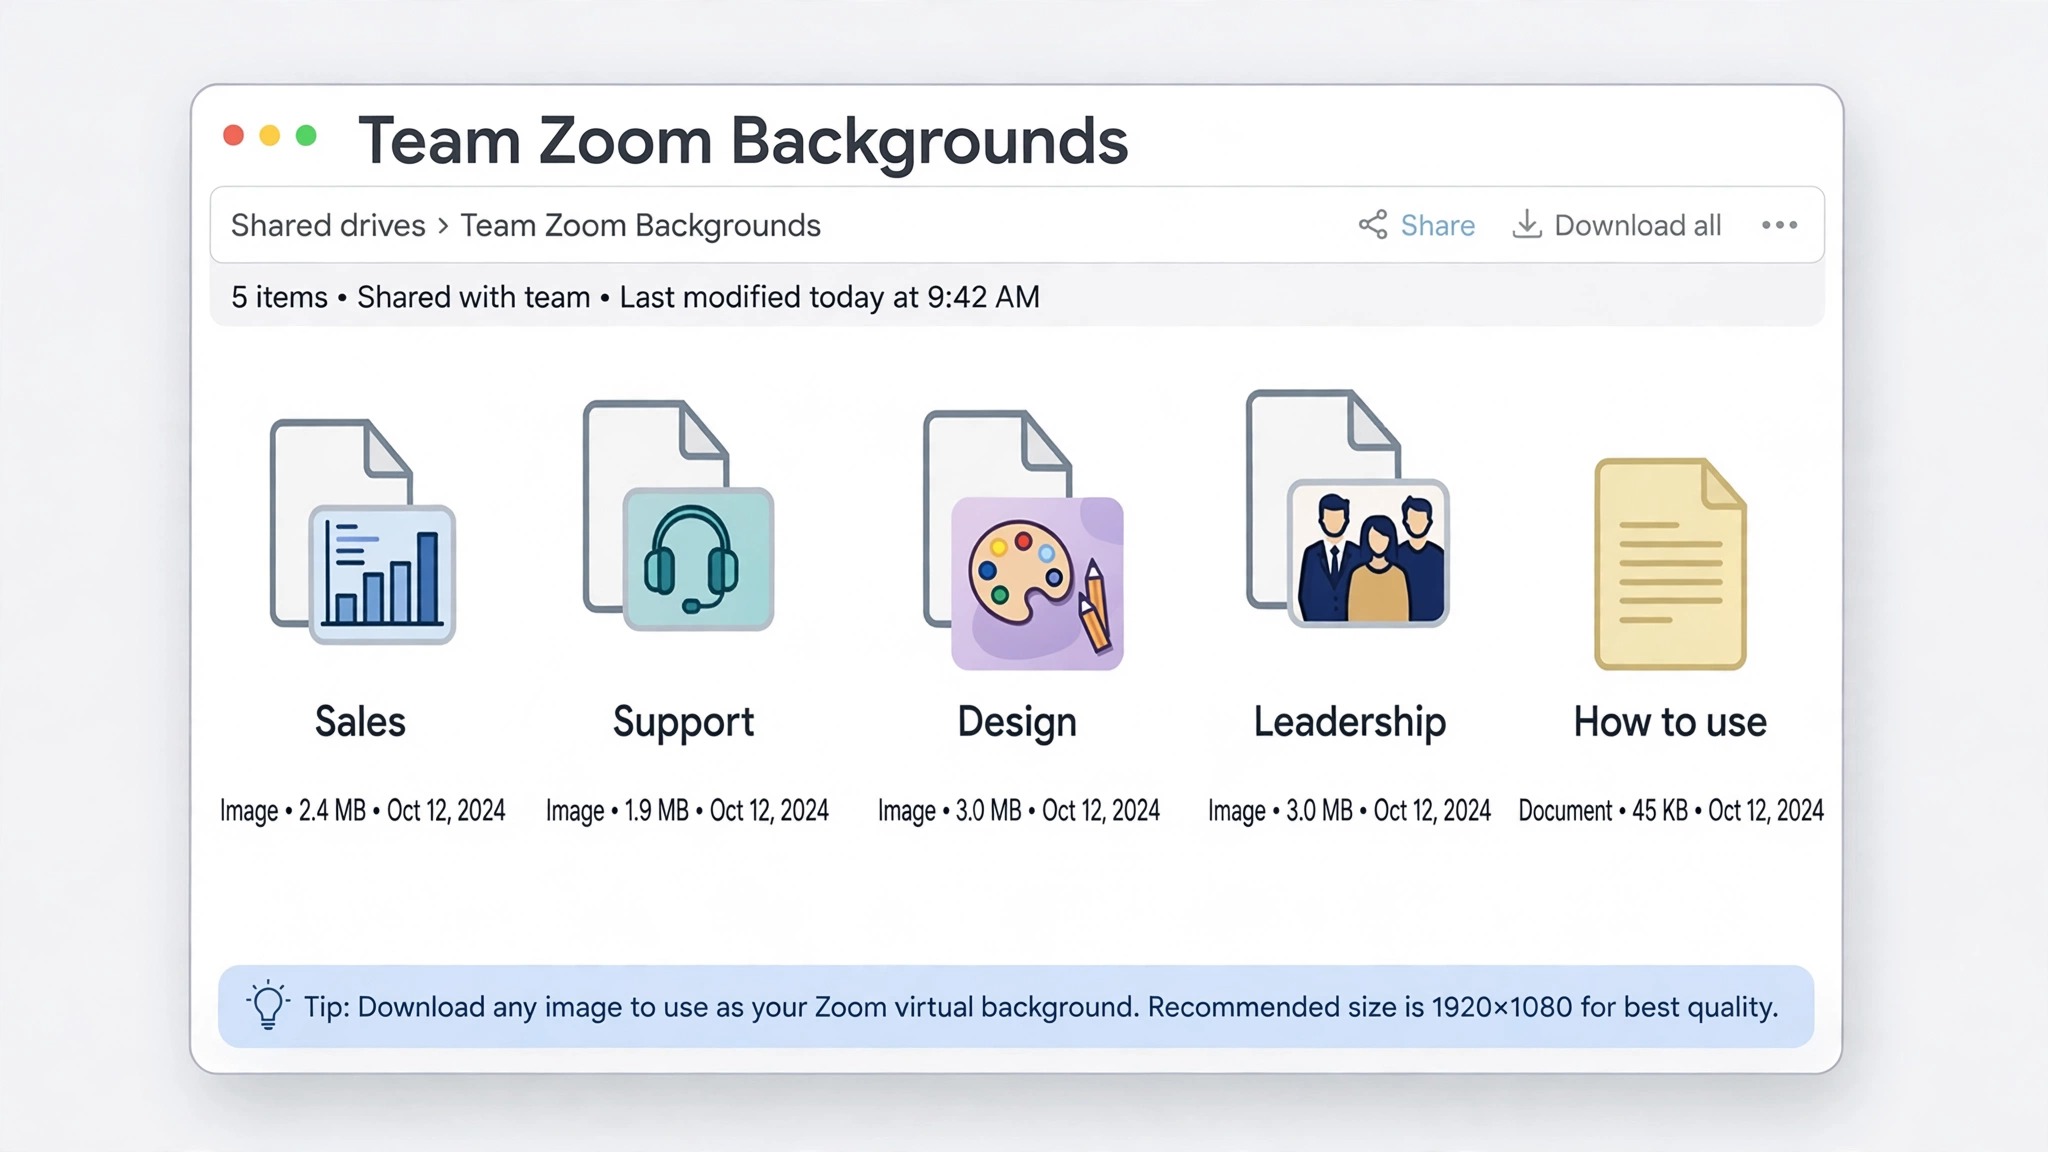
- Share the finished files in one folder. Put the three or four backgrounds in a shared drive folder, name each file for its use, and send the team one message with the folder link and the upload steps. One folder, one message, no hunting.
Tools That Build a Team Background Fast
Any design tool that exports a 1920 by 1080 JPG can make a Zoom background, but the tools below are the ones that make it fast for a team, because they offer templates, brand kits and easy sharing. Prices were checked against vendor pages in late 2026 and move by region, so confirm before you pay.
Canva
Canva is the fastest starting point for most teams learning how to make a Zoom background for your team. Search for Zoom background templates, pick one, swap in your logo and colours, and export at 1920 by 1080. The free plan covers the job, with more than a million templates and 5 GB of storage, and free exports carry no watermark.
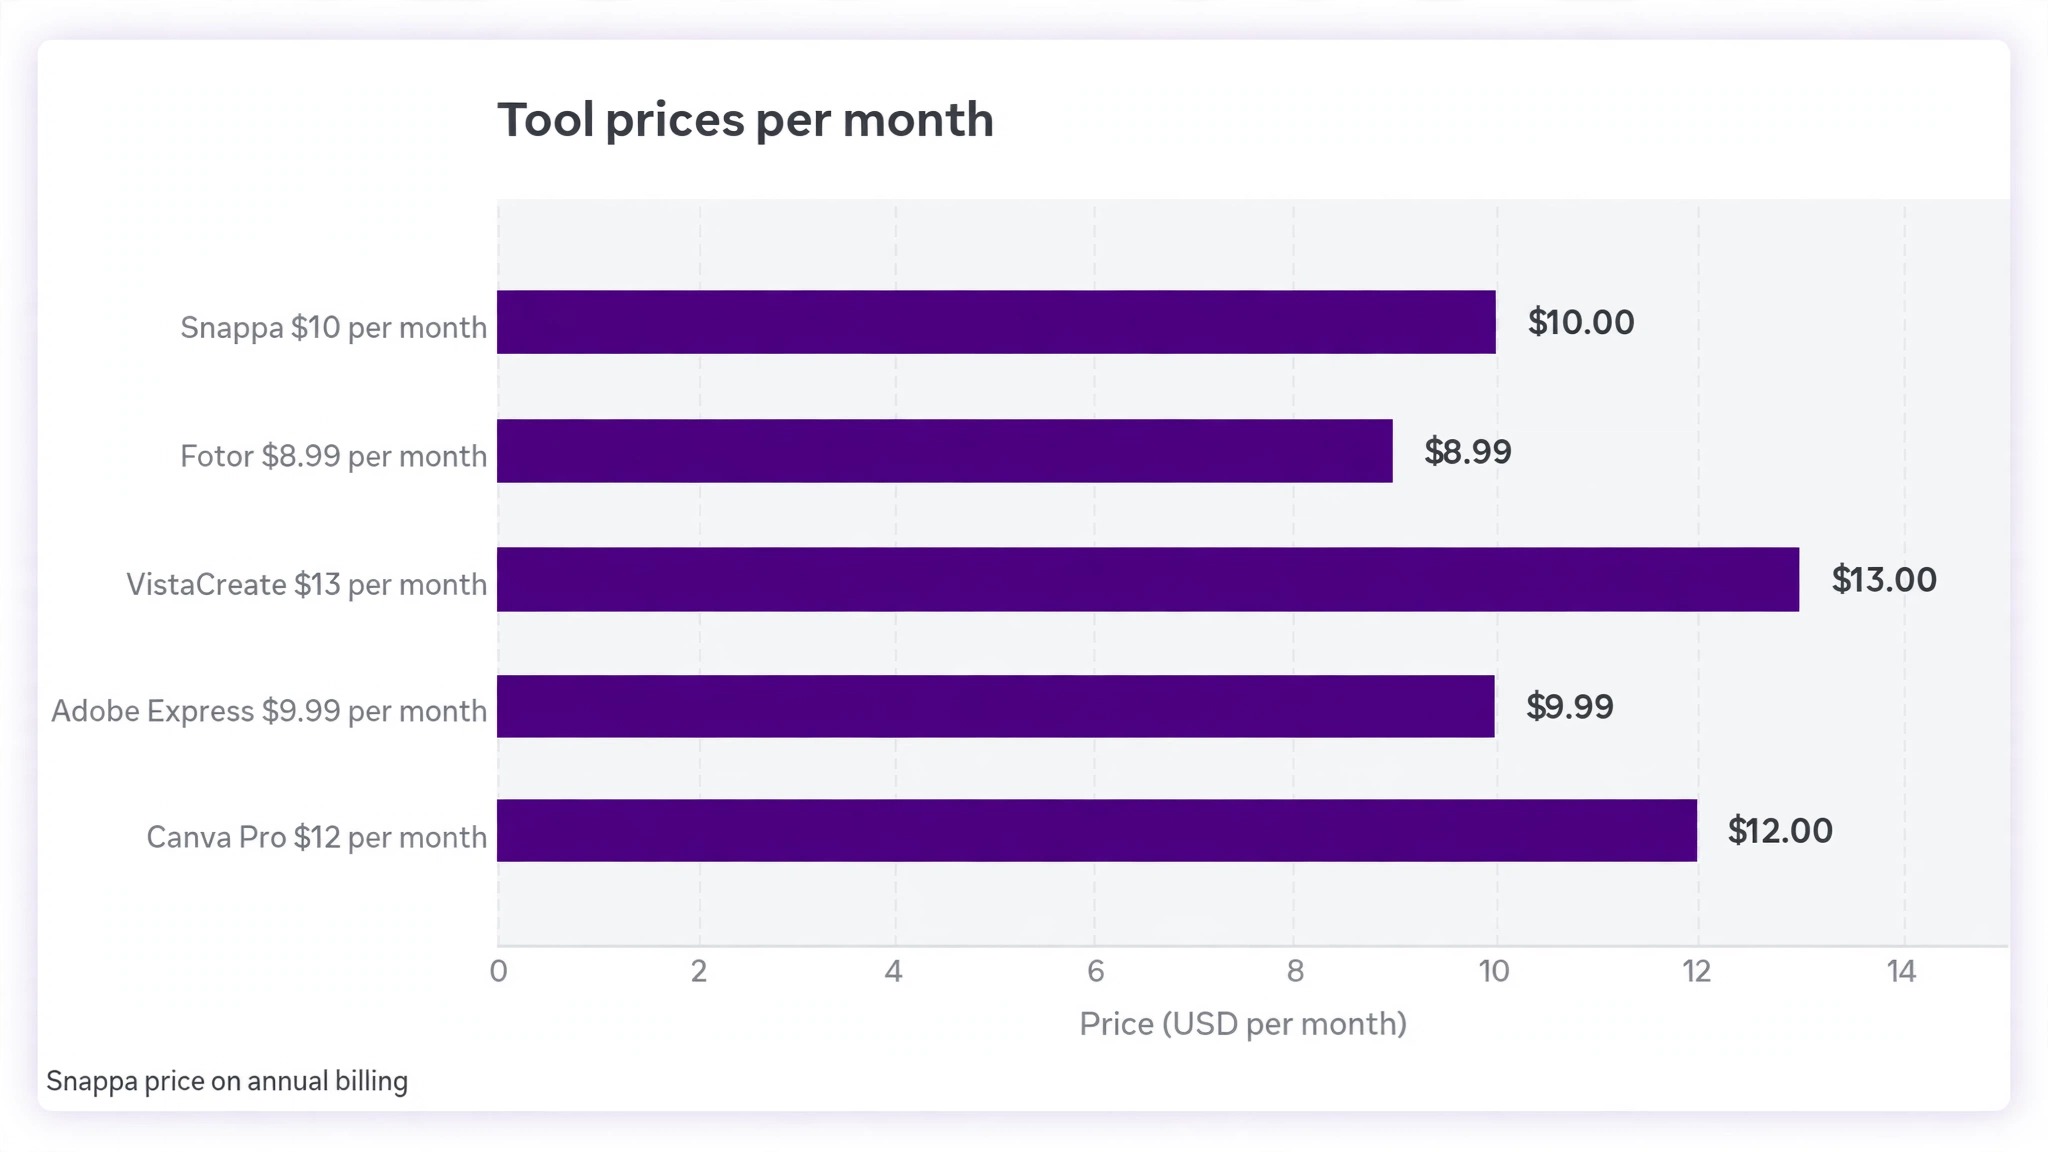
Pro, at about $12 a month on annual billing, adds a brand kit that locks your colours and fonts, a background remover for cutting out photos, and Magic Resize for turning the same design into a Teams or Meet background. The brand kit is the feature that matters for a team, because it stops each person from inventing a slightly different shade of your brand colour. Share the finished design as a template link and the whole team can download their copy without editing the master.
Adobe Express
Adobe Express is the strongest free alternative for teams learning how to make a Zoom background for your team, and its Premium plan costs $9.99 a month, or $99.99 a year, which undercuts Canva Pro. The free plan includes templates, 5 GB of storage and a useful amount of generative AI, and Premium adds brand kits, one click resizing for every platform, and 250 AI credits a month.
Its Firefly AI can generate a background image from a text prompt, which helps when the team wants an office scene it does not have a photo of. Adobe stock photos are built into the editor, so a good backdrop is a search away. If your team already uses Acrobat or Photoshop, Express feels familiar from the first minute, and the brand kit keeps the output consistent across the team.
VistaCreate
VistaCreate, formerly Crello, is the budget alternative to Canva for teams learning how to make a Zoom background for your team. The free Starter plan includes 100,000 templates, one brand kit and 10 GB of storage, which is more generous than Canva free on storage and brand kit. Pro costs $13 a month, or $10 a month on annual billing, and adds the one click resizer, background remover and scheduling.
The editor will feel familiar to anyone who has used Canva, with a drag and drop canvas and a template panel on the left. VistaCreate is also strong on animated designs, so a team that wants a subtle animated background will find it easier here than in Canva. For a small business that wants a brand kit without paying Canva prices, VistaCreate is the pick.
Fotor
Fotor suits teams learning how to make a Zoom background for your team that start from a photo rather than a template. It is a photo editor with design templates, and its AI tools can remove a background, improve a dull office photo or generate a backdrop from a prompt. The free Basic plan exports normal quality JPG and PNG with 512 MB of storage, and Pro costs $8.99 a month for HD exports, transparent PNGs and watermark free effects.
Fotor is the right tool when the team has a good photo of its real office and wants to clean it up, straighten it and add the logo, rather than build a design from a blank canvas. The photo editing is deeper than Canva or Express, and the trade off is a smaller template library.
Snappa
Snappa is the simplest tool in this group for teams learning how to make a Zoom background for your team, and that is its appeal. It offers more than 6,000 templates, exports web optimised JPG and high resolution PNG, and does the job with fewer menus and fewer choices. The free plan allows three downloads a month, which covers a small set of team backgrounds, and Pro costs $10 a month on annual billing for unlimited downloads and background removal.
Snappa suits a team that wants to build four backgrounds in an afternoon and never open the tool again. It is not the tool for a team that designs every week, because its library and brand features are lighter than Canva or Express, but for a one off background set it is the fastest route.
Zoom Built In AI Backgrounds
Zoom itself now offers AI generated virtual backgrounds inside the app, which is the quickest way to learn how to make a Zoom background for your team on your own. Open Settings, go to Virtual Backgrounds, click Generate next to the AI background option, type a description of the scene you want, and Zoom creates it. That is the fastest way to get a personal background, and it needs no other tool at all.
The limits are control and consistency. You cannot set a precise brand colour, you cannot place a logo in an exact corner, and two team members who type the same prompt will get two different images. Use the built in generator for personal backgrounds and quick experiments, and use Canva or Express for the shared team set where the logo and the colours have to match.
Photopea
Photopea is the free option for anyone who already knows Photoshop and wants to learn how to make a Zoom background for your team with full control. It runs in a browser, keeps files on your device, and offers layers, masks and precise control at no cost. There is no template library and no brand kit, so it suits a team member who can build a background from scratch and wants pixel level control over the logo placement and the safe zone. Export as JPG or PNG at 1920 by 1080 and the result is identical to a paid tool.
Photopea is also useful for fixing a background that another tool exported with a flaw, because it can edit the file directly without a subscription. For a team with one person who knows image editing, it is the free workhorse behind the whole set.
Roll Out the Backgrounds to the Whole Team
Making the backgrounds is half the job. Getting the team to use them is the other half, and most rollouts fail on the second part. The fix is a short, clear process that takes a week and needs no meeting.
First, put the finished files in one shared folder with clear names. Name each file for its use, such as Client Call, Internal Meeting and Team Social, so nobody has to open four files to find the right one. Include a short text file in the same folder with the upload steps in plain words. A folder with clear names and one instruction file beats a chat message with four attachments every time.
Second, send one message to the whole team with the folder link, the reason for the change, and a deadline. The message should say that from Monday, client calls use the Client Call background, and that anyone who needs help can ask one named person. A deadline turns a suggestion into a change. Without one, half the team will mean to do it and never get around to it.
Third, help the people who struggle. Some team members will upload the file in a minute. Others will get stuck on the Settings menu or find that their computer does not show the virtual background option. That usually means the admin has disabled virtual backgrounds, the Zoom app needs an update, or the computer is too old for the feature. The named helper should check those three things first, update the app, and confirm the admin setting allows backgrounds. On iPad and iPhone, virtual backgrounds work on all plans, so a tablet is a good fallback for a team member whose laptop cannot run them.
Fourth, check the result on a real call. Join a team meeting in the first week and look at every background on screen. Note the logos that are cut off, the text hidden behind heads, and the people whose lighting makes them a silhouette. Fix the files once, re share the folder, and the team will use the corrected versions. A rollout that is checked once is a rollout that sticks.
Account admins can control virtual backgrounds from the Zoom web portal, including whether the feature is on at all, so the rollout owner should confirm the setting before the team message goes out. If the option is missing from the app, the admin setting is the first place to look, not the app itself. A team that discovers the setting is off on launch day loses a week to a fix that takes two minutes.
Mistakes That Make a Background Look Worse Than No Background
The first mistake is a busy backdrop. A photo with strong lines, bright objects or people in it will fight with the speaker for attention, and the background removal software will struggle with the edges. Pick a calm image, darken it slightly, and keep the detail away from the centre. A background should be noticed once and then forgotten.
The second mistake is text that is too small or too long. A tagline in small type turns into a grey smudge on a compressed video call, and a paragraph is unreadable at any size. Keep the words to five or fewer, set them large, and put them in a corner. If the words do not survive a small preview window, they will not survive a call.
The third mistake is a logo in the middle. The middle of the frame is where the speaker sits, so a centred logo hides behind a head. Move the logo to a corner, keep it clear of the edges, and check it on a real call. A logo nobody can see is decoration, not branding.
The fourth mistake is ignoring light. A team member sitting with a bright window behind them will look like a silhouette, and no background can fix that. The guide should tell people to face the light, put a lamp in front of them if the room is dark, and avoid sitting under a single harsh ceiling light. Good light does more for a call than any background.
The fifth mistake is a file that is too large or the wrong size. A background built at the wrong ratio will stretch or crop, and a file over 15 MB will not upload at all. Build at 1920 by 1080, export as JPG at 85 percent quality, and check the file size before sharing. A two minute check saves a round of messages from people whose upload failed.
Size Checklist Before You Share the Files
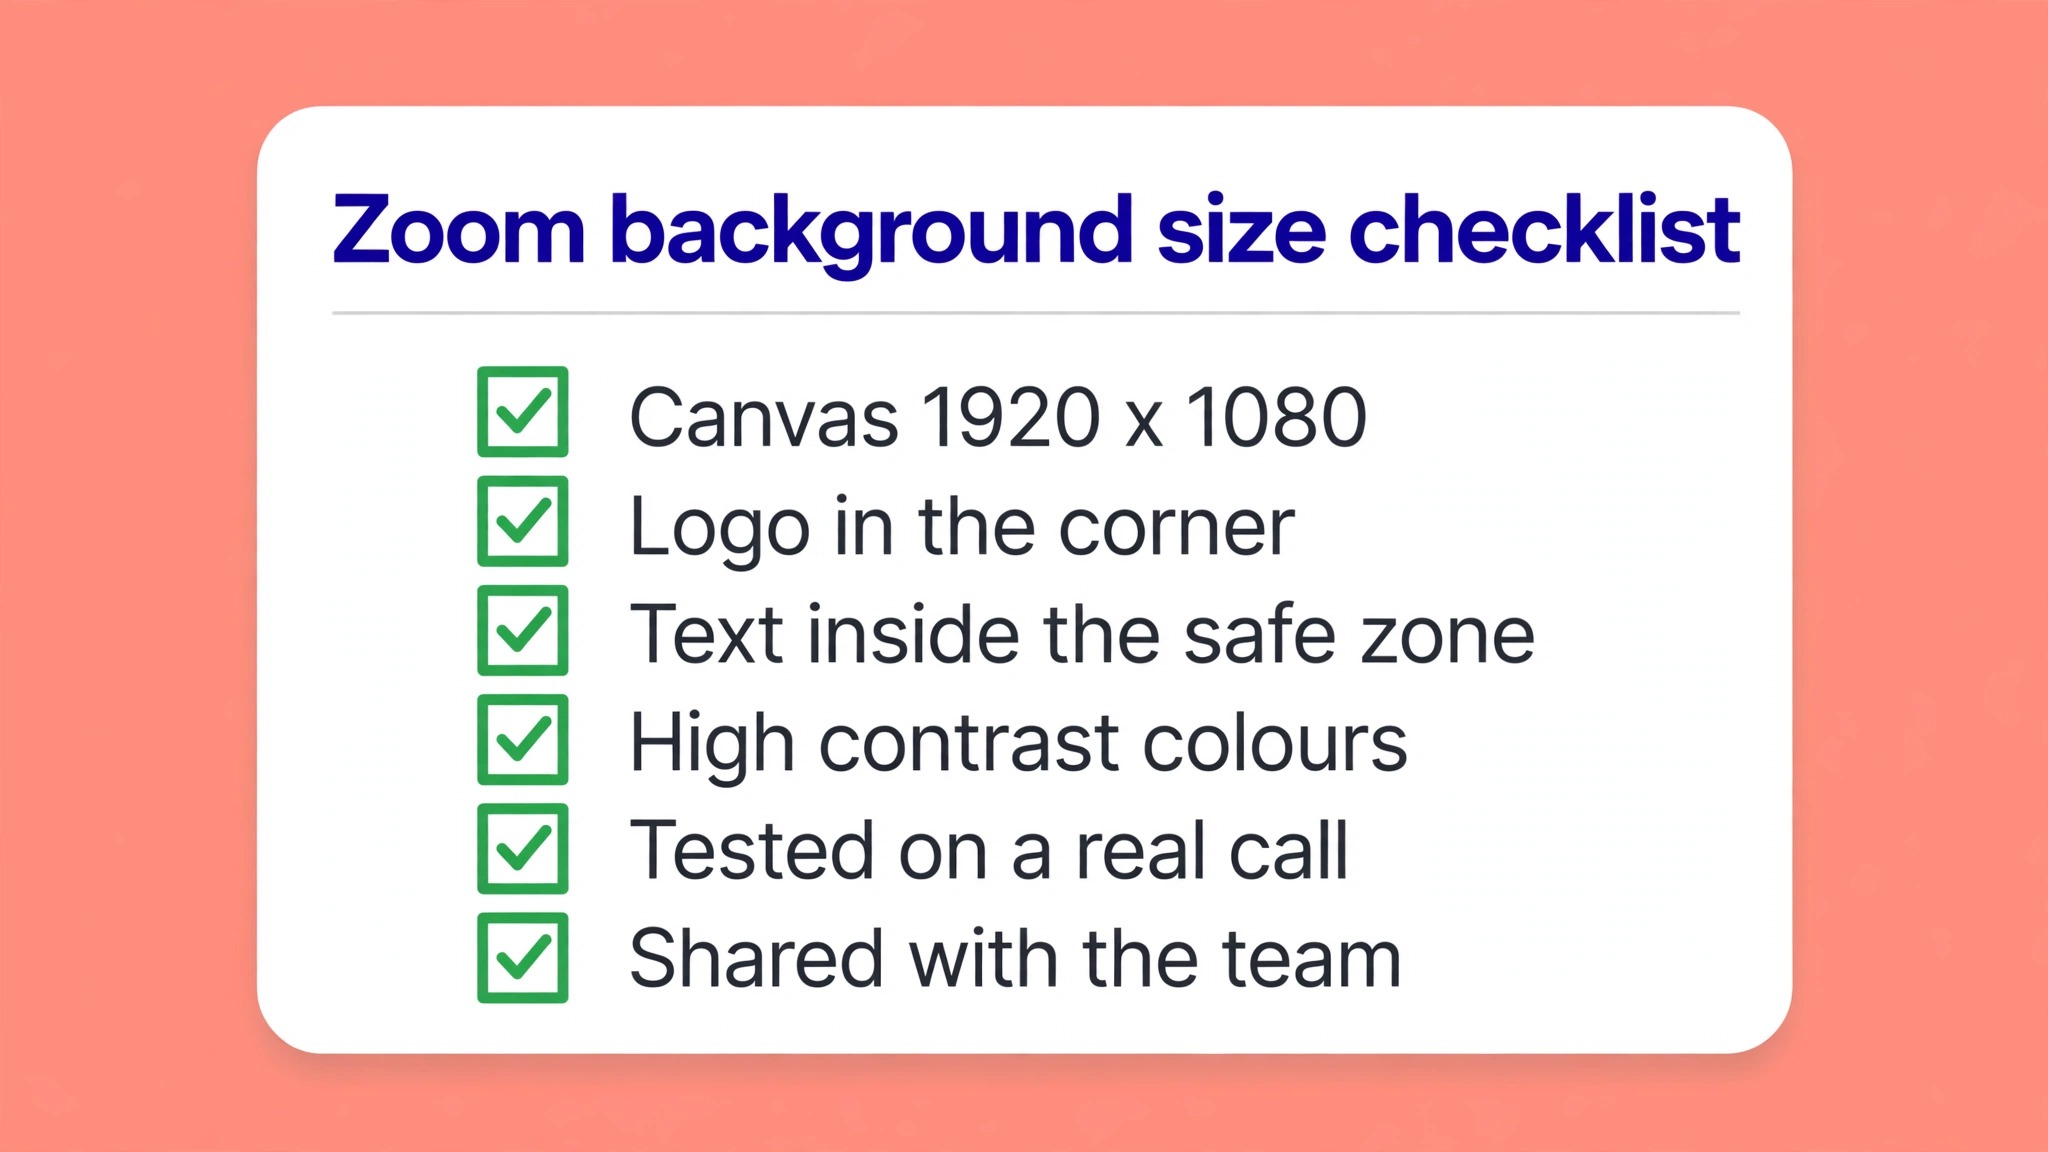
Run this checklist on every background before it goes into the shared folder. A file that passes all six checks will work on any team member computer, on any camera, and on any call.
- Canvas is 1920 by 1080 pixels at 16 by 9, confirmed in the design tool before export.
- File is a JPG or PNG under 15 MB, with a clear name that says what it is for.
- Logo sits in a corner, at least 80 pixels from the edge, and is readable in a small preview.
- Text is five words or fewer, set at 60 points or larger, and sits in a corner the speaker will not cover.
- Middle 60 percent of the canvas is clear of logos, text and strong detail, so the speaker has room.
- File was tested on a real Zoom call, on video, with the camera angle the team actually uses.
Frequently Asked Questions About Team Zoom Backgrounds
What size should a Zoom background be?
Use 1920 by 1080 pixels, which is full HD at the 16 by 9 ratio of a normal webcam. Zoom accepts JPG and PNG images up to 15 MB, and says 1280 by 720 is the minimum worth using. Match the ratio to your camera, and keep important elements inside the middle 80 percent of the canvas so they survive cropping on cameras with a different ratio.
How do I upload a custom background in Zoom?
Open the Zoom desktop app, click your profile picture and open Settings, then go to Virtual Backgrounds in the left menu. Click the plus icon, choose Add Image, and pick your file. During a meeting, click the arrow next to Stop Video and choose Choose a virtual background instead. If the option is missing, check that your admin has enabled virtual backgrounds in the Zoom web portal, and update the app.
Can I use a video as a Zoom background?
Yes. Zoom accepts MP4 and MOV video backgrounds from 480 by 360 pixels up to 1920 by 1080, and the file must be under 15 MB. Keep the clip under 30 seconds, loop it smoothly, and avoid fast cuts or flashing elements. Video backgrounds need more computing power, so test them on the oldest laptop on the team before sharing them.
How do I make a Zoom background for your team with a logo that stays visible?
Put the logo in a top corner, keep it at least 80 pixels from the edge, and test it on a real call with the camera at its normal angle. The middle of the frame belongs to the speaker, so a logo placed there will hide behind a head. Build the design at 1920 by 1080, keep the text to five words or fewer, and check the result on video before you share the file with the team.
Do I need a green screen for a Zoom background?
No. Zoom removes the real background without a green screen on most modern computers. A green screen still gives a cleaner edge, especially for curly hair or glasses, but good light on the face matters more. Face the light, avoid a bright window behind you, and the software will do the rest.
Why does my Zoom background look blurry or stretched?
A blurry background usually means the image was too small, so build at 1920 by 1080 and export at full quality. A stretched background usually means the ratio is wrong, so check that the canvas is 16 by 9 before you export. A file over 15 MB will not upload at all, so compress it or export as JPG at 85 percent quality. Test the finished file on a real call before you share it.
The Bottom Line on Team Backgrounds
Learning how to make a Zoom background for your team is a small job with an outsized return. One afternoon of design, one shared folder and one message to the team, and every call looks like it comes from the same company. The specs are simple, the tools are free or cheap, and the design rules fit on one page.
Build the set at 1920 by 1080, keep the middle clear, put the logo in a corner, test it on a real call, and share it in one folder. Then check the next team meeting and enjoy the moment when every face on the screen sits in front of the same clean, branded backdrop. That is the whole job, and it is worth doing properly.